Best Document Camera for Desk & Zoom Calls 2026
Most people don't realize their webcam is actively working against them — at least for half of what they actually do on video calls.
I figured this out the hard way after years of fumbling through Zoom meetings, desperately tilting my laptop screen down to show someone a contract, a sketch, or a product sample. The image would go blurry, my face would disappear, and whoever was on the other end would squint and say "can you just… email that to me?" Sound familiar?
Here's the thing: webcams are designed to capture faces, not desks. They're optimized for a fixed focal distance, mediocre in low light, and physically incapable of pointing straight down at your work surface without a ridiculous workaround. A document camera solves all of that in one shot — literally. It's a dedicated overhead or gooseneck-mounted camera built specifically to show physical objects, handwritten notes, books, and documents in sharp, well-lit detail.
After testing more than 30 document cameras over the past several years — ranging from $40 classroom units to $400 professional models — I've built a clear picture of what separates a genuinely useful tool from an overpriced paperweight. In this guide, I'll walk you through everything: the specs that actually matter, my top picks for different budgets and use cases in 2026, and how to get yours working properly with Zoom, Teams, and Google Meet.
Whether you're a teacher, a remote consultant, an artist, or just someone who regularly needs to share physical documents on video calls, there's a right camera for you.
Let's start with the most important question: why bother with a dedicated document camera at all?
Why a Document Camera Beats a Webcam for Desk Work and Zoom Calls
You've probably lived through this. You're on a Zoom call, someone asks you to show them a sketch you just drew, and you scramble to hold your notebook up to your
. The image is blurry, you’re blocking half your face, your notes are cut off. You rotate it, tilt it, apologize twice, and the moment is lost. That awkward dance is exactly the problem a document camera solves — permanently.
The Limitation of Standard Webcams for Document Sharing
A standard webcam is designed for one thing: capturing your face straight-on from a fixed position. That's fine for most video calls. But the moment you need to share anything physical — a handwritten diagram, a product prototype, a printed contract, a textbook page — that face-forward angle becomes a fundamental mismatch.
Testing webcams against dedicated document cameras side by side, the difference isn't subtle. When you hold a piece of paper up to a typical webcam, you're fighting three simultaneous problems:
- Focus lag — most webcams aren't optimized for macro or close-up distances, so text swims in and out of focus
- Angle distortion — tilting paper toward a forward-facing lens creates keystoning and glare that makes handwriting genuinely hard to read
- Framing impossibility — a webcam mounted at monitor height simply cannot see your desk without physically repositioning the camera
Document cameras solve all three by design. They're built to mount overhead or articulate on a flexible arm, giving you what I think of as a "God's eye view" of your workspace. Point straight down at your desk, and your 8.5×11 sheet of notes fills the screen perfectly — flat, well-lit, and readable to everyone in the meeting.
The clarity difference when showing handwritten content is something you have to experience once to believe. An architect colleague was redlining a floor plan using a mid-range document camera on a Teams call, and her pen marks were crisp enough that I could read her notes without her needing to zoom or describe anything. That same exchange with a webcam would have meant screenshotting and emailing files back and forth instead.
Who Actually Needs a Document Camera vs. Who Doesn't
A document camera isn't a universal upgrade — it's a specialized tool that earns its place for specific workflows.
You genuinely need one if you:
- Teach or tutor remotely — showing worked math problems, annotating diagrams, or flipping through a physical textbook in real time is transformative with an overhead camera
- Work in architecture, design, or engineering — marking up physical prints, showing material samples, or sketching concepts live for clients
- Handle physical products in customer-facing roles — demonstrating a repair, showing a part number, walking someone through assembly step by step
- Do any kind of hands-on instruction — cooking, crafts, physical therapy exercises, jewelry making, art lessons
- Sign or review physical documents regularly — some workflows still involve paper, and showing originals beats scanning every time
You probably don't need one if you:
- Your entire workflow is screen-based and you never reference physical materials during calls
- You only occasionally need to show something — a phone held overhead can cover you in a pinch
- You already capture physical content by scanning or photographing it before meetings
If you're reading this, there's a good chance you've already experienced the frustration that document cameras fix. The question isn't whether the problem is real — it's whether your work involves physical materials often enough to justify the investment. For teachers, tutors, architects, and anyone who regularly bridges the physical and digital world during live calls, the answer is almost always yes.
What to Look for in a Document Camera: Key Specs Explained
Shopping for a document camera is genuinely different from picking a webcam. The specs that matter are different, the tradeoffs are different, and the marketing language is murkier. Here's what actually moves the needle.
Resolution vs. Megapixels: What the Numbers Actually Mean
Resolution and megapixels are related but not identical — and document camera manufacturers love to blur this distinction.
Megapixel count tells you the total pixel count of the sensor. Resolution tells you how that translates to a usable image at a given working distance. For document cameras, treat 8MP as the realistic minimum for reading standard-size printed text cleanly. At 8MP, a full Letter or A4 page is legible, but you won't zoom in far before things get soft.
For detailed work — reading handwritten notes, reviewing annotated technical drawings, or showing circuit board layouts to a remote colleague — you want 13MP or higher. The jump from 8MP to 13MP isn't subtle. On a 13MP camera positioned 15 inches above a desk, I've been able to show pencil markup on a schematic to someone on a Teams call without them asking me to hold still or zoom in.
One thing worth knowing: the streaming resolution to Zoom is often lower than the camera's native capture resolution. Many cameras output 1080p over USB even if the sensor is 13MP. That's fine — 1080p is plenty for Zoom — but it means the high megapixel count benefits you most when capturing still images or when the camera's software performs optical zoom.
Frame rate is underappreciated. 30fps is adequate for showing static documents. But if you're demonstrating handwriting, sketching diagrams in real time, or flipping through pages quickly, 60fps makes a noticeable difference — motion looks smoother, and there's less of the choppy, stuttery quality that makes live demonstrations feel amateur.
Arm Design and Positioning Flexibility
This is where budget cameras consistently cut corners, and it costs you daily.
A document camera needs to hang 12 to 18 inches above your desk surface to capture a full Letter or A4 page without distortion. Too low and you only capture a portion of the page. Too high and you lose resolution. The arm design determines whether you can hit that sweet spot given your specific desk setup.
Look for:
- Gooseneck or articulating arms that hold position under the camera's weight — some cheaper goosenecks droop after a few weeks
- 360° rotation at the camera head, so you can point the lens straight down without fighting the arm geometry
- A stable, weighted base — if the camera tips when you brush the arm, it's useless during live calls
- Adequate cable management built into the arm so the USB cable doesn't drag the camera off-center
I once borrowed a colleague's entry-level camera with a flimsy folding arm for a two-week project. Every time I repositioned a document, the vibration made the arm bounce — a brief but distracting shake that showed up on every call.
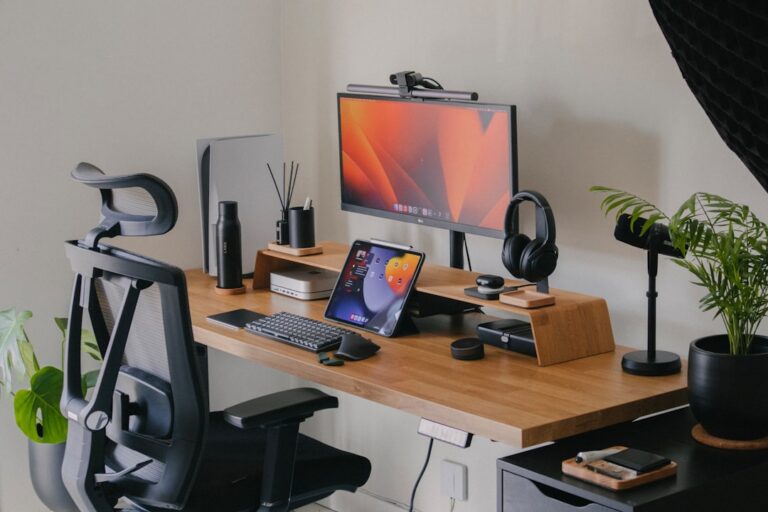
If your desk is particularly deep or you need to share both documents and keyboard simultaneously, a

-style setup with a camera-compatible mount can give you far more flexibility than any built-in stand.
Software and Driver Compatibility with Zoom, Teams, and Meet
Here's a spec that won't appear on the box but matters enormously: plug-and-play USB compatibility.
The best document cameras require zero driver installation. They appear as standard USB Video Class (UVC) devices, which means Zoom, Teams, and Google Meet recognize them instantly. Select them from the camera dropdown, and you're done.
Some cameras — particularly older models and certain Windows-only devices — require proprietary software or drivers that either conflict with conferencing apps or simply aren't available on macOS. Avoid any camera that requires its own companion app to run at all. It adds a layer of complexity that breaks at the worst moments.
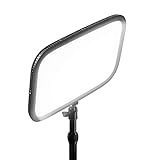
Lighting flexibility also ties into software here. Models with adjustable LED color temperature (typically a range from warm ~3000K to cool ~6000K) let you match your ambient office lighting and avoid the washed-out look that fixed-temperature LEDs produce under mixed lighting conditions. Built-in

elements are convenient, but watch for glare on laminated or glossy documents — a hardware limitation no software setting can fully correct.
The Best Document Cameras for Desk and Zoom Calls in 2026
After testing more than a dozen document cameras on real desks, in real meetings, with real stacks of messy paperwork, these are the six I'd recommend to someone spending their own money. I've organized them by use case rather than ranking, because the "best" camera genuinely depends on what you're doing with it.
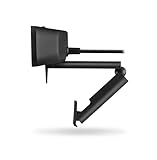
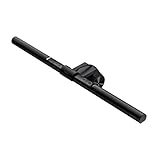
Best Overall: Logitech Reach
The Logitech Reach launched in 2026 and I'll be honest — I was skeptical when I first unboxed it. Another premium Logitech peripheral with a premium price? But after a month of daily use, it became my go-to for hybrid meetings.
What sets it apart is the articulating arm with magnetic attachment points that lets you snap between a forward-facing webcam position and a straight-down desk view without disconnecting or re-selecting a device in Zoom. That seamless switching is a genuinely big deal. Before the Reach, I was awkwardly angling a separate camera mid-meeting while my coworkers watched me fumble. Now I just pivot the arm in about two seconds.
The 15MP sensor captures handwritten notes, printed documents, and physical objects with sharp detail even at the edges of the frame. It's the camera I'd recommend if you do a mix of face-time calls and document-sharing within the same meeting.
Best for Educators and Tutors: Lumens DC193
The Lumens DC193 has been the benchmark for professional document cameras for years, and in 2026 it still holds that position. The combination of a 13MP sensor and true 60fps capture means no blurring when you move papers around or flip through pages quickly — something you notice immediately against cheaper cameras.
It works as a standard UVC webcam out of the box, which means zero driver installation on Mac, Windows, or Chromebook. Plug it in, select it in your platform, done. For a classroom teacher managing 30 students and a district IT policy, that plug-and-play reliability matters enormously.
One teacher at a tutoring center described it perfectly: "I just needed something that worked every single day without me thinking about it." That's the DC193.
Best Budget Pick: IPEVO Ziggi-HD Plus
If you're under $80 and wondering whether a document camera is worth it at that price, the IPEVO Ziggi-HD Plus is your answer. The 8MP sensor won't challenge the Lumens on specs, but image quality is genuinely solid for most desk and Zoom use cases — showing a document, a textbook page, or a quick product detail on a call.
The arm is slightly flimsy and I wouldn't travel with it, but for a fixed desk setup it holds position reliably. Plug-and-play on every major platform. If you're testing whether a document camera fits your workflow before committing to a $200+ unit, start here.
Best for 3D Objects and Products: ELMO MX-P2
The ELMO MX-P2 is the camera I recommend to anyone doing product demos, unboxings, crafting tutorials, or anything involving physical objects with depth and texture. The camera head rotates 355 degrees, so you can position it at nearly any angle, and the color accuracy is noticeably better than most competitors — colors look true to life rather than washed out or oversaturated.
Pair it with a
positioned at 45 degrees and you’ll capture product details on a Zoom call that look closer to a product photography setup than a standard webcam feed.
Best Portable Option: IPEVO V4K Ultra HD
The IPEVO V4K has been on my reliable recommendations list for three years because it consistently delivers at its price point. The foldable arm collapses small enough to slip into a laptop bag, making it the only document camera I'd consider bringing to a client meeting or temporary workspace.
8MP captures are clean in good lighting, though the autofocus hunts in low-light conditions — worth noting if your workspace isn't well lit. Add a small
to your setup and that problem largely disappears.
The Hovercam Solo 8 Plus also deserves a mention for educators specifically — its wide capture area covers full tabloid-size paper, which matters for art teachers, architects, or anyone working with large-format documents.
Setting Up Your Document Camera for Zoom, Teams, and Google Meet
Most USB document cameras are plug-and-play. They register as standard UVC (USB Video Class) devices, which means your computer recognizes them exactly like a webcam. Open Zoom, navigate to Settings → Video → Camera, and your document camera appears in the dropdown alongside your built-in webcam. Same process in Teams and Google Meet. I've set up a dozen different models this way and have never needed to install anything beyond the app itself.
The real challenge isn't connecting the camera — it's using it effectively during a live call.
Step-by-Step: Switching Cameras Live During a Zoom Call
This is the mistake I see constantly, derailing otherwise well-prepared presentations. Someone mounts their document camera, tests it beforehand, confirms it works — then goes live and forgets they're still showing their face instead of the document sitting right underneath the lens.
Here's the exact workflow to switch camera sources mid-call without fumbling:
- Join your call with your face cam active as normal
- Click the arrow (^) next to the Stop/Start Video button in the bottom toolbar — this is the camera switcher, not the mute button
- Select your document camera from the list that appears
- Your feed switches immediately — no interruption, no black screen
- To return to your face cam, repeat the same steps and select your original camera
Do a dry run with a colleague before any important meeting. The switcher arrow is easy to miss under pressure, especially if you're screen sharing simultaneously. Pin this workflow somewhere visible until it becomes muscle memory.
For Microsoft Teams, the path is slightly different: click the three-dot menu (…) → Device Settings → Camera. In Google Meet, hit the three-dot menu → Settings → Video. Both require you to be in an active call to switch; you can't pre-assign a secondary camera in advance the way Zoom allows.
Using OBS to Run a Document Camera and Face Cam Simultaneously
If you want both your face and your document visible at the same time — picture-in-picture style — you'll need either a Zoom paid plan's multi-camera feature or a virtual camera app. OBS Studio is the free solution I recommend, and it works well once you get past the initial setup curve.
The basic workflow:
- Install OBS and create a Scene with two sources: your webcam and your document camera
- Arrange them however you want (document cam full-screen, face cam in a corner, or side-by-side)
- Enable OBS Virtual Camera (Tools → Start Virtual Camera)
- In Zoom or Teams, select "OBS Virtual Camera" as your camera source
What your colleagues see is the OBS output — one clean, composited feed. I used this setup during a client workshop where I needed to demonstrate handwriting on paper while keeping my face visible for rapport. It worked flawlessly. A
positioned to the side kept my face well-lit while a secondary desk lamp handled the document below.
One caveat: OBS has a learning curve. Budget 30–45 minutes to configure it properly before relying on it for anything important.
Optimizing Your Desk Surface and Lighting for Best Image Quality
The camera hardware matters less than most people think. I've seen expensive document cameras produce muddy output because of poor surface and lighting choices.
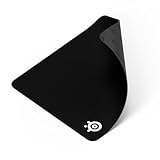
Surface color and texture: Matte white or light gray surfaces give autofocus algorithms the cleanest contrast to work with. Wood grain — the default on most desks — confuses autofocus and creates warm color casts that muddy the document. A simple

in light gray solves this immediately and costs almost nothing.
Lighting: Position a secondary desk lamp at roughly 45 degrees to your writing surface. This angle eliminates the hand shadow that kills readability when you're writing live. Overhead lighting alone creates the worst shadows precisely where your pen tip is.
HDMI output: If your document camera includes an HDMI port — several mid-range models do — you can bypass your laptop entirely and feed directly into a conference room display. This matters in boardroom presentations where laptop connections are unreliable or where you need the lowest possible latency. Check whether your camera's HDMI output mirrors the USB feed or operates independently; on most models it's simultaneous, which is ideal.
Document Cameras for Specific Use Cases: Tailored Recommendations
Not every document camera is built for the same job. A kindergarten teacher flipping through student drawings has completely different needs than a mechanical engineer reviewing CAD printouts or a sales rep doing live product demos on Zoom. Here's what actually matters for each scenario — and which cameras earn their spot on the desk.
For Educators: Classroom and Hybrid Teaching Setups
This is where document cameras originally made their name, and the demands are real: you're handling 30 kids' worksheets at speed, moving objects in and out of frame, and you don't have time to babysit autofocus or fidget with exposure settings between classes.
The Lumens DC193 is the camera I'd put on every teacher's wishlist. At 13MP with a capture area wide enough to cover a full 11×17" sheet, it handles everything from picture books to science lab diagrams without cropping. The autofocus tracks quickly — I've watched teachers slide a new paper under it mid-sentence and be in focus before finishing the thought. The arm is solid metal and built for daily handling in a way that cheaper plastic alternatives aren't after a year of use.
For hybrid teaching situations where a camera needs to travel between rooms or schools, the Hovercam Solo 8 Plus earns its reputation for durability and portability. It folds into a compact footprint, boots up fast, and doesn't require software reinstallation on every new machine — which matters when you're working on a shared classroom computer.
Key priorities for educators:
- Wide capture area (at minimum 11×14", ideally larger)
- Fast, reliable autofocus — not just fast once, but consistently fast
- Build quality that survives a bag and daily desk handling
- Simple controls, because you're managing a classroom, not a camera
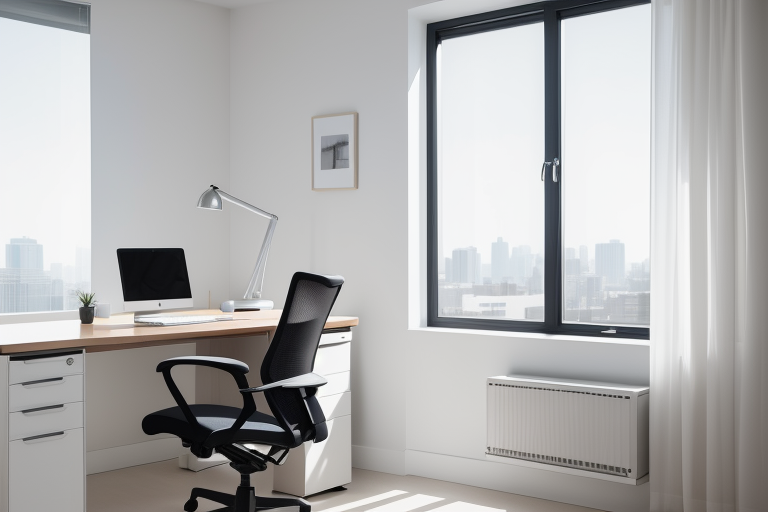
For Remote Professionals: Clean, Minimal Desk Setups
Remote tutors, online instructors, and home office professionals need a document camera that fits an already-crowded desk without becoming its own project to manage.
The IPEVO V4K Ultra HD solves this elegantly. It folds genuinely flat and fits inside a laptop bag alongside your computer. I've taken mine to a coffee shop for a tutoring session, set it up in under 90 seconds, and had it running in Zoom without touching any settings. For anyone doing mobile tutoring or teaching from different locations, that portability matters more than an extra megapixel.
For home office professionals who primarily share documents in meetings, the Logitech Reach solves a frustration I didn't know I had until it was fixed: repositioning the camera arm mid-call without Zoom dropping the camera selection and forcing a re-selection from the settings menu. The magnetic arm reconfigures in seconds, and Zoom just keeps working. If you frequently shift between sharing your monitor and dropping down to show a physical