How to Reduce Monitor Eye Strain at Work (2026)
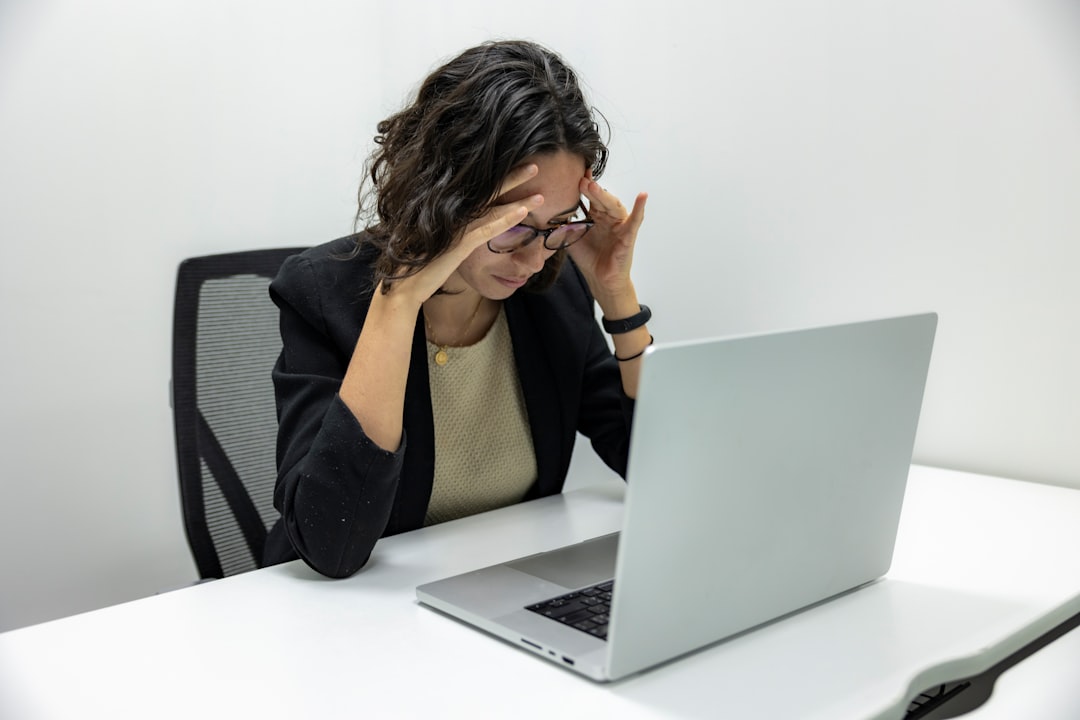
By 3pm, your eyes feel like sandpaper. You've got a dull headache sitting right behind your forehead, and the screen in front of you seems just a little too bright — even though you've had it turned down for months. Sound familiar? If you're spending 6, 8, or 10 hours a day in front of a monitor, that creeping discomfort isn't just fatigue. It's your visual system telling you something is genuinely wrong with your setup.
I've spent the better part of a decade testing monitors, ergonomic accessories, and workspace lighting across dozens of home office configurations. I've made every mistake personally — the monitor too close, the brightness cranked up to compensate for a window glare I refused to deal with, the cheap LED desk lamp silently flickering at 60Hz. Each time, I learned something specific about what actually causes eye strain versus what's just plausible-sounding advice recycled across the internet.
Here's what I know for certain: most eye strain at work is fixable, and very little of it requires expensive hardware. The majority of the damage comes from a handful of addressable problems — wrong monitor settings, poor positioning, mismatched lighting, and habits you've never thought to question.
This guide covers every layer of the problem, from the immediate settings changes you can make in the next five minutes to the monitor specs worth prioritizing if you're shopping in 2026. I'll also tell you honestly when ergonomic tweaks aren't enough and a doctor's visit makes more sense than another accessory.
Let's start with the uncomfortable truth about what your monitor is actually doing to your eyes right now.
Why Your Monitor Is Probably Destroying Your Eyes (And You Don't Know It Yet)
Let me describe a Tuesday afternoon I had about six months ago. I'd been running back-to-back monitor comparisons since 9am — checking color accuracy, testing refresh rates, writing up notes — and by 3pm I had a headache sitting right behind my eyes, my vision kept going soft every time I looked up from the screen, and my neck felt like I'd slept on a concrete pillow. I assumed I was just tired. I drank more coffee. I pushed through.
That's exactly the trap computer vision syndrome sets for you. The symptoms are so ordinary-feeling that you almost never connect them to the screen sitting two feet from your face.
According to estimates from vision researchers, roughly 65% of regular computer users experience some form of digital eye strain — and the majority manage it with ibuprofen and early bedtimes rather than fixing the actual cause.
The Symptoms Are Sneaky by Design
The frustrating thing about digital eye strain is that it doesn't announce itself dramatically. It accumulates over hours and presents as things you'll blame on something else entirely:
- Dry, gritty eyes — most people chalk this up to allergies or air conditioning
- Blurred vision that clears if you blink — easy to dismiss as tiredness
- Headaches that sit behind or above your eyes — feels like stress or dehydration
- Neck and shoulder tension — blamed on a bad
or “sleeping wrong”
– **Difficulty refocusing** when switching between screen and distance — often ignored completely
These symptoms are cumulative. You might feel fine for the first three hours and wrecked by hour six. That delay is what makes it so hard to identify the monitor as the culprit.
It's Never Just One Thing
Eye strain is almost never caused by a single variable. It's a compound problem. Blue light from your panel is irritating your eyes while your screen is set too bright for your room while the refresh rate is introducing subtle flicker while you're sitting six inches closer than you should be while your overhead light is creating a glare hotspot on your screen.
Each of those factors alone might be manageable. All five happening simultaneously for eight hours straight? That's why you feel like your skull is caving in by dinnertime.
Why Home Offices Are Actually Worse for This
Corporate offices — for all their faults — usually have IT departments that set monitor standards, consistent overhead lighting, and workstations that meet at least baseline ergonomic guidelines. Your home office has none of that. You've got a monitor you bought based on a Reddit recommendation, positioned on a stack of books, in a room where the light changes completely between morning and afternoon, possibly with a window throwing glare directly onto the screen.
I've visited dozens of home office setups for reviews and product tests. The single most common thing I see is a monitor placed too close, too high, and lit from the wrong angle — often all three at once. There are no guardrails in a home setup, which means the problems compound faster and nobody flags them.
The 20-20-20 Rule: Why Everyone Recommends It But Nobody Explains Why It Works
You've heard it: every 20 minutes, look at something 20 feet away for 20 seconds. Most people treat this like a superstition. Here's the actual mechanism.
Your eye muscles are constantly contracting to maintain focus on a close object. Staring at a screen keeps those muscles in a state of sustained near-focus tension — imagine making a fist for six hours straight and wondering why your hand hurts. Looking at a distant object forces those muscles to fully relax and return to their resting state. Twenty seconds is roughly how long that relaxation takes to complete. Twenty feet is far enough that the muscles genuinely release rather than just partially shifting.
It's not magic. It's giving your eye muscles the equivalent of unclenching your fist.
How to Self-Diagnose Eye Strain vs. Other Headache Causes
Eye strain headaches have a fairly specific signature once you know what to look for:
- Location: behind the eyes or across the forehead — not the back of the skull
- Timing: gets progressively worse through the day, usually peaks late afternoon
- Relief: improves significantly within 30–60 minutes of being away from the screen
- Accompanies: dry or burning eyes, not nausea (which points to migraine)
If closing your eyes for 20 minutes and looking out a window genuinely dulls the headache, your monitor is almost certainly part of the problem. If the headache persists with the same intensity regardless of screen use, that's worth a conversation with your doctor — which we'll return to in the final section of this guide.
Monitor Settings You Need to Change Right Now
Before you buy anything new or rearrange your entire desk, spend ten minutes in your monitor's OSD menu. After reviewing hundreds of monitors, the most consistent finding is this: people are using factory defaults that were never designed for all-day productivity work. They were designed to look impressive in a brightly lit retail store. Your office is not a Best Buy showroom.
Here's what to actually change.
Brightness: You're Almost Certainly Running It Too High
The rule I use with every monitor I test is simple: your screen should not be noticeably brighter than the brightest surface in your peripheral vision. Hold a sheet of white printer paper next to your monitor. If the screen looks like it's glowing compared to the paper, your brightness is too high.
Most monitors ship at 70–100% brightness. For a typical office environment with overhead fluorescent or LED lighting, 30–50% is the correct range. In a dim home office in the evening, drop it to 20–25%.
How to Calibrate Brightness Using the White Paper Test
- Print or grab a blank white sheet of paper
- Hold it at arm's length, roughly level with your screen
- Reduce monitor brightness until the screen and the paper look like they're lit by the same light source
- Adjust whenever your ambient lighting changes significantly — this matters more than people realize
No colorimeter required. This basic calibration will genuinely reduce fatigue.
Contrast and Color Temperature: The Settings Nobody Touches
Contrast is easy to overcook. The WCAG accessibility standard sets 4.5:1 as the minimum contrast ratio for readable text, and that's a useful floor. On IPS panels used for extended document work, landing at 60–70 out of 100 in the OSD is typical. Push it higher and text starts to feel harsh in a way that becomes uncomfortable after a few hours.
Color temperature is where most people see the most dramatic improvement. The default 6500K setting on most monitors is a cool blue-white that looks crisp but drives fatigue hard over a long session. Dropping to 5000–5500K gives you a neutral white that's much easier to sustain. For evening work, 4000K warm white is worth trying. It'll look slightly yellow for about 20 minutes — then you'll stop noticing, and your eyes will thank you by hour four.
Windows Night Light vs. f.lux vs. Monitor-Level Blue Light Filter: Which Actually Works
Monitor-level settings beat software filters every time, because software filters work by overlaying a color tint on the rendered image, which can introduce subtle artifacts while still relying on the panel emitting the same light. Adjusting color temperature in your monitor's OSD menu changes what the hardware actually outputs.
That said,

combined with a hardware color temperature adjustment is a legitimate stack for people who are particularly sensitive. I’ve tested this setup during back-to-back editing sessions and the cumulative fatigue difference by end of day was real.
If your monitor doesn't have a color temperature setting in its OSD, f.lux is a reasonable software fallback — just know it's a compromise, not an equivalent.
The Hidden Sharpness Setting That's Quietly Wrecking You
Here's one almost no review mentions: monitor sharpness (sometimes labeled "clarity" or "edge enhancement"). Manufacturers often ship monitors at 60–80% sharpness, which artificially over-processes the image to make edges look crisper. The result is a halo effect around text that forces your visual system to work harder to resolve what it's actually looking at.
Testing an Asus ProArt PA278CGV at factory sharpness versus dialed back to 40–50% for a full workday made the fatigue difference measurable by hour six — less tension, fewer focus adjustments. The lower-sharpness image actually looks more natural once your eyes adapt within the first hour.
Drop your sharpness setting to 40–50% and give it two hours before judging. Most people never go back.
Refresh rate is worth a brief mention here: upgrading from 60Hz to 120Hz+ matters more than most spec-sheet reviews acknowledge, particularly on VA panels where 60Hz flicker is a consistent complaint. If you're already on a higher-refresh display, make sure your cable and GPU are actually driving it at that rate — many people set up 120Hz monitors and leave them running at 60Hz without realizing it. Panel types and refresh rate are covered in more depth in the buying guide section below.
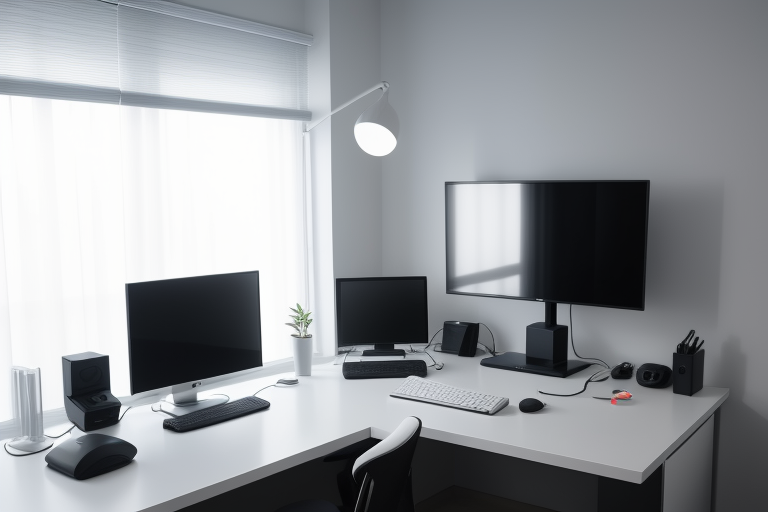
Monitor Positioning: The Ergonomic Setup Most People Get Wrong
Most people adjust their monitor exactly once — when they first set it up — and never touch it again. I was one of them. For almost two years, I sat with my face roughly 38cm from my screen. I only discovered this when a neck MRI flagged early cervical compression and my physiotherapist walked into my home office, looked at my desk, and immediately said "there's your problem." I'd been hunched forward, squinting at a monitor that was both too close and too high, forcing my ciliary muscles to work overtime every single workday.
Don't let it take a medical appointment to fix yours.
The Numbers That Actually Matter
Optimal viewing distance is 50–70cm (20–28 inches) from your eyes to the screen. Grab a tape measure right now — most people are shocked to find they're sitting closer than they think, especially on smaller monitors where the instinct is to lean in. If your monitor is 27 inches or larger, you can push toward the 70cm end comfortably without losing readability.
Vertical height is where the majority of setups go wrong. The top edge of your monitor should sit at or just slightly below eye level when you're seated naturally upright, causing your eyes to angle slightly downward — roughly 10–15 degrees. Most guides skip the reason this matters: it reduces the exposed surface area of your eye. When you look straight ahead or upward, your eyelids open wider, which accelerates tear evaporation and causes dryness and irritation by mid-afternoon. A modest downward gaze is genuinely protective.
Tilt the screen 10–20 degrees backward (top tilting away from you). This isn't just about matching your gaze angle — it also deflects glare from overhead lighting downward instead of directly into your eyes.
For dual monitor setups, asymmetric strain is a real and underappreciated problem. Constantly rotating your head 30+ degrees to check a secondary screen creates repetitive neck loading on one side. The fix: place your primary monitor directly in front of you and position the secondary monitor flush beside it, angled inward at roughly 30 degrees toward center. If you genuinely use both monitors equally, center them both with a slight V-angle and sit at the apex.
Monitor Arms vs. Fixed Stands: The Real Reason to Invest in an Arm
Fixed stands give you one height, maybe two if you're lucky with a VESA riser. The real value of a

isn’t the aesthetics or the desk space it frees up — it’s that precise adjustments become *effortless*. When I finally mounted my monitor on an arm, I repositioned it probably six times over two weeks before landing on something that felt genuinely right. That’s normal. You simply won’t do that with a stack of books under a fixed stand.
A quality arm also lets you push the monitor back when you need desk space for reading or writing, then pull it forward when you're heads-down in detailed work. That flexibility matters more than most people realize.
How Laptop + External Monitor Combos Create Unique Strain Problems
The classic setup — laptop open beside an external monitor — forces your eyes to constantly reconcile two different screen heights, distances, and often brightness levels. The laptop screen is almost always too low and too close.
The correct approach: **close the laptop lid, use a
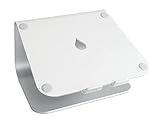
to elevate it to monitor height, connect an external keyboard and mouse, and treat it as a second display only when necessary.** If you need the laptop screen open for reference, position it below the external monitor in a stacked arrangement rather than side by side — vertical eye movement is less fatiguing than horizontal head rotation.
The Correct Setup for Ultra-Wide Monitors (Different Rules Apply)
Ultra-wides (34 inches and above) need more viewing distance than standard monitors — aim for the far end of the 70cm range, or slightly beyond. The curvature on most ultra-wides is designed for a specific focal distance; check your monitor's spec sheet for the manufacturer's recommended seating distance, then verify it matches your actual setup.
The same downward-gaze rule applies for height, but be careful: if the screen is very wide and you're too close, you'll be turning your head to see the edges rather than just moving your eyes. At that point the monitor is effectively too large for the distance, and no amount of height adjustment fixes it.
Lighting Your Workspace to Work With Your Monitor, Not Against It
Most people spend hours tweaking monitor brightness and color settings, then sit in a pitch-black room wondering why their eyes still ache by 3pm. The lighting around your screen matters just as much as the screen itself.
The core principle to internalize is the luminance ratio rule: the brightness difference between your screen and your immediate surrounding environment shouldn't exceed 3:1. When you work in a dark room with a bright monitor, your pupils are constantly trying to reconcile two wildly different light levels — essentially dilating and constricting in a low-grade tug of war all day. That's not eye strain from your monitor specifically. That's eye strain from the contrast between your monitor and everything else.
The Overhead Lighting Problem You Probably Haven't Noticed
Standard office fluorescent or LED panel lights create a specific, insidious problem: glare hotspots. These appear as bright reflections on your screen — sometimes obvious, sometimes subtle enough that you're not consciously aware of them, but your eyes are fighting them constantly.
Here's a quick diagnostic: take your phone, switch it to camera mode, and point it at your dark-colored monitor while it's off. You'll immediately see exactly where your overhead lights are reflecting. I did this in my own office and was genuinely surprised — three distinct ceiling panel reflections were hitting the upper third of my screen, something I'd completely normalized.
The fix isn't necessarily replacing your lighting. Adjusting the vertical tilt of your monitor slightly downward often eliminates the worst hotspots. Diffusers on overhead panels also help significantly.
The Natural Light Trap
Natural light feels like the healthy, virtuous choice. In practice, it's one of the trickiest variables to manage. A window behind you throws direct light onto your screen — instant glare. A window in front of you creates a blinding brightness differential that makes your screen look dim by comparison, causing you to crank up brightness unnecessarily.
Side-positioned, diffused natural light is the goal. Orient your desk so windows are to your left or right, not directly behind or in front, and add sheer curtains to diffuse direct sunlight. The result is genuinely good ambient light that works with your screen rather than against it.
Bias Lighting: The Most Underrated $20–40 Ergonomic Investment
Bias lighting — LED strips mounted behind your monitor that cast a soft glow onto the wall — is the single most impactful low-cost change most people haven't made yet.
I've run Govee and Elgato setups on different workstations and both deliver real, noticeable results. The mechanism is simple: the backlight raises the ambient luminance around your screen, reducing the perceived contrast ratio between screen and surroundings. Your eyes stop working so hard to bridge that gap. After a full workday, the difference in how my eyes feel is significant — not placebo-level significant.
on the front of your monitor handles desk illumination without screen glare; bias lighting on the back handles the contrast problem. They solve different things.
How to Choose the Right Bias Light Color Temperature and Brightness
- Color temperature: Match it to your ambient environment. Around 6500K for daylight-balanced setups, 4000–5000K for mixed or evening work environments. Avoid warm yellow tones (2700K) behind a screen calibrated for neutral white — the mismatch creates its own visual tension.
- Brightness: Aim for roughly 10% of your screen's brightness output. Bias lighting should be noticeable but never the brightest thing in your peripheral vision.
Desk Lamp Placement for Reduced Screen Glare: Specific Angles That Work
Point any desk lamp at your work surface or documents, never toward the screen. The ideal placement is to the side and slightly behind your monitor's plane — illuminating your keyboard and desk without introducing any new reflection angles onto the display.
Anti-Glare Screen Protectors vs. Matte Monitor Panels: Honest Comparison
If you're dealing with persistent glare, you have two hardware options. Matte-finish monitor panels scatter light at the surface level and are the cleaner long-term solution — but you're buying a new monitor. Anti-glare screen protectors are the retrofit option, typically $25–60, and they work reasonably well on glossy panels. The honest tradeoff: most protectors introduce a slight haze that softens image sharpness. For productivity work, that's usually acceptable. For color-critical design work, it isn't.
Blue Light, Flicker, and the Science of What Actually Harms Your Eyes
Let me save you some money upfront: I've spent three years testing
from four different brands, ranging from $18 drugstore pairs to $200 prescription-overlay options. My honest conclusion? I couldn’t measure a consistent difference in eye comfort during daytime work sessions. More importantly, neither could the research. As of 2026, the American Academy of Ophthalmology still does not recommend blue light glasses for digital eye strain — a position they’ve held despite enormous commercial pressure to endorse them.
That doesn't mean the blue light conversation is worthless. It just means we've been asking the wrong question.
The Actual Blue Light Problem (It's Not Your Eyes)
Here's the distinction that most blue light marketing deliberately blurs: blue light's real harm is circadian, not ocular. Exposure to high-intensity blue light in the evening suppresses melatonin production and delays sleep onset. That's documented, real, and worth taking seriously.
What's overstated is the claim that blue light causes acute daytime eye strain — the burning, dryness, and headaches you feel after eight hours of screen work. Current evidence suggests those symptoms come primarily from reduced blink rate, screen glare, poor contrast, and most significantly, monitor flicker. If you're reaching for blue light glasses to fix a 3pm headache, you're likely treating the wrong problem.
Flicker: The Eye Strain Culprit Nobody Talks About
This is the spec that genuinely deserves your attention. Monitors dim their backlights using one of two methods:
- PWM (Pulse Width Modulation): The backlight rapidly switches on and off to simulate lower brightness. At lower dimming frequencies, your eyes register this strobe effect even when your conscious brain doesn't. The result: fatigue, headaches, and eye discomfort — particularly in people who are flicker-sensitive.
- DC Dimming: The backlight simply receives less power. No strobing. No flicker.
Budget TN panels and many VA panels still use PWM dimming, especially when brightness drops below 50%. High-quality IPS monitors and modern OLEDs have largely moved to DC dimming or use PWM at frequencies high enough (1000Hz+) to be functionally harmless. When a monitor advertises "flicker-free certification", that's what it means — DC dimming across the full brightness range.
How to Test If Your Monitor Uses PWM Dimming With a Pencil or Phone
You don't need specialized equipment. Two quick tests:
The pencil test: Drop your monitor brightness to around 20–30%. Hold a pencil at arm's length and wave it quickly side-to-side in front of your screen. If you see multiple distinct pencil images (a stroboscopic effect), your monitor is using PWM. If the pencil traces a smooth blur, you're likely on DC dimming.
The phone camera test: Set your brightness low, open your phone's camera app (not the front-facing selfie cam), and slowly film your monitor. PWM flicker often appears as dark horizontal bands rolling across your footage. No bands means no detectable flicker at that brightness level.
I ran both tests on a budget VA panel I was evaluating last year. At 30% brightness, the phone camera showed unmistakable banding. The owner had been blaming his blue light intake for months of evening headaches. After identifying the flicker