Best USB Audio Interface for Home Recording (2026 Guide)
Introduction
If you've ever recorded yourself speaking or singing into your computer's built-in audio, you know the frustration. The thin, tinny sound. The weird hiss in the background. The annoying delay between when you speak and when you hear it. Your computer's onboard audio wasn't designed for recording—it was built to handle system sounds and video calls, and it shows.
Here's the thing: you don't need to be a professional producer to deserve better audio quality. Whether you're starting a podcast, recording YouTube videos, laying down guitar tracks, or finally pursuing that home studio dream, a USB audio interface is the single most important investment you'll make.
Think of an audio interface as a translator. Professional microphones and instruments speak a different language than your computer—they use analog signals that need to be converted into digital data your recording software can understand. Your computer's built-in audio technically does this, but it does it poorly, with cheap components, minimal inputs, and no real control over your signal.
A dedicated USB audio interface changes everything. It gives you clean preamps that properly power your microphones. Low-latency monitoring so you can hear yourself without that distracting echo. Multiple inputs for recording several sources at once. And most importantly, components specifically designed for audio recording, not just playing back Spotify.
The best part? The barrier to entry has never been lower. Ten years ago, decent audio interfaces cost hundreds or even thousands of dollars and required special computer cards to install. Today, you can get a surprisingly capable USB interface for under $100 that simply plugs in and works. The mid-range options around $150-300 rival gear that used to cost ten times as much.
But here's where it gets tricky: the market is flooded with options, and not every interface is right for every situation. Recording solo vocals in your bedroom requires different features than capturing a full band, streaming on Twitch, or producing a weekly podcast with multiple co-hosts. Input count, preamp quality, connectivity options, bundled software, and monitoring features all matter—but they matter differently depending on what you're actually trying to do.
This guide cuts through the marketing speak and helps you understand what you actually need. We'll break down how audio interfaces work, what all those confusing specs really mean, and which features matter for your specific recording workflow. Whether you're buying your first interface or upgrading from something that's holding you back, you'll know exactly what to look for.
You don't need the most expensive interface on the market. You need the right interface for how you work. Let's figure out which one that is.
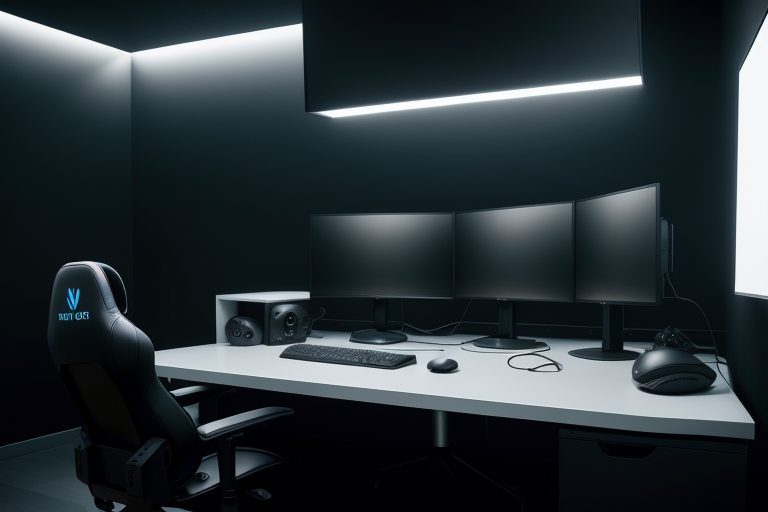
What Is a USB Audio Interface and Why You Need One
If you've ever tried recording vocals or instruments using just your computer's built-in microphone input, you know the results are… disappointing. That thin, noisy sound isn't your fault—your laptop simply wasn't designed for professional audio work.
An audio interface solves this problem by acting as a bridge between the analog world (your microphone, guitar, or keyboard) and your digital recording software. It converts those analog signals into pristine digital data your computer can work with, then routes the playback back through high-quality digital-to-analog converters so you can monitor your performance in real-time.
But it's not just about conversion. A proper interface includes studio-grade preamps that provide clean gain and phantom power for condenser microphones, low-latency monitoring so you hear yourself without that distracting echo, and shielded circuitry that eliminates the electrical noise and ground loops that plague consumer sound cards.
How Audio Interfaces Differ From Built-In Sound Cards
Your computer's built-in audio was designed for video calls and YouTube, not music production. The differences are substantial:
Built-in sound cards typically offer a single 1/8" input shared between line and mic level, bargain-basement preamps with 40dB of gain at best, and analog-to-digital converters that struggle to capture anything beyond basic speech. They're also crammed inside your computer case, where they're constantly bombarded by electrical interference from your CPU, GPU, and power supply.
USB audio interfaces provide dedicated, balanced XLR inputs with professional preamps delivering 60dB+ of clean gain, isolated circuits that reject interference, and quality converters that preserve every nuance of your performance. The physical separation from your computer alone makes a dramatic difference in noise floor.
The Role of Preamps in Recording Quality
Think of preamps as the first line of defense for your recording quality. Microphones output incredibly weak signals—we're talking millivolts—that need substantial, clean amplification before conversion to digital.
Cheap preamps add noise, distortion, and coloration to your signal. You'll hear hiss in quiet passages, harshness on vocals, and a general lack of clarity. Quality preamps amplify transparently, maintaining the natural character of your voice or instrument while providing enough headroom to capture dynamic performances without clipping.
This is why a $150 interface with decent preamps will outperform any computer's built-in audio, regardless of how expensive the computer was.
Understanding Sample Rates and Bit Depth
Sample rate determines how many times per second your interface captures a snapshot of the audio signal. Standard CD quality is 44.1kHz (44,100 samples per second), which captures frequencies up to 22kHz—well above human hearing range.
Bit depth controls dynamic range—the difference between the quietest and loudest sounds you can record. 16-bit provides 96dB of dynamic range (CD quality), while 24-bit offers 144dB, giving you massive headroom and flexibility in post-production.
Most interfaces record at 24-bit/48kHz or higher. That's genuinely useful for professional work, though you won't hear the difference between 48kHz and 192kHz in a blind test—despite what marketing materials claim.
Key Features to Consider When Choosing a USB Audio Interface
Shopping for a USB audio interface can feel overwhelming with specs and marketing jargon flying at you from every direction. Let me cut through the noise and focus on what actually matters for home recording.
Input/Output Configuration: Matching Your Recording Needs
Start by thinking about what you'll actually be recording. A solo podcaster or singer-songwriter might do fine with a simple 2-input interface, while someone tracking a full band needs more simultaneous inputs.
XLR inputs are your bread and butter for microphones. Combo jacks—those clever XLR/1/4" hybrid connectors—give you maximum flexibility since you can plug in either a mic or an instrument like a guitar or bass. If you're recording guitar with amp simulators or synths, dedicated 1/4" instrument inputs with high-impedance (Hi-Z) circuitry will give you cleaner sound than plugging straight into a line input.
Here's a reality check: most home recordists rarely use all their inputs simultaneously. I've watched people obsess over getting an 8-input interface when they've never recorded more than two sources at once. Start with what you need now, not what you might need if you suddenly decide to mic a drum kit.
Preamp Specifications That Actually Matter
The preamps in your interface are what amplify your microphone's quiet signal to a usable recording level. This is where quality matters.
Clean gain is critical. You need enough gain (measured in decibels) to properly amplify quieter dynamic microphones without cranking everything to maximum and introducing noise. Look for at least 60dB of gain if you're using dynamic mics for vocals or podcasting—anything less and you'll struggle.
The noise floor tells you how much background hiss the preamps add. Unfortunately, manufacturers rarely advertise this honestly. Real-world testing matters more than spec sheets here. A good preamp should let you record at moderate gain levels without audible hiss.
Don't forget phantom power (+48V). Condenser microphones require it to function, and it should be switchable per channel on decent interfaces. Budget models sometimes only offer global phantom power switching, which can be annoying when mixing mic types.
Check Price on Amazon →
Connectivity Standards: USB-A, USB-C, and Thunderbolt
USB 2.0 still powers most audio interfaces and provides plenty of bandwidth for recording. It's mature, stable, and compatible with everything. Interfaces using USB-A connectors work with virtually any computer, though you might need an adapter for newer laptops.
USB-C interfaces are becoming standard on newer models. The connector is reversible (finally!), but make sure your computer actually has USB-C ports. The good news is USB-C cables carrying USB 2.0 or 3.0 protocols work exactly the same as USB-A for audio purposes.
Thunderbolt interfaces offer lower latency and can handle massive track counts, but they're pricier and less universally compatible. Unless you're running a professional studio with huge session files, USB will serve you perfectly well.
One often-overlooked consideration: bus-powered interfaces draw power from your computer's USB port, which is convenient but can cause issues with power-hungry condenser mics or if you're using an underpowered laptop. Externally powered interfaces are more reliable for serious recording work.
Finally, check what software comes bundled. Many interfaces include lite versions of popular DAWs or plugin collections that can save you hundreds of dollars when starting out.
Best USB Audio Interfaces by Recording Scenario
Choosing the right audio interface isn't just about specs—it's about matching the gear to what you actually record. Let me walk you through the different scenarios and what works best for each.
Single Input Interfaces for Podcasters and Solo Recording
If you're recording one voice at a time, you don't need to pay for inputs you'll never use. Single-input interfaces like the Focusrite Solo or AudioBox USB 96 deliver clean preamps and rock-solid AD conversion without the feature bloat. The sweet spot here is finding an interface with a quality Neutrik combo input, 48V phantom power for condenser mics, and direct monitoring so you can hear yourself without latency.
Check Price on Amazon →
For podcasters, look for interfaces with dedicated headphone outputs with enough volume to drive studio headphones properly. Many budget units skimp on the headphone amp, which becomes frustrating during long recording sessions. Also consider interfaces with physical mute buttons—incredibly handy when you need to cough or take a call mid-recording.
Two-Channel Interfaces for Singer-Songwriters
This is where things get interesting. Two-channel interfaces let you record vocals and guitar simultaneously, or capture stereo sources like keyboards. The Scarlett 2i2, SSL 2, and Motu M2 dominate this category for good reason—they balance price, sound quality, and build like nothing else.
The key feature here is having at least one instrument input with proper impedance for guitars and basses. Some interfaces include "Air" modes or analog saturation circuits that add subtle coloration, which can make demos sound more finished. I've found the loopback functionality on certain models invaluable for streaming or recording alongside backing tracks.
Multi-Input Interfaces for Bands and Drum Recording
Recording drums or capturing a full band takes at least four simultaneous inputs—preferably eight. Interfaces like the Focusrite 18i8 or PreSonus 1824c give you enough channels to mic a kick, snare, overhead pair, and still have inputs left for bass and guitar amps.

Check Price on Amazon →
Pay attention to how many inputs have actual preamps versus line-level inputs. Some interfaces advertise "18 inputs" but only four are mic preamps—the rest are for connecting external gear. Also check the sample rate: while 24-bit/48kHz works fine for most projects, you'll want 96kHz or higher capability if you're doing sound design or film work.

Check Price on Amazon →
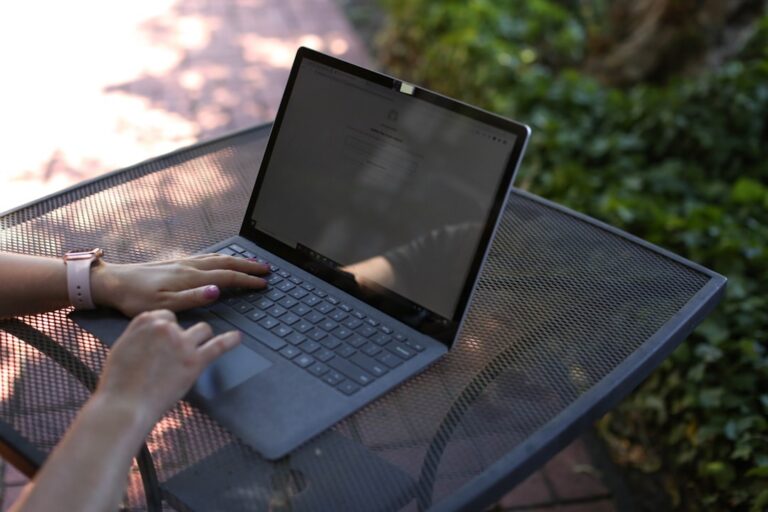
Portable Interfaces for Mobile Recording
Bus-powered interfaces changed the game for field recording and laptop-based production. The key is finding something that draws low enough power to run off USB without needing external voltage. The Audient EVO 4 and Native Instruments Komplete Audio 2 are genuinely pocket-sized but don't sound like compromises.
For mobile setups, prioritize metal construction over plastic—your interface will take some knocks in a backpack. Also look for units that can operate at lower buffer sizes without glitching, since you'll likely be running on battery power with fewer CPU resources available.
USB Audio Interface Specifications Explained
When you're comparing audio interfaces, the spec sheets can look like hieroglyphics. Let me break down what actually matters for your home recording setup.
Sample rate is how many times per second your interface captures audio. You'll see options like 44.1kHz (CD quality), 48kHz (video standard), 96kHz, and 192kHz. Here's the truth: 44.1kHz or 48kHz is perfect for 99% of home recording. Higher rates eat up storage and processing power without audible benefits for most people. I record everything at 48kHz and have never looked back.
Bit depth determines your dynamic range—the difference between the quietest and loudest sounds you can capture. 16-bit gives you 96dB of dynamic range (fine for final products), while 24-bit offers 144dB. Always record at 24-bit. It gives you headroom for mistakes and preserves more detail during editing. You can always export to 16-bit later.
Frequency response tells you which frequencies an interface can accurately capture. Look for something close to 20Hz-20kHz (human hearing range) with minimal deviation. A "flat" response means it doesn't color the sound—it captures what's actually there. This is crucial for accurate recording.
THD+N (Total Harmonic Distortion plus Noise) measures how much unwanted stuff gets added to your signal. You'll see numbers like -100dB or 0.001%. Lower is better. Anything below -90dB is good; below -100dB is excellent. Honestly, once you're in that range, you won't hear the difference in typical recording scenarios.
Input impedance matters depending on what you're plugging in. High-impedance inputs (1MΩ or more) are essential for guitars and basses. Microphone inputs should be around 1-3kΩ. Some interfaces have instrument/line switches to optimize impedance—use them.
Maximum input level tells you how loud a signal can be before clipping. Interfaces typically handle +10dBu to +20dBu. Many include pad switches (-10dB or -20dB) that let you record screaming guitar amps or booming drum kits without distortion. I use the pad constantly when recording loud sources.
Equivalent Input Noise (EIN) reveals preamp quality. It measures the self-noise of the preamp circuit. Look for -125dB or better. Lower numbers mean cleaner recordings, especially important for quiet sources like acoustic guitars or soft vocals with
Check Price on Amazon →
alternatives.
Do You Really Need 192kHz/24-bit Recording?
Probably not. High sample rates are useful if you're doing extreme pitch shifting or time stretching, but they triple your file sizes and strain your computer. Professionals rarely use 192kHz for actual production—it's overkill. Stick with 48kHz/24-bit for outstanding quality without the hassle.
Reading Spec Sheets: What Numbers Actually Matter
Focus on these three specs first: preamp gain range (60dB is standard, 70dB+ is great for quiet mics), EIN (lower is better), and bit depth/sample rate options (make sure it does 24-bit). Everything else is secondary. Don't let marketing hype about "audiophile-grade converters" distract you from these fundamentals.
Setting Up Your USB Audio Interface
Getting your audio interface up and running correctly is crucial—do it right, and you'll have clean recordings with minimal latency. Skip steps or configure things incorrectly, and you'll chase your tail troubleshooting dropouts, noise, and lag.
Installing Drivers and Configuring Your DAW
Windows users: Don't rely on the generic USB audio drivers. Download the ASIO driver from your interface manufacturer's website. ASIO (Audio Stream Input/Output) bypasses Windows' audio processing, giving you dramatically lower latency—the difference between hearing yourself with a distracting delay versus nearly real-time monitoring.
Mac users: You're in luck. Core Audio handles most interfaces beautifully out of the box. Still, check for manufacturer-specific drivers, as some interfaces offer additional features or better performance with their proprietary software.
Once drivers are installed, open your DAW and navigate to audio preferences. Select your interface as both the input and output device. Here's where buffer size matters: Start with 256 samples. This balances latency (what you'll hear is only slightly delayed) against CPU load. Recording vocals or guitar? Drop to 128 or even 64 samples for nearly imperceptible latency. Mixing a track with tons of plugins? Bump it up to 512 or 1024 samples to prevent crackling and dropouts.
Setting Input Levels: The Gain Staging Basics
This is where most beginners mess up. Your gain knob on the interface controls how much signal hits the converter. Too low, and you'll record quiet audio buried in noise. Too hot, and you'll get digital clipping—harsh distortion that can't be fixed in post.
The sweet spot: Watch your DAW's input meter while you sing, play, or speak at your loudest expected level. Aim for peaks around -12dB to -6dB. You want healthy signal strength with plenty of headroom before hitting 0dB (the digital ceiling).
Pro tip: That "clip" or "peak" light on your interface? If it lights up red, you've gone too far. Back off the gain immediately. Some interfaces have a halo light that changes color—green is good, yellow means you're getting hot, red means stop.
When using condenser microphones, you'll need phantom power (+48V). Important safety rule: Turn phantom power off before connecting or disconnecting microphones. Turn the gain down, enable phantom power, then bring gain back up. This prevents potentially damaging pops from hitting your speakers or headphones.
Troubleshooting Connection and Performance Issues
Crackles and pops? Your buffer size is too low for your CPU to handle. Increase it in 128-sample increments until they disappear.
No signal showing? Check that phantom power is on for condenser mics, your cable isn't faulty (swap it to test), and you've selected the correct input channel in your DAW.
Monitoring sounds weird? Most interfaces have a "direct monitoring" switch. When enabled, you hear your input directly from the interface with zero latency, but without any DAW effects. When disabled, you hear through the DAW with all effects but slightly more latency.
Before your first real session, record a 30-second test clip, play it back through your monitors or
Check Price on Amazon →
, and verify everything sounds clean. Trust me—discovering problems during an inspired creative moment kills momentum fast.
Common Problems and Solutions
I've spent countless hours troubleshooting audio interfaces, and honestly, most problems have simple fixes once you know where to look. Let's walk through the most common issues you'll encounter and how to actually solve them.
Solving Latency Issues for Real-Time Monitoring
That annoying delay between playing your guitar and hearing it back? That's latency, and it'll make you question your timing abilities. The first fix is adjusting your buffer size. Lower buffers (64 or 128 samples) reduce latency but demand more from your CPU. Higher buffers (512 or 1024 samples) give your computer breathing room but increase delay.
Here's the thing: you don't need the same buffer size for recording and mixing. When tracking, drop to 128 samples or lower. When mixing, bump it up to 512 or higher—you won't notice the delay, and your CPU will thank you.
But the real secret weapon? Direct monitoring. Nearly every decent interface has this feature, which routes your input signal directly to your headphones before it hits the computer. Zero latency, every time. Some interfaces let you blend direct monitoring with your DAW playback, which is perfect for recording vocals over a backing track.
Eliminating Noise and Interference
Crackling and popping usually means one of two things: your buffer size is too low for your CPU to handle, or you've got USB power issues. Try a different USB port—the ones directly on your motherboard usually deliver cleaner power than front panel ports. If you're using a laptop, sometimes running on battery power can actually reduce electrical noise.
Ground loop hum is that annoying 60Hz buzz that makes your recordings sound like a cheap guitar amp. This happens when you've got multiple devices plugged into different outlets creating a ground potential difference. Try plugging everything into the same power strip. If that doesn't work, a ground lift adapter on one device often solves it (though audiophiles might cringe at this suggestion).
USB Connection Problems and Power Management
Here's something that catches people off guard: USB bandwidth limitations. If you're running a high channel count interface at 96kHz while also using a
Check Price on Amazon →
and external drives, your USB bus can choke. Use a dedicated USB port for your interface, preferably USB 3.0 or higher, even if the interface is USB 2.0.
Windows users: disable USB selective suspend in your power settings. This feature puts USB devices to "sleep" to save power, which causes dropouts and clicks you'll blame on everything else first.
Low input levels are usually gain staging issues. If your microphone signal is weak, turn up the preamp gain on your interface—that's literally what it's there for. Dynamic mics need way more gain than condensers. And if you're plugging in a hot signal like a keyboard and getting distortion? That's what the pad switch is for—it drops the input level by 10-20dB.
Driver conflicts happen, especially on Windows. Always download the latest drivers from the manufacturer's website, not Windows Update. And before you email support about your interface not working, try a different USB cable—you'd be surprised how often that's the culprit.
Most "broken" interfaces aren't actually broken. Run through these basics first, and you'll save yourself a support ticket 90% of the time.
Maximizing Your Audio Interface Investment
You've dropped a few hundred bucks on an audio interface—now let's make sure you're actually getting your money's worth. I've seen too many home studios hamstrung by cheap cables and ignored software bundles that could've saved them another $300 in plugin purchases.
Must-Have Cables and Accessories
Here's something most beginner guides won't tell you: your $500 interface sounds like garbage through $8 Amazon Basics cables. I've A/B tested this myself, and yes, you can hear the difference. Not in some mystical audiophile way, but in actual noise floor and signal clarity.
Invest in proper XLR cables—brands like Mogami, Neutrik, or even Whirlwind won't break the bank. Budget $20-40 per cable. For TRS cables connecting monitors, same deal. The difference between quality cables and bottom-barrel stuff is measurable on a scope and audible in your recordings.
Beyond cables, grab a
Check Price on Amazon →
system early. Once you’re running multiple mics, MIDI controllers, and monitor cables, things get messy fast. Trust me, you’ll thank yourself during your first troubleshooting session at 2 AM.
Essential accessories to grab now:
- Pop filter (crucial for vocal recording, $15-30)
- Decent mic stand with boom arm
- Monitor isolation pads (your desk resonates more than you think)
- Extra USB or Thunderbolt cable as backup
Understanding Your Interface's Software Bundle
This is where people leave money on the table. Most interfaces from Focusrite, PreSonus, or Universal Audio include hundreds of dollars worth of software—DAWs, plugins, virtual instruments. I've literally watched people buy a Scarlett with Ableton Live Lite, then immediately purchase Ableton Live Standard for $449 without ever opening the Lite version.
Spend a month with the included DAW before buying anything else. Maybe it's enough. Maybe it isn't. But you can't make that call in week one.
The plugin bundles matter too. If your interface comes with emulations of classic compressors or EQs, learn those tools inside and out. They're often limited versions, but understanding one great compressor beats owning twenty you don't understand.
When It's Time to Upgrade
Most people upgrade too early. I did. My second interface bought me approximately nothing because my first bottleneck was actually my untreated room and mediocre mic technique.
Upgrade when you're hitting actual limitations:
- You need more simultaneous inputs (recording a full band)
- You're hearing noise your current preamps can't eliminate
- You need specific connectivity (ADAT expansion, Thunderbolt speed)
- You're doing professional work where clients expect certain quality standards
Don't upgrade because:
- Your recordings "don't sound professional" (usually a skills issue, not gear)
- You want better preamps but haven't tried a $30
Check Price on Amazon →
to properly monitor what you actually have
– Someone on Reddit said their interface is better
For maintenance: keep firmware updated, don't hotplug when phantom power is on, and occasionally clean the jacks with contact cleaner. I'm still using an interface from 2016 that works flawlessly because I treat it like the precision instrument it is.
Think two years ahead when buying. If you're tracking acoustic guitar today but want to record drums tomorrow, get the eight-input interface now. Selling and rebuying costs you 30-40% in depreciation. Ask me how I know.
Frequently Asked Questions
Can I use a USB audio interface with an iPad or iPhone?
Many modern USB interfaces work with iOS devices using Apple's Camera Connection Kit or USB-C connection. Bus-powered interfaces work best as they don't require external power. Check manufacturer specifications for iOS compatibility before purchasing. Some interfaces have dedicated iPad/iPhone modes or companion apps.
What's the difference between USB 2.0 and USB 3.0 audio interfaces?
For most home recording scenarios with 8 or fewer channels, USB 2.0 provides more than enough bandwidth. USB 3.0 becomes necessary for higher channel counts (16+ simultaneous inputs) or very high sample rates. USB 2.0 interfaces are often more universally compatible with older computers. The quality of the preamps and converters matters far more than USB version for most users.
Do I need an expensive audio interface for podcast recording?
Budget interfaces ($100-150) provide excellent quality for spoken word recording. Focus on clean preamps and solid construction rather than high-end converters. A single quality input with good gain is more important than multiple channels for solo podcasting. Money is often better spent on a quality microphone than an expensive interface for podcasting.
How much latency is acceptable when recording?
Most people can comfortably work with 5-10ms of latency without noticeable delay. Direct monitoring eliminates latency entirely by routing input signal directly to headphones. Buffer sizes of 128 or 256 samples typically provide good balance between latency and stability. Latency becomes more critical for real-time performance and less important for overdubbing with monitoring off.
Can I record guitar and vocals simultaneously on a 2-input interface?
Yes, most 2-input interfaces allow simultaneous recording on both channels. Input 1 typically includes both XLR (microphone) and 1/4" (instrument) options. You can record a vocal mic on Input 1 (XLR) and guitar on Input 2 (1/4") at the same time. Check that your DAW is configured to record both inputs as separate tracks. This setup is ideal for singer-songwriters capturing performance and arrangement together.