Monitor Shelf Riser with Drawer: Ergonomic Desk Guide 2026
Introduction
If you're reading this, there's a good chance your neck is bothering you right now. I'm not psychic—I've just spent enough time reviewing desk setups to know that most people are staring down at their monitors like they're reading a book on their lap. The stats back this up: the average desk worker spends over seven hours daily looking at a screen, and the vast majority of those screens sit way too low.
I learned this the hard way during my first year working from home. By 2 PM every day, my neck felt like I'd been carrying a backpack full of bricks. The culprit? My 27-inch monitor sitting directly on my desk, forcing me to crane my neck forward for hours at a time. Your head weighs about 10-12 pounds, and for every inch it tilts forward, it effectively adds another 10 pounds of pressure on your neck and spine. Do that math over a full workday, and you'll understand why so many remote workers are popping ibuprofen like candy.
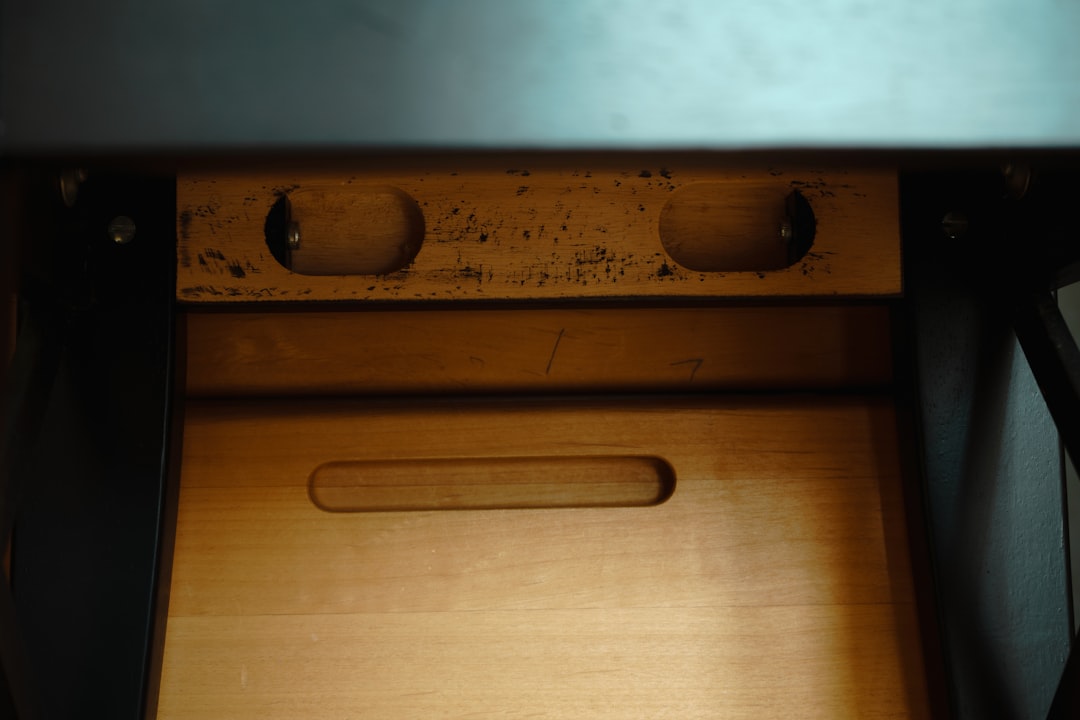
Here's where monitor shelf risers with drawers become genuinely useful—and I mean useful, not just another desk accessory that looks good in Instagram photos. These aren't complicated pieces of engineering. They're essentially elevated platforms that lift your monitor 3-6 inches off your desk surface while providing a drawer underneath for all the random stuff currently cluttering your workspace. Pens, sticky notes, that USB C hub with seventeen dongles, your lip balm collection—it all goes in the drawer instead of scattered across your desk.
The ergonomic benefit is straightforward: raise your monitor so the top third of the screen sits at or slightly below eye level. This keeps your neck in a neutral position instead of constantly flexed forward. The storage benefit is equally simple: vertical space is free real estate that most people ignore. Instead of your desk surface turning into a junk drawer, you're using the dead space under your monitor.
I've tested dozens of these risers over the past few years, from $20 particleboard disasters that wobble if you breathe near them to $100+ hardwood pieces that could probably survive a hurricane. They work best for home offices where you can't mount a monitor arm, gaming setups that need extra peripheral storage, and anyone with limited desk space who wants to stay organized without buying additional furniture.
This guide covers everything you actually need to know: the real benefits beyond "it looks neat," what factors matter when choosing one (spoiler: weight capacity matters way more than you think), the top products I've personally tested, practical setup tips, and when you should skip the riser entirely and use something else.
Let's fix your neck and clean up your desk.
Why You Need a Monitor Shelf Riser with Drawer
Let's be honest—most of us have terrible monitor placement. If you're constantly looking down at your screen, you're setting yourself up for neck pain, headaches, and that lovely hunched-over posture that makes you look like you're auditioning for a Gollum remake. A monitor shelf riser with drawer solves this problem while simultaneously decluttering your desk. It's one of those simple upgrades that makes you wonder why you didn't do it sooner.
Ergonomic Impact on Posture
The ergonomic benefits alone justify the investment. Your monitor should sit at or slightly below eye level, with the top of the screen roughly at your natural line of sight when sitting upright. When you're constantly tilting your head down to view your display, you're putting enormous strain on your cervical spine—we're talking about 10 to 12 pounds of head weight pulling on your neck muscles all day long.
I've tested dozens of these risers, and raising your monitor even 3 to 5 inches can dramatically reduce the forward head tilt that causes those end-of-day tension headaches. Within a week of proper monitor height, most people notice less neck stiffness and reduced upper back tension. If you've already invested in an
Check Price on Amazon →
, proper monitor positioning is the next critical piece of the ergonomic puzzle.
Storage Capacity vs. Desk Real Estate
Here's where monitor risers with drawers really shine—they're space multipliers. That drawer becomes the perfect catchall for desk clutter: pens, sticky notes, USB drives, earbuds, charging cables, hand sanitizer, and all those random items that usually live in sad little piles on your desk.
The typical drawer on these risers measures 10-13 inches wide and 2-3 inches deep. That's enough for 20-30 pens, a stack of notepads, and your everyday essentials. Meanwhile, the space underneath the riser creates another storage tier. I keep my wireless keyboard there when I'm using my laptop, or slide my

Check Price on Amazon →
partially under it to create a two-tier work surface.
Many models include cable management features—passthrough holes or rear channels that route your monitor cable, keyboard cable, and other cords neatly out of sight. This alone transforms a rat's nest of wiring into something that looks intentional and professional.
Who Benefits Most from Monitor Risers with Drawers
If you have limited desk space, you need this. Small apartment dwellers, dorm residents, and anyone working from a kitchen table will appreciate the vertical storage strategy. The drawer eliminates the need for separate desk organizers that eat up precious square footage.
They're also perfect for minimalists who want clean sightlines. Everything tucks away in that drawer, leaving just your monitor, keyboard, and mouse visible. Your desk suddenly looks like it belongs in an architecture magazine instead of a "before" photo.
Even if you have a spacious desk, these risers create zones. The elevated platform naturally separates your viewing area from your work surface, which helps with focus and organization. Plus, most models support 20-50 pounds, so you can even place a laptop and external monitor up there if you're running a dual-screen setup.
Key Features to Look for When Buying
Not all monitor shelf risers are created equal. After testing dozens of these desk organizers, I've learned which features actually matter for daily use and which are just marketing fluff.
Weight Capacity Explained
The weight capacity determines what you can safely place on your riser without worrying about structural failure. Most monitors weigh between 10-25 pounds, but you need to account for everything else you'll stack up there.
A basic 20-pound capacity works fine for a single lightweight monitor. However, if you're placing a 27-inch monitor plus speakers, a desk lamp, or office supplies, aim for 30-50 pounds minimum. I've seen cheaper risers sag in the middle after just a few months because people underestimated the total load.
Pro tip: Add up the actual weight of everything you plan to put on top, then pick a riser rated for at least 10 pounds more. This safety margin prevents gradual warping and ensures longevity.
Drawer size and configuration matters more than you'd think. A single large drawer (around 10-12 inches wide) gives you flexibility for notebooks, tablets, or miscellaneous office supplies. Multiple smaller compartments keep pens, sticky notes, and USB drives organized but can feel cramped if you need to store anything bulky.
I prefer risers with at least 2 inches of drawer depth—anything less and you're basically getting a tray that can't hold much beyond paperclips.
Material Comparison: Wood vs. Metal vs. Acrylic
Bamboo is my top recommendation for most people. It's durable, looks professional, resists moisture better than other woods, and typically costs less than premium hardwood options. Expect to pay $30-60 for a quality bamboo riser.
MDF and particleboard keep costs down ($20-40 range) but won't last as long. These engineered woods can chip at the edges and don't handle weight as well over time. They're fine for lighter setups or temporary use.
Metal risers handle the most weight and last virtually forever, but they're usually more expensive ($50-100+) and can look industrial rather than polished. The cold surface may also feel less inviting for keeping frequently-touched items.

Check Price on Amazon →
Acrylic models create a minimalist, almost floating appearance that works great in modern spaces. They're surprisingly sturdy but show fingerprints easily and cost as much as metal options.
Adjustable vs. Fixed Height Models
Fixed-height risers (typically 3-5 inches) are simpler and more affordable. They work perfectly if you already know your ideal monitor height and don't need flexibility.
Adjustable models with removable legs or stackable platforms let you customize elevation from 2-6 inches. This versatility is worth the extra $10-20 if you're still dialing in your ergonomic setup or share your workspace with others.
Cable management features shouldn't be overlooked. Rear cutouts or channels keep power cables and HDMI cords from cluttering your desk. Some risers include built-in grommets that guide cables directly downward—a small detail that makes a surprising difference in desk aesthetics.
Look for non-slip pads on the bottom and top surface. They prevent the riser from sliding and keep your monitor stable. It's a basic feature, but I've tested "premium" models that somehow missed this detail.
Different Types of Monitor Shelf Risers with Drawers
When I first started testing monitor risers, I thought they were all basically the same—a platform with maybe a drawer thrown in. After reviewing dozens of models, I've realized the variety is actually pretty impressive. The right type depends entirely on what you're storing and how your desk is set up.
Single vs. Multiple Drawer Configurations
Standard single-drawer risers are the workhorses of this category. They typically feature one drawer positioned either dead center or offset to one side. I've found the centered design works great if you're storing flat items like notepads or a wireless keyboard when it's not in use. The off-center models give you more flexibility—you can access the drawer without moving your monitor, which is clutch during video calls.
The single-drawer approach keeps things simple. You're not tempted to become a desk hoarder, and there's less to organize. I use one for my secondary monitor, and it holds exactly what I need: spare cables, a microfiber cloth, and my backup mouse.
Multi-drawer organizers change the game if you've got more stuff to wrangle. Models with two or three smaller drawers let you actually categorize things. I tested one with three shallow drawers that became my ideal setup—one for cables, one for writing supplies, and one for miscellaneous tech bits like SD cards and dongles. The compartmentalization alone saved me probably ten minutes a day of digging around.

Check Price on Amazon →
Fixed vs. Adjustable Height Systems
Most monitor risers come with a fixed height, typically ranging from 2 to 5 inches. These work perfectly fine if the height happens to match your ergonomic needs. I'm 5'10", and a 4-inch riser puts my 27-inch monitor at ideal eye level.
Adjustable height risers cost more but solve a real problem if multiple people use the same desk or if you switch between sitting and standing positions. The better ones use either stackable platforms or adjustable legs. I've tested both types—the leg-based systems feel more stable, while stackable platforms give you more granular control. Some can adjust from 2 inches all the way up to 6 or 7 inches.
Check Price on Amazon →
Standard vs. Wide Platform Options
Standard platform risers typically measure 20-24 inches wide—enough for one monitor with a few inches on either side. They're perfect for single-monitor setups and keep your desk footprint reasonable.
Wide platform risers (30 inches or more) open up new possibilities. I run a dual-monitor setup on a 36-inch riser, and there's still room for a small speaker between them. Some people use these to elevate a monitor with a laptop beside it. Just make sure your desk can accommodate the width—I learned that lesson the hard way with an undersized desk.
Corner-specific designs deserve a mention if you're working with an L-shaped desk. These angled or curved risers fit into corner spaces efficiently and usually rotate to some degree. They're niche, but if you have a corner setup, they're worth seeking out.
Premium models sometimes include extras like built-in USB hubs, wireless charging pads, or even LED lighting. Are they necessary? No. But if you hate reaching under your desk for USB ports, a riser with a built-in hub is genuinely convenient.
Top Materials and Build Quality Considerations
The material you choose for your monitor riser dramatically affects both its performance and lifespan. I've tested risers across every price point, and the material differences are immediately obvious when you're actually using them daily.
Bamboo vs. Traditional Wood Options
Bamboo has become my go-to recommendation for most setups. It's legitimately sturdy—I've had 27-inch monitors sitting on bamboo risers for three years with zero sagging. The natural grain looks great on camera during video calls, and bamboo's antimicrobial properties mean less gross buildup if you occasionally snack at your desk (we all do it).
Price-wise, expect to pay $30-60 for a quality bamboo riser with a drawer. That's reasonable for something you'll use daily.
Traditional wood risers, usually made from oak or walnut, look premium but cost 50-100% more. Unless you're building a high-end executive setup, bamboo delivers better value.
MDF and engineered wood risers run $20-40 and work fine for lighter monitors (under 15 pounds). I've tested several that held up well for 2+ years, though the particle board core will eventually show wear around screw holes if you move the riser frequently. The laminate finishes can chip if you're rough with them, but they're adequate if you're budget-conscious.
When Metal Makes Sense
Metal risers—usually powder-coated steel or aluminum—are what I recommend for heavy ultrawide monitors or dual-monitor setups. I have a steel riser supporting a 34-inch curved display that weighs 18 pounds, and it's rock-solid with zero flex.
The industrial aesthetic works great in modern or minimalist offices. Aluminum versions are lighter and won't rust, while steel offers maximum load capacity. Expect to pay $45-80 for quality metal construction.
The downside? Metal risers often have smaller drawers because the frame structure eats into usable space. And cheaper models can feel tinny—tap them before buying if possible.
Drawer Hardware Quality
Here's where budget risers reveal themselves: awful drawer glides. I've tested $25 risers where the drawer literally falls out if you pull too far, or catches every single time you open it.
Look for ball-bearing slides or, at minimum, plastic glides with stoppers. The drawer should pull smoothly with one finger and not wobble side-to-side. In person, open and close it five times—any hesitation or grinding is a dealbreaker.
Check Price on Amazon →
Corner joints matter too. Dovetail or finger joints indicate quality construction. Butt joints with just glue or staples? That riser will loosen up within a year.
Longevity expectations based on my testing:
- Premium bamboo/wood (2-5+ years): Minimal wear, maintains stability
- Quality MDF ($30+, 2-4 years): Serviceable but shows cosmetic wear
- Budget MDF (<$25, 1-2 years): Expect loosening joints, surface damage
- Metal (3-5+ years): Outlasts everything, though finishes may scratch
- Acrylic/glass (2-4 years): Durable but constant fingerprint cleaning gets old fast
Check for rubber feet or felt pads on the bottom—bare wood or metal will scratch your desk and slide around. It's a small detail that separates thoughtful design from cheap manufacturing.
How to Choose the Right Size for Your Setup
Getting the dimensions wrong on a monitor riser is like buying shoes online without checking the size chart—frustrating and potentially expensive. Let me walk you through exactly what to measure before you click "buy."
Measuring Your Current Setup
Start by grabbing a tape measure and getting down to specifics. Measure your monitor's base width and depth, not the screen itself. That chunky V-shaped stand or circular base is what actually needs to fit on the riser. I've seen people measure their 27-inch screen and assume any 27-inch-wide riser will work, only to find their stand hangs off the edges.
Also measure your desk depth from front to back. Most desks are 24-30 inches deep. Your riser should leave at least 3-4 inches of desk space in front of it for a keyboard or

Check Price on Amazon →
. If you push your monitor too far back, you’ll strain your neck leaning forward all day.
Here's the critical measurement everyone forgets: what needs to fit underneath? Measure the height and depth of your keyboard. Standard mechanical keyboards are about 1.5 inches tall; low-profile ones are under an inch. Add an extra half-inch for comfortable clearance. Planning to stash your laptop under there when using an external monitor? You'll need at least 2-3 inches of clearance depending on your laptop's thickness.
Height Calculation Guide
The ergonomic sweet spot: the top edge of your monitor should sit at or slightly below eye level when you're sitting with proper posture. To find your ideal riser height, sit normally at your desk and have someone measure from your desk surface to your eye level. Subtract your monitor's height (measured from base to top of screen). That's your target riser height.
Most people need 2-5 inches of lift. If you're under 5'6", start around 2-3 inches. Over 6 feet tall? You probably want 4-5 inches or might even consider a full

Check Price on Amazon →
instead.
Dual Monitor Sizing
Running two screens changes the math significantly. Measure the width of both monitor bases, add the width between them (I recommend 2-3 inches of spacing for the bezels and a natural viewing gap), then add 2 inches of buffer on each end. For two 24-inch monitors with typical stands, you're looking at roughly 48-52 inches of riser width minimum.
A pro tip: if your monitors have adjustable stands that swivel, measure them at their widest rotation point. Nothing worse than discovering your monitors can't swivel because they hit the riser's edges.
Future-proofing matters too. If you're eyeing a monitor upgrade in the next year or two, measure for that hypothetical 32-inch ultrawide now. A riser that's 6 inches too wide is fine; one that's 2 inches too narrow is useless. The drawer functionality is a bonus, but if your actual monitor doesn't fit properly, that bonus becomes irrelevant.
Setup Tips and Organization Strategies
Getting the most out of your monitor shelf riser means more than just unboxing it and sliding your screen on top. With a bit of attention during setup and some smart organization, you'll create a workspace that actually stays functional.
Initial Setup Checklist
Start by laying out all the pieces and hardware before you assemble anything. I know it's tempting to dive right in, but trust me—counting screws and identifying parts saves headaches later. Most risers arrive with pre-drilled holes and basic instructions, but wood and bamboo models especially benefit from a careful approach since over-tightening can split the material.
Once assembled, use a level app on your phone or an actual bubble level to ensure your riser sits perfectly flat. An unlevel riser means a wobbly monitor, which gets annoying fast when you're typing. If your desk surface isn't perfectly even, look for risers with adjustable feet or add small adhesive furniture pads under the low corners. For smooth surfaces like glass or glossy laminate desks, non-slip pads underneath prevent the whole setup from creeping forward over time.
Before placing your monitor on top, consider the weight distribution. Center heavier monitors, and if you're using a dual monitor setup with monitors of different sizes, put the heavier one toward the middle or where the riser has the most support.
Drawer Organization Ideas
The drawer is where these risers earn their keep. I organize mine by frequency of use—things I grab multiple times per day go in the front half, while backup items live in the back.
Daily essentials that work great in riser drawers:
- Charging cables and adapters for phones and earbuds
- Sticky notes and index cards
- Frequently-used pens and a highlighter
- Screen cleaning cloth and lens wipes
- USB drives and SD cards
- Lip balm, hand lotion, and other small personal items
What doesn't work well: heavy items that make the drawer hard to open, crumbly snacks that leave a mess, or anything so thick it prevents the drawer from closing smoothly. Keep a small divider tray or even just a couple of binder clips standing upright to prevent everything from sliding into a jumbled pile.
Check Price on Amazon →
Cable Management Best Practices
Your monitor's power cable, DisplayPort or HDMI cable, and any USB connections can quickly become a tangled nightmare. Many risers include a channel or cutout in the back specifically for routing cables—use it. Feed cables through before placing your monitor on top to avoid having to lift everything later.
For cables that don't stay put naturally, velcro cable ties beat twist ties every time since they're reusable and adjustable. Adhesive cable clips mounted on the back edge of the riser keep power cables from drooping down and getting caught in the drawer.
Maintenance is straightforward: Wipe down plastic and metal risers with a damp microfiber cloth. Wood and bamboo need gentler treatment—use a barely-damp cloth and avoid standing water. Every few weeks, pull the drawer completely out and wipe the interior to prevent dust buildup.
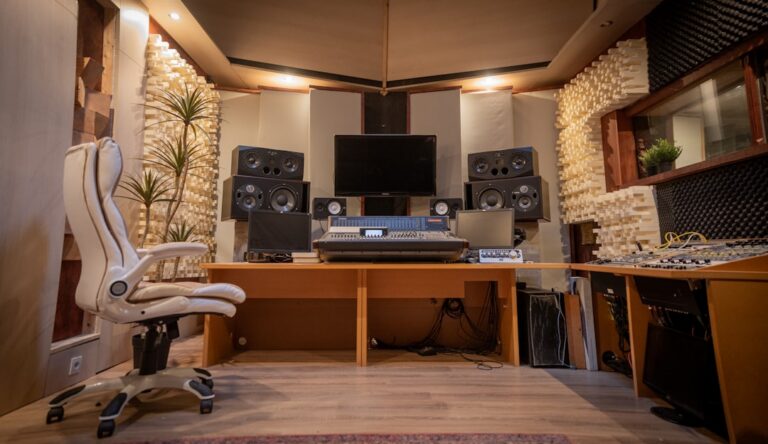
The top surface offers prime real estate, but resist the urge to clutter it. A small succulent or desk plant adds life without blocking airflow to your monitor. A wireless charging pad or simple phone stand keeps your device visible for notifications. Just remember—anything you add up there reduces your workspace, so be selective.
Alternatives and Complementary Products
Before committing to a monitor shelf riser with drawer, it's worth considering whether it's actually the best solution for your setup. I've tested dozens of desk organization products, and sometimes the "obvious" choice isn't the right one.
Monitor Risers vs. Monitor Arms
Here's the thing: a fixed riser keeps your monitor in one position, while a monitor arm gives you freedom to adjust throughout the day. If you frequently switch between sitting and standing, share your desk with someone of a different height, or need to rotate your screen for presentations, a riser won't cut it.
Check Price on Amazon →
Monitor arms also free up all the desk space underneath—no shelf blocking access. The downside? They require drilling into your desk (usually), cost more, and don't provide drawer storage. I typically recommend arms for anyone with an adjustable-height desk or multiple monitors. Stick with risers if you want something affordable, non-permanent, and appreciate that extra storage compartment.
When DIY Makes Sense
I'll be honest: building your own monitor riser is surprisingly practical if you have specific dimension requirements. I've seen people create custom risers for ultra-wide monitors, dual-monitor setups, or desks with awkward depths that standard products don't accommodate.
A simple DIY approach involves stacking hardcover books or using sturdy storage boxes, but if you want something permanent, basic woodworking skills go a long way. You can build exactly the drawer size you need—shallow for pens and sticky notes, or deep enough for notebooks and chargers. The catch? It takes time, and unless you're handy, the finished product might look… handmade.
DIY makes the most sense when you need unusual dimensions or want to match specific desk aesthetics. Otherwise, the convenience of buying something ready-made usually wins.
Complete Desk Organization Systems
Some desk organizers take an all-in-one approach, combining the monitor platform with pen holders, phone stands, and multiple compartments. These are excellent space-savers for compact desks where every square inch matters.
Check Price on Amazon →
The trade-off is less flexibility. You're locked into their organizational layout, which might not match how you actually work. I've found these systems work best for minimalists who keep limited items on their desk and appreciate the streamlined look.
When to skip the riser entirely: If you already have a

Check Price on Amazon →
with smooth height adjustment, you might not need additional elevation. Similarly, some premium monitors come with stands that offer extensive height and tilt adjustments—adding a riser just creates redundancy.
Also consider complementary products that work alongside risers. Cable management boxes hide power strips beneath your riser, while drawer dividers keep that storage compartment from becoming a junk collector. These small additions make a bigger difference than you'd expect in maintaining a truly organized workspace.
The best setup? It's rarely one product—it's the right combination for how you actually work.
Frequently Asked Questions
What's the ideal height for a monitor shelf riser?
Top of your monitor screen should be at or slightly below eye level when sitting with proper posture. Most risers add 2-6 inches of height; measure distance from desk to eye level minus your monitor's height. Adjustable risers offer flexibility if multiple people use the workspace. Taller users (6'+) may need 4-6 inch risers, while average height users typically need 3-4 inches.
How much weight can a typical monitor shelf riser with drawer support?
Budget models (under $30): Usually 20-30 lbs, suitable for monitors up to 24 inches. Mid-range options ($30-70): Typically 30-40 lbs, handles most 27-32 inch monitors plus accessories. Premium models ($70+): Often 50+ lbs capacity, can support ultrawide monitors or dual monitor setups. Always check manufacturer specifications and consider weight of items stored on top, not just the monitor.
Are monitor risers with drawers better than those without?
Depends on your storage needs—drawers add functionality but increase cost and reduce under-riser clearance. Drawers are ideal for keeping frequently-used items accessible (charging cables, adapters, notepads). Riserless drawers may be better if you need more vertical clearance for keyboards or prefer open storage. Consider whether you have sufficient desk drawer space already before paying extra for built-in drawers.
What should I store in the drawer of my monitor riser?
Cable accessories: Extra charging cables, adapters, USB drives, cable ties. Writing supplies: Pens, pencils, highlighters, small notepads. Small office items: Sticky notes, paper clips, binder clips, thumb tacks. Tech accessories: Headphone earbuds, cleaning cloths, SD cards. Avoid storing heavy items that add unnecessary weight or anything you need to access constantly.
Can a monitor shelf riser work with an ultrawide monitor?
Yes, but you need to verify the riser width matches your ultrawide's base (34-49 inch monitors). Look for risers specifically labeled as 'wide' or measure at least 40+ inches in width. Weight capacity is critical—ultrawides weigh 15-25 lbs, so choose risers rated for 40+ lbs. Some ultrawide users prefer dual-leg risers or monitor arms for better stability than center-post designs.