Best Flexible Microphone Boom Arm Desk Mounts (2026 Guide)
Introduction
I've spent countless hours testing microphones at my desk, and I can tell you there's nothing quite as frustrating as fighting with a mic stand that refuses to position itself exactly where you need it. You know the scenario: you've got your keyboard, monitor, coffee mug, and notebook all competing for space, and your microphone boom arm keeps drifting into your face or hovering awkwardly above your mouse pad. Or worse—it won't reach the sweet spot for your recording setup at all.
That's where flexible boom arms completely change the game.
Unlike the spring-loaded scissor arms you've probably seen everywhere or the basic rigid boom poles that came with your mic, flexible boom arms use a different approach entirely. Think of them like those bendy desk lamps you can position anywhere—but engineered specifically to hold microphones securely while giving you infinite positioning options. They're built with segmented gooseneck designs or articulated joints that let you bend and twist the arm into virtually any position, and more importantly, they stay where you put them.
Check Price on Amazon →
I've watched podcasters position these arms to curve around dual monitors, streamers angle them perfectly to stay out of camera frame while maintaining ideal pickup distance, and musicians bend them into tight spaces that would be impossible with traditional boom arms. Remote workers love them too—you can tuck the mic away when you're done with calls instead of having a giant metal contraption permanently occupying prime desk real estate.
The key difference comes down to mechanics. Spring-loaded scissor arms rely on tension springs and joints that work great for specific positions but fight you when you need something unconventional. Rigid boom arms give you basic extension but limited articulation. Flexible arms, on the other hand, use either continuous gooseneck construction (one smooth, bendable tube) or multi-segment joints that lock in place through friction or ball joints. This means you get the stability of a rigid arm with the adaptability of something much more versatile.
But here's the catch: not all flexible boom arms are created equal. Some are too flimsy and sag under heavier mics. Others are so stiff they're a workout to adjust. And many don't include the cable management features you actually need to keep your setup looking clean.
In this guide, I'll walk you through everything you need to know about flexible microphone boom arms. You'll learn about the different construction types and what each excels at, how to properly install and mount them for maximum stability, the real positioning advantages they offer over other boom arm styles, and most importantly—how to choose one that'll actually work for your specific microphone and desk setup. No fluff, just the practical details that matter when you're trying to build a functional workspace.
What Is a Flexible Microphone Boom Arm and How Does It Work?
A flexible microphone boom arm is a desk-mounted positioning system that uses either a continuous gooseneck design or multi-segment articulating joints to hold your microphone exactly where you place it. Unlike traditional spring-loaded boom arms that rely on tension and counterweights, flexible arms stay put through the mechanical friction of their internal components—no springs, no drift, no readjustment needed.
The magic happens inside the arm itself. Most flexible boom arms contain either a tightly wound metal core (in gooseneck designs) or a series of ball-and-socket joints (in segmented models). When you bend the arm, you're essentially creating friction between these internal components. That friction is calibrated to be strong enough to hold position under the weight of your microphone, but still loose enough that you can reposition it without tools or excessive force.
The key advantage? Simplicity. You position it once, and it stays there. No fiddling with tension knobs, no spring bounce when you adjust it, and no complicated setup. This makes flexible arms particularly popular for content creators who frequently move their microphone between speaking positions—podcasters who switch between sitting and standing, for example, or streamers who need to quickly swing the mic out of camera frame.
Check Price on Amazon →
Gooseneck vs. Articulating Segment Designs
Gooseneck arms feature a continuous flexible tube, usually 12-18 inches long. They're simple, intuitive, and allow infinite positioning angles within their range of motion. The downside? They can be harder to precisely position because there's no "locking" at specific angles—you're fighting the entire length of the arm's resistance. Over time, some cheaper gooseneck arms can develop "memory" and prefer returning to frequently-used positions.
Articulating segment designs use multiple ball-joint connections, typically 3-5 segments with adjustment points between them. Each joint locks independently, giving you more precise control over positioning. These tend to feel more robust and maintain their holding power longer than budget gooseneck options. The trade-off is slightly less fluid adjustment—you're positioning discrete segments rather than continuously bending.
How Flexible Arms Hold Position Without Springs
The holding mechanism is purely mechanical friction. In gooseneck designs, a tightly coiled internal metal spring or wire creates resistance when bent. The tighter the coil, the more weight it can support. In articulating designs, each ball joint has a carefully calibrated fit—tight enough to resist the microphone's weight, loose enough to reposition by hand.
This brings us to the biggest limitation: weight capacity. Most flexible arms max out at 1-3 pounds, which covers most USB microphones and lighter XLR models. But if you're mounting a heavy broadcast mic like a Shure SM7B (about 1.7 lbs) with a shock mount (another 0.5 lbs), you're pushing the limits. Spring-loaded arms routinely handle 4-5 pounds because their counterweight system shares the load differently.
The sweet spot for flexible arms is lightweight USB microphones in the 0.5-1.5 pound range—basically anything that doesn't require massive amounts of gain and processing power. For anything heavier, you'll want to look at traditional spring-loaded designs that can handle the load without gradually sagging over time.
Advantages of Flexible Boom Arms Over Traditional Mic Stands
If you've ever wrestled with a rigid mic stand while trying to find that perfect angle, you'll immediately appreciate what flexible boom arms bring to the table. Unlike traditional scissor arms with their predetermined pivot points, flexible arms let you bend your microphone into literally any position you can imagine. Need it to curve around your monitor_arm? No problem. Want it to duck under an overhead light? Done. This infinite adjustability is a game-changer when you're working with tight desk layouts or complex setups.
The compact footprint is another huge win. When you're done recording, a flexible boom arm can curl up like a contented cat—tucking itself against the wall or snaking back behind your monitors. Try that with a spring-loaded scissor arm, which stays permanently extended at whatever length you last set it to. I've tested both types extensively, and there's no comparison when you need to reclaim desk space for other work.
Here's something most people don't think about until it's too late: silence matters. High-quality scissor arms use springs that can creak, squeak, or make subtle noise when you adjust them mid-recording. Flexible arms? Dead silent. They stay exactly where you put them through friction alone, with no springs to telegraph every tiny movement into your microphone. If you've ever had to pause a recording session because your mic arm decided to sing its own background track, you know how valuable this is.
Space-Saving Benefits for Small Desks
Let's be honest—not everyone has a sprawling desk setup with room to spare. In cramped quarters or multi-monitor setups, those bulky scissor arms become territorial nightmares. I've seen people literally unable to fit a traditional boom arm because the extended mechanism collides with monitor bezels or sits too far forward.
Flexible arms excel here because they can snake through tight gaps and wrap around obstacles. Got a monitor mounted close to the edge? Your flexible arm can curve behind it. Need your mic positioned between two displays? A flexible arm can thread that needle where a rigid mechanism simply won't fit. The space savings aren't just theoretical—I've measured setups where switching to a flexible arm freed up 8-10 inches of horizontal desk space.
Why Streamers and Video Creators Prefer the Low Profile
If you're on camera, visibility matters. Flexible boom arms sit much lower in the frame than their scissor-arm cousins. A traditional spring-loaded arm with its chunky parallel linkages becomes part of your background whether you want it there or not. Flexible arms, by contrast, can stay almost completely hidden—slinking in from the side or top of frame as just a slim goose-neck profile.
Plus, there's the price factor. While premium scissor arms from boutique brands can run $100-200, solid flexible boom arms typically cost $20-50. You're getting more positioning freedom, better space efficiency, and silent operation for a fraction of the price. That's tough to beat.
Types of Desk Mounts and Installation Methods
Getting your microphone boom arm properly mounted makes the difference between a stable setup and a wobbling mess. Let's break down your options and what actually works in real-world setups.
C-Clamp Installation: Step-by-Step
C-clamp mounts are the workhorses of the boom arm world. They grip the edge of your desk with serious force—I'm talking 50+ pounds of clamping pressure. The typical clamp range is 0.5 to 2.5 inches, which covers most standard desks perfectly.
Here's how to install one properly:
Prep your space. Clear the desk edge and measure the thickness. If you've got a standing desk with a control panel mounted underneath, you'll need to work around it.
Position the clamp. Don't just slap it on the corner. Think about your arm's reach when you're seated. For most setups, mounting 12-18 inches from your primary sitting position gives you optimal flexibility.
Tighten gradually. Crank the clamp down in stages, checking alignment as you go. I've seen too many people torque these down in one go and end up with a crooked mount.
Test the full range. Before routing cables, swing that arm through its complete motion. You want to make sure it doesn't hit your monitor, keyboard, or anything else in its path.

Check Price on Amazon →
Bolt-through and grommet mounts offer rock-solid stability by actually going through your desk. These require drilling a hole (usually 0.5 to 1 inch diameter), but the trade-off is zero wobble. If you've got a dedicated desk that isn't moving, this is the installation method that'll last years without needing adjustment. Just measure twice and drill once—there's no do-overs here.
Adhesive base mounts solve a specific problem: desks where clamps won't work. Glass desks, rental apartments, or ultra-thick countertop desks all benefit from this approach. The catch? You're limited to lighter microphones and shorter arms. Most adhesive mounts tap out around 2-3 pounds total weight, and any heavy USB mic on a long extension will eventually start sagging.
Hybrid clamp designs have become my go-to recommendation for expensive hardwood or finished desks. They feature rubber padding or cork inserts that distribute pressure without leaving marks. Yes, you'll pay $10-15 more, but that's nothing compared to explaining dents to a landlord or spouse.
Which Mount Type Works Best for Your Desk
The honest answer depends on what you're working with:

Check Price on Amazon →
-
Standard MDF/particle board desks (most IKEA-style): C-clamps all day. They're strong enough and won't damage the surface.
-
Standing desks: C-clamps or bolt-through. Standing desks move, so you need serious clamping force.
-
Glass desks: Adhesive only, but honestly, consider if a boom arm is even your best choice here.
-
Thick butcher block or solid wood: Bolt-through wins, or a hybrid clamp if you don't want permanent holes.
-
Rental or temporary spaces: Hybrid clamps with padding let you mount and remove without damage.
Desktop weighted bases exist, but I rarely recommend them for flexible boom arms. The leverage physics just don't work well—you need an absurdly heavy base to prevent tipping when the arm is extended. Save weighted bases for straight vertical stands.
Key Features to Look for When Buying a Flexible Boom Arm
Shopping for a flexible boom arm can feel overwhelming when you're staring at dozens of nearly identical options. The difference between a boom arm that holds your microphone perfectly and one that slowly droops throughout your recording session often comes down to a few critical features.
Arm length and reach typically ranges from 12 to 20 inches. To figure out what you need, measure from your desk clamp point to where you want your microphone positioned. I generally recommend going slightly longer than you think necessary—a 16-18 inch arm gives you flexibility to position your mic overhead, to the side, or in front of you without awkward angles. Remember that flexible arms don't extend straight out like scissor arms, so you'll lose a couple inches to the natural curve.
Core stiffness and memory is where most cheap boom arms fail spectacularly. Inside every flexible arm is either a series of metal ball joints, a thick steel cable, or a gooseneck wire. High-quality arms use densely wound steel cables or robust gooseneck designs that maintain their position under load. Lower-quality options use thinner internal components that gradually droop, especially when holding heavier microphones. If you read reviews mentioning "doesn't hold position" or "sags over time," that's a core stiffness problem.
Understanding Weight Capacity vs. Your Microphone
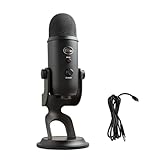
Most manufacturers list maximum weight capacity, typically ranging from 1 to 3 pounds. Here's the reality: most USB microphones weigh well under 1 pound. A Blue Yeti weighs about 1.2 pounds, and that's one of the heavier consumer options.
Check Price on Amazon →
The trick is to account for your entire setup weight—microphone plus shock mount plus any pop filter attachments. Add everything together and look for a boom arm rated for at least double that combined weight. This safety margin ensures the arm won't slowly creep downward during use.
Thread Sizes and Shock Mount Compatibility
Microphone threading comes in two standard sizes: 3/8-inch (common in Europe and on most shock mounts) and 5/8-inch (standard in North America for mic stands). Quality boom arms include both sizes or come with threaded adapters.
Before buying, check your microphone's mounting thread. If you're using a shock mount, check that threading too—they're not always the same as the microphone itself. Keep those adapters that come with your boom arm; losing them means an annoying trip to the hardware store for a $3 part.
Cable management separates a clean setup from a tangled mess. Look for integrated cable channels that run along the arm's length, or at minimum, velcro straps or clips at intervals. Some arms feature magnetic cable guides, which sound fancy but honestly work about as well as simple velcro.
Build quality reveals itself in the joints and diameter. Metal joints outlast plastic every time, and thicker arm diameter (around 0.5-0.7 inches) generally indicates more robust internal components. Check if the mounting hardware is metal or plastic—plastic threads strip easily.
Most flexible arms offer full 360-degree rotation at the mounting point, but vertical reach varies significantly. Measure your desk height to microphone position; some arms max out at 12-14 inches of vertical adjustment, which might not work if you need overhead positioning for podcasting or streaming.
Best Practices for Positioning and Using Your Flexible Arm
Getting a flexible boom arm is one thing—actually using it properly is another. I've seen countless people frustrated with drooping mics or cable tangles, usually because they skipped the setup fundamentals. Let's fix that.
Setting Up for Podcasting vs. Singing vs. Gaming
For podcasting, position your mic 4-6 inches from your mouth at a slight downward angle (about 45 degrees). Cardioid mics pick up sound in a heart-shaped pattern, so speaking slightly off-axis reduces plosives while maintaining clarity. I keep mine just below chin level and slightly to the side.
Gaming setups need the mic closer to maintain voice quality during intense moments—about 3-4 inches works well. Position it above your keyboard line of sight so it's not in your face during gameplay. The flexible arm's advantage here is you can swing it away when you're done, unlike a

Check Price on Amazon →
that stays put.
For singing or vocal recording, you'll want more distance—typically 6-8 inches—to capture fuller tone without overloading the capsule. Dynamic mics handle close proximity better than condensers, but both benefit from consistent positioning.
Optimal Positioning Techniques
Here's what actually prevents drooping: respect the weight limit. If your arm supports 3 pounds, don't mount a 2.8-pound mic with a shock mount and pop filter. Leave yourself a 25% buffer minimum.
Check all joints monthly and re-tighten as needed. I set a calendar reminder because these things loosen gradually—you won't notice until your mic is slowly descending mid-podcast.
Mark your positions. Seriously. Use a small piece of electrical tape or take photos of your favorite angles for different scenarios. When you need to move the arm out of the way, you can return to your sweet spot in seconds rather than spending 10 minutes finding it again.
Cable Management Without Adding Weight
This is where people sabotage themselves. Heavy cable management solutions defeat the purpose of a flexible arm.
Run your XLR or USB cable along the arm's length using the built-in clips (if included) or lightweight velcro strips. Never use zip ties—they're permanent and add unnecessary tension. Leave a service loop at both ends so the cable doesn't pull on the mic or create tension that fights the arm's positioning.
Check Price on Amazon →
Avoid bundling power cables with your audio cable along the arm. Keep them separate to prevent interference and reduce weight.
Avoiding Common Mistakes
Don't over-bend the segments. These arms have a breaking-in period, but repeatedly bending sections to extreme angles weakens the internal core. If you're forcing it, you're damaging it.
Watch for uneven weight distribution. If you add a pop filter to one side of your mic, the arm may develop a twist. Balance accessories or upgrade to an arm rated for more weight.
Know when it's failing. If you've tightened all joints and the arm still won't hold position, the internal springs or gooseneck core is shot. At that point, repositioning is pointless—you need a replacement.
The key is treating your flexible arm as a precision tool, not a wrestling opponent. Set it up right once, and it'll serve you for years.
Common Problems and Troubleshooting
Even the best flexible boom arms can develop issues over time. Here's how to diagnose and fix the most common problems you'll encounter.
Fixing a Drooping Arm: Quick Solutions
The dreaded droop is the number one complaint with flexible mic arms. You position your microphone perfectly, only to watch it slowly sink toward your desk over the next hour.
Why it happens:
- The internal gooseneck core has weakened from repeated adjustments
- You're using a microphone that's too heavy for the arm's rating
- The arm was cheaply constructed from the start (under $20 arms are notorious for this)
Quick fixes to try:
- Remove any unnecessary accessories like heavy
Check Price on Amazon →
shock mounts if you can use a lighter alternative
– Reshape the arm to create more supporting angles—sometimes a gentle S-curve distributes weight better than one sweeping bend
– Try the “reset trick”: fully extend and bend the arm in the opposite direction for 30 seconds, then reposition
If these don't work, you're likely dealing with metal fatigue in the gooseneck core. Unfortunately, there's no permanent DIY fix here.
When to Upgrade to a Spring-Loaded Arm Instead
If you find yourself fighting drooping issues constantly, it's a sign that flexible arms aren't the right solution for your setup. Spring-loaded boom arms use counterbalance systems that hold position regardless of how many times you adjust them.
Consider upgrading if you're using a microphone heavier than 1.5 pounds, adjust your mic position multiple times per day, or need it to hold at extreme angles.
Desk clamp issues are another frustration. If your clamp won't tighten properly, check if your desk is within the arm's specified thickness range (usually 0.75-2.5 inches). Too thick? You'll need a mounting adapter. Too thin? Add a rubber pad or folded cloth to fill the gap and prevent damage to your desk surface.
Limited reach often catches people by surprise. Before repositioning your entire setup, try mounting the base clamp at the corner of your desk instead of the center of an edge—this can add several inches of effective reach. Some arms also offer optional extension segments, though these can introduce more wobble.
Vibration and handling noise travel straight down flexible arms into your recording. A proper shock mount is essential, not optional. Additionally, placing a small isolation pad under your desk clamp can reduce transmitted vibrations from keyboard typing or desk bumps.
Thread adapter wobble between your mic and the boom arm is usually caused by loose threading. Hand-tighten firmly (no tools needed), and if it still spins, wrap one layer of thread tape around the male threads before connecting.
Arms becoming too stiff or loose over time signals the internal mechanisms wearing out. Budget flexible arms typically last 1-2 years with daily adjustments, while quality ones might give you 3-4 years. If your arm has lost its ability to hold position and you've had it for over two years, it's simply reached its lifespan. Fighting with a worn-out arm isn't worth the frustration—replacement is your best option.
For heavy microphone and shock mount combinations exceeding 2 pounds, check compatibility specs carefully. Most flexible arms simply can't handle this weight reliably, regardless of what the marketing claims.
Flexible Boom Arms vs. Other Mic Mounting Options
Before you settle on a flexible boom arm, it's worth understanding how they stack up against other mounting solutions. Each type has its sweet spot, and choosing the right one depends on your specific setup and needs.
Scissor/Spring-Loaded Arms
The heavyweight champions of mic mounting, scissor arms use internal springs to counterbalance your microphone's weight. I've used both types extensively, and the difference is immediately noticeable. Spring arms glide smoothly with just a finger's touch, staying exactly where you position them without drift.
The catch? They're designed for heavier mics, typically starting at 1.5 pounds. That
Check Price on Amazon →
on your desk probably weighs under a pound, which means a spring arm might actually float upward. Quality spring arms also start around $80 and climb past $200 for premium options like the RODE PSA1+ or Blue Compass.
When to choose spring arms: You're using a broadcast-style XLR microphone, you need frequent repositioning throughout the day, or you simply want the smoothest operation money can buy.
Desktop Mic Stands
Sometimes the simplest solution is the right one. A basic desktop stand costs $10-30 and does one thing well: keeps your mic in place. I keep a small tabletop stand for video calls when I don't need broadcast-quality audio.
Pros: Inexpensive, stable, zero setup hassle
Cons: Takes up desk real estate, limited positioning, mic stays closer to keyboard noise
Desktop stands work great if you sit in the same position and don't mind the mic being visible in your workspace. For everything else, you'll want something more versatile.
Floor Stands and Wall-Mounted Arms
Floor stands are what you see in professional studios—they hover over your workspace without touching your desk. The appeal is obvious: zero desk clutter. The reality? You'll trip over the base, and adjusting height means bending down every time.
Wall-mounted arms offer a permanent solution for dedicated recording spaces. Once installed, they're rock-solid and keep your desk completely clear. But "permanent" is the key word—you're drilling into walls and committing to that mic position for the long haul.
When Flexible Arms Are the Best Choice
After testing dozens of mic mounts, I consistently recommend flexible arms for most home office and gaming setups. Here's when they shine:
- Budget matters: $15-60 gets you a functional solution
- Space is tight: They fold close to the desk when not in use
- Lighter mics: Perfect for USB mics under 2 pounds
- Multiple positions: Podcasting, gaming, and video calls in one setup
- Rental-friendly: Clamp-on installation, no wall damage
Decision Matrix: Which Arm Type Is Right for You?
Choose flexible arms if: You're using a USB mic, budget is under $60, you want rental-friendly installation, or you need basic repositioning.
Choose spring arms if: You have an XLR microphone, budget allows $80+, you reposition frequently, or you want the smoothest operation.
Choose desktop stands if: Your mic stays stationary, you rarely adjust positioning, or you're on the tightest budget.
Choose floor/wall mounts if: You have a dedicated studio space, professional audio needs, or want zero desk footprint.
The honest truth? Most people reading this article should start with a quality flexible arm in the $30-50 range. Test your workflow. If you find yourself fighting the arm's stiffness or wishing for smoother movement, then upgrade to a spring arm with confidence.
Frequently Asked Questions
Will a flexible boom arm work with my Blue Yeti or other heavy USB microphone?
Most flexible arms struggle with mics over 1.5 lbs – Blue Yeti weighs about 1.2 lbs, so it's borderline. Look for heavy-duty flexible arms rated for 2+ lbs, or consider a spring-loaded arm for better support. Using without a shock mount helps reduce total weight, but you'll sacrifice vibration isolation. Some users report success but gradual drooping over weeks – may need frequent repositioning.
How do I prevent my flexible arm from drooping over time?
Never exceed the manufacturer's weight rating – includes mic, shock mount, and cables. Avoid leaving it extended at extreme angles for long periods when not in use. Periodically tighten any adjustment collars or joints on articulating models. Route cables loosely so they're not pulling down on the arm. Higher-quality arms with thicker cores or better internal cabling last longer without drooping.
Can I attach a flexible boom arm to a glass desk?
Standard C-clamps can crack glass and aren't recommended for glass desks. Look for adhesive base mounts designed specifically for non-clampable surfaces. Some clamps have extra-wide contact pads that distribute pressure safely on tempered glass. Alternative: mount to a thick board or platform that sits on the desk, then clamp to that. Weight limits are more critical on glass – keep total setup under 2 lbs for safety.
What's the difference between a gooseneck and an articulating flexible arm?
Gooseneck: continuous flexible tube, bends anywhere along its length, simpler design, typically less expensive. Articulating: multiple segments with ball joints, adjusts at specific points, often holds position better. Gooseneck pros: smoother curves, more positioning options, lower profile. Articulating pros: more precise positioning, typically stronger, easier to return to preset positions. Choice depends on whether you need infinite micro-adjustments vs. reliable locking positions.
Do I need a shock mount if I'm using a flexible boom arm?
Yes, recommended – flexible arms actually transfer more desk vibrations than spring-loaded arms. The rigid connection to your desk means typing, mouse clicks, and desk bumps travel up the arm. Shock mounts isolate the mic from these vibrations, crucial for clean audio. Budget alternative: foam isolation pad under the desk clamp mount helps reduce transfer. Some mics have internal shock mounting, but external is still better for flexible arms.