Floating Shelves for Home Office: Setup & Organization Guide
Introduction
If you're staring at a desk buried under notebooks, charging cables, coffee mugs, and that growing pile of "I'll file this later" papers, you're not alone. The average home office desk has about 60% less surface area than you actually need—and that's before you add a

Check Price on Amazon →
or a decent keyboard setup.
The solution isn't a bigger desk. It's looking up.
Floating shelves transform cluttered horizontal surfaces into organized vertical storage systems. They're the difference between constantly shuffling papers to find your mouse and having a clear workspace where everything has its place. I've tested dozens of home office setups, and the most productive spaces all share one thing: they use wall space as strategically as desk space.
Why Your Home Office Needs Floating Shelves
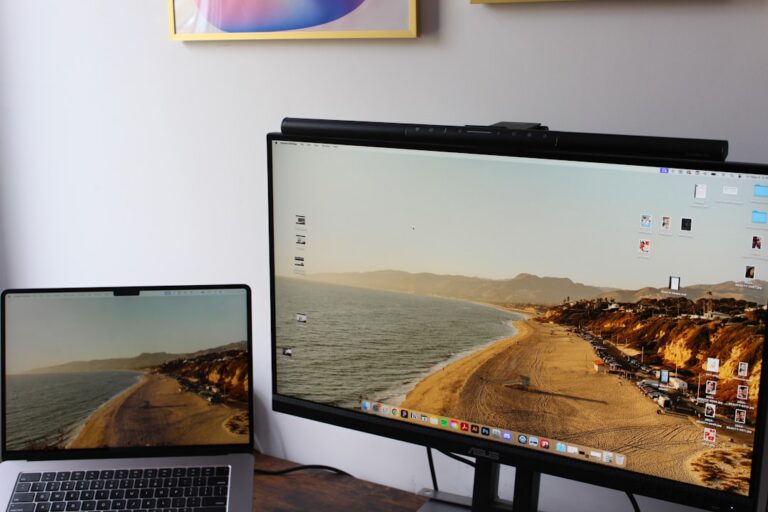
Most home office workers face the same crisis: too much stuff, not enough desk. You need your laptop, maybe an external monitor, a notebook, your phone, a water bottle, and somehow room to actually work. Traditional solutions—like stuffing everything in desk drawers or buying bulky bookcases—create new problems. Drawers become black holes where pens go to die, and floor-standing bookcases eat up precious square footage in already-tight spaces.
Floating shelves solve this elegantly. They:
- Free up critical desk real estate by moving reference books, supplies, and decorative items to eye level
- Create distinct visual zones that separate "active work" from "storage" from "personal display"
- Add personality without chaos through curated displays of plants, photos, or collectibles
- Keep frequently-used items accessible without cluttering your primary work surface
- Make small offices feel larger by drawing the eye upward and eliminating floor-level visual weight
What Makes Floating Shelves Better Than Traditional Bookcases
Here's the thing about traditional bookcases: they're designed for living rooms, not workspaces. They take up 12-18 inches of floor space, create dark corners, and force you to reach awkwardly over your desk. Floating shelves, mounted exactly where you need them, put your most-used items within arm's reach while maintaining clean sight lines across your office.
They're also considerably more flexible. Need to adjust shelf height when you add a

Check Price on Amazon →
? Easy. Want to create an asymmetrical layout that fits your specific workflow? Done. Try doing that with a prefab bookcase.
What This Guide Covers
Over the next sections, I'll walk you through everything you need to build a floating shelf system that actually works for your home office:
- Selecting the right shelves for your wall type, weight needs, and aesthetic preferences
- Installation strategies that won't damage walls or end in disaster
- Styling principles that balance function with visual appeal
- Real-world setup examples from minimalist to maximalist approaches
By the end, you'll know exactly how to leverage vertical space to create a home office that's both more productive and better-looking than what you're working with now.
Why Floating Shelves Are Perfect for Home Office Setups
After reviewing dozens of home office setups over the years, I've noticed one thing consistently: the most functional spaces aren't necessarily the biggest—they're the ones that use vertical space intelligently. Floating shelves have become my go-to recommendation for anyone working with less-than-ideal square footage or trying to create a workspace that doesn't scream "cluttered home office."
Space Efficiency vs. Traditional Storage
Traditional bookcases and filing cabinets eat up floor space you probably don't have. A standard bookcase typically takes up 12-18 inches of depth, which matters when you're working with a converted bedroom or living room corner. Floating shelves, by contrast, average 6-10 inches deep and literally use space that would otherwise just be… wall.
I've seen this work particularly well above desk areas where you can keep reference books, your daily planner, or charging stations within reach without sacrificing desk real estate. Unlike a

Check Price on Amazon →
unit that locks you into a specific footprint, shelves let you customize exactly where things go. Need 8 inches of clearance above your monitor? Mount the shelf there. Want to create a gap for your
Check Price on Amazon →
? Easy.
The real advantage shows up in awkward layouts—rooms with slanted ceilings, spaces behind doors, or that weird gap between your desk and window. Traditional furniture won't fit these spots, but floating shelves adapt to whatever weirdness your space throws at you.
The Psychology of Organized Vertical Storage
Here's something I didn't appreciate until I started working from home full-time: visual clutter kills productivity. A desk covered in notebooks, charging cables, and random office supplies creates low-level mental noise all day.
When you move items to eye-level or above, your brain processes them differently. They're visible and accessible, but they don't compete for attention with your actual work. I keep my current project materials on my desk and everything else—backup supplies, archived documents, decorative items—on floating shelves. It's accessible without being intrusive.
Cost Comparison: Floating Shelves vs. Other Solutions
Let's talk numbers. A decent quality 36-inch floating shelf runs $30-80 depending on material and weight capacity. You can outfit an entire wall for $150-300.
Compare that to alternatives:
- Custom built-ins: $500-2,000+ per wall section
- Quality bookcase: $200-600 for a single unit
- Modular storage systems: $300-800 for comparable capacity
- Floating shelves: $30-80 per shelf
For renters, this becomes even more compelling. You're not investing hundreds in furniture you might leave behind when you move. Most floating shelves install with basic hardware that leaves minor holes you can patch in 10 minutes. I've installed and removed dozens of shelves across four apartments—landlords have never blinked at the nail holes.
The flexibility factor compounds the value. Changed your mind about shelf height? Move it. Upgraded to a bigger monitor? Reconfigure the layout. Got a new job with different storage needs? Rearrange everything in an afternoon without buying new furniture.
Types of Floating Shelves for Different Home Office Needs
Choosing the right floating shelves isn't just about aesthetics—it's about matching your storage needs with the proper weight capacity and configuration. Let me break down the main options I've tested in various home office setups.
Standard Rectangular Shelves
These are your workhorses. Most rectangular floating shelves come in depths from 8 to 12 inches and lengths from 24 to 48 inches. I've found the 10-inch depth hits the sweet spot for office use—deep enough for books and binders, but not so deep they protrude awkwardly into your workspace.
Typical load capacity ranges from 15 to 50 pounds depending on installation quality and wall type. They're perfect for organizing reference books, displaying plants, or storing office supplies. I keep my label maker, staplers, and frequently-used notebooks on mine.
Corner Floating Shelves
Dead corner space is wasted opportunity. Corner shelves, typically triangular or fan-shaped, transform that awkward intersection into functional storage. They're ideal for charging stations, small printers, or decorative items that add personality without cluttering your main work surface.
The catch? Most corner shelves max out around 20-25 pounds, so save them for lighter items.
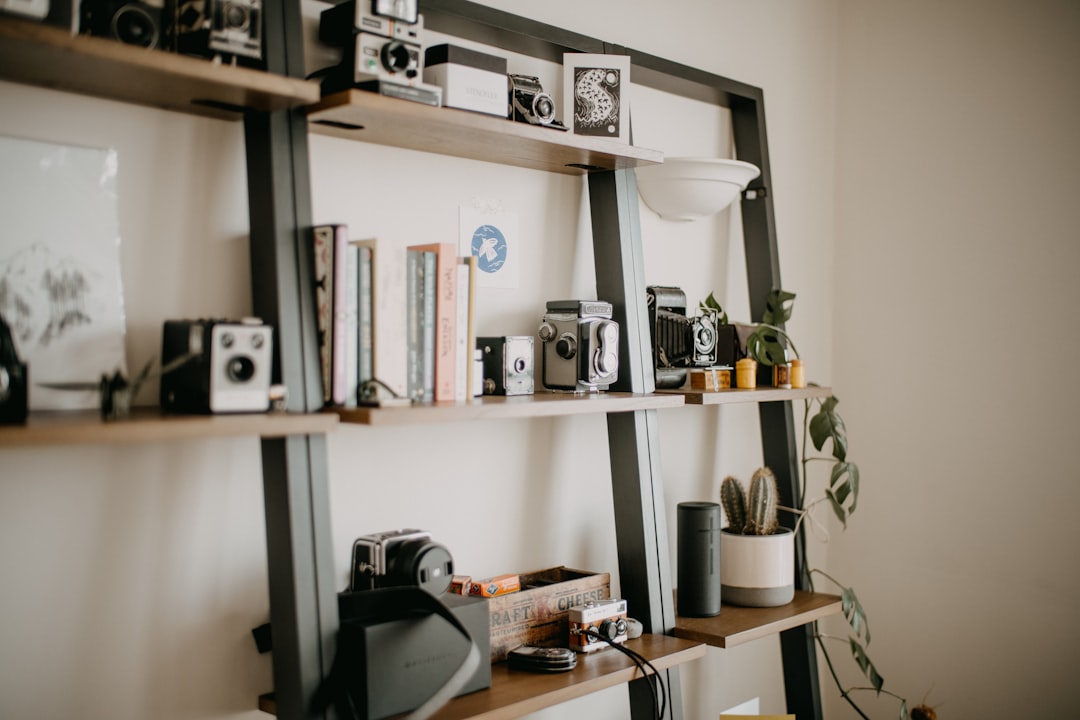
Ladder-Style Floating Shelf Systems
These vertical systems feature multiple shelves connected by a ladder-like frame. What I love here is the adjustability—you can often reposition shelves as your needs change. They're excellent for creating a dedicated supply station without installing multiple separate shelves.

Check Price on Amazon →
Box/Cube Floating Shelves
If you're like me and have random tech accessories, cables, and office odds-and-ends that create visual clutter, enclosed cube shelves are game-changers. The closed sides hide the chaos while keeping items accessible. I use these for storing extra webcam equipment and headphone collections.
Industrial Pipe Shelves
When you need serious load capacity—think heavy equipment, multiple monitors, or an extensive technical library—industrial pipe shelves deliver. With proper installation, they can handle 100+ pounds. The exposed pipe aesthetic isn't for everyone, but in industrial or modern spaces, they look intentional and professional.
Minimalist Invisible Bracket Shelves
These use concealed hardware for that true "floating" look. The shelf appears to emerge directly from the wall with no visible support. They create the cleanest aesthetic but typically sacrifice some weight capacity. Expect 25-40 pound limits depending on thickness and installation method.
Desk-Mounted Shelves
These attach directly to your desk rather than the wall. Monitor risers fall into this category, creating vertical storage while improving ergonomics. I've also seen clever desk extensions that add a small shelf to the side or back of a work surface—perfect for keeping current projects visible without consuming desk real estate.
Check Price on Amazon →
Load-Bearing Capacity: What Each Type Can Handle
- Lightweight (under 20 lbs): Corner shelves, thin minimalist designs
- Medium (20-50 lbs): Standard rectangular, cube shelves, most ladder systems
- Heavy-duty (50+ lbs): Industrial pipe shelves, thick solid wood with reinforced brackets
Material Choices
Wood remains the most popular—versatile, easy to match with existing furniture, available in every finish imaginable. Metal shelves offer industrial appeal and superior strength-to-thickness ratios. Glass creates modern elegance but limits weight capacity and shows every fingerprint. Composite materials like MDF provide budget-friendly options when covered with quality veneer.
Style Considerations
Match your shelves to your overall aesthetic. Modern offices benefit from clean lines and minimal hardware. Industrial spaces embrace exposed brackets and raw materials. Scandinavian designs favor light wood and simple forms. Traditional setups call for thicker, ornate shelving with visible decorative brackets.
How to Choose the Right Floating Shelves for Your Setup
Choosing floating shelves isn't just about picking something that looks nice on Pinterest. You need to think through what you're actually storing, where it's going, and whether your wall can handle it without becoming a disaster zone.
Start by making an honest inventory. Are you shelving a row of matching binders, or a chaotic mix of books, a

Check Price on Amazon →
, spare cables, plants, and that weird desk toy collection? Books are dense and heavy. Tech accessories are lighter but need specific depths. Decorative items just need to look good and stay put.
The Rule of Visual Proportion in Shelf Selection
Here's what most people get wrong: they choose shelf length based on how much stuff they have, not on how it looks with their desk. A 72-inch shelf floating above a 48-inch desk looks awkward and top-heavy. A good rule is to keep shelves within 80-120% of your desk width, or go deliberately shorter (around 60%) for a stacked, gallery-wall effect.
Depth matters more than you think. A 6-inch shelf works perfectly for office supplies, small books, and cable organizers. Go 8-10 inches for standard books and medium equipment. If you're storing larger reference books or want to place items in front of each other, you need 12 inches minimum. I've seen too many people buy shallow shelves, then watch their stuff constantly tip forward.
Weight Capacity Chart: Common Office Items
Before buying, calculate your actual load. Here's what common items weigh:
- Hardcover books: 2-4 lbs each
- Three-ring binders: 3-5 lbs when full
- Printer or scanner: 10-20 lbs
- Potted plant (medium): 5-8 lbs
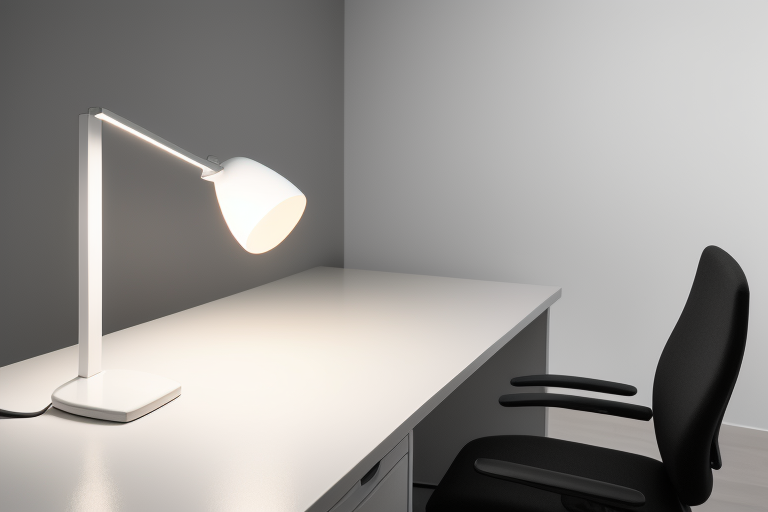
- Desk lamp: 2-5 lbs
- Cable management box with gear: 3-6 lbs
Check Price on Amazon →
Most floating shelves claim 20-50 lbs capacity, but that assumes perfect installation into studs. Reality check: if you're going into drywall with anchors, cut that number in half for safety. A shelf loaded with textbooks can easily hit 40 pounds.
Check Price on Amazon →
Measuring and Planning Your Shelf Layout
Grab a tape measure and mark out obstacles first. Note outlets (leave 3 inches clearance), light switches, windows, and door swing paths. Measure from your desk surface up—shelves placed 18-24 inches above your desk keep items within easy reach without head-bump risk.
Your wall type determines everything about installation. Drywall needs proper anchors or stud mounting. Plaster is brittle and cracks easily—you'll want to find the lath or use heavy-duty anchors. Concrete and brick require masonry bits and specific anchors, but once mounted, they're bombproof.
On budget: spend more when you're storing heavy or valuable items. A $40 solid wood shelf with quality hardware beats a $15 particleboard shelf that sags within six months. But for lightweight decorative storage? Those budget-friendly options work fine.
Finally, color and finish should fade into your existing setup, not fight it. Dark shelves on dark walls create depth. Light shelves on light walls keep things airy. Matching your desk finish creates cohesion, while contrasting adds visual interest—just pick one approach and commit.
Installation Guide: Mounting Floating Shelves Securely
I've installed dozens of floating shelves in my office and testing spaces, and I can tell you—proper installation makes all the difference between a shelf that holds your gear confidently and one that keeps you up at night wondering when it'll come crashing down.
Essential Tools You'll Need
Before you start drilling holes, gather these basics: a quality stud finder (don't guess where studs are), a drill with appropriate bits, a carpenter's level (at least 24"), a pencil, and appropriate hardware. For drywall installations, get heavy-duty anchors rated for your shelf's weight capacity plus 50% extra. Trust me on that margin.
Stud Mounting for Maximum Weight Capacity
Finding studs is your golden ticket to rock-solid shelves. Most residential walls have studs every 16 or 24 inches. Use your stud finder to locate them, then mark their centers. For home office setups where you're storing books, binders, or equipment, mounting into studs gives you 50+ pounds capacity per bracket versus maybe 15-20 pounds with even the best anchors.
If your shelf is at least 32 inches wide, you can typically hit two studs. That's ideal for holding a
Check Price on Amazon →
or heavier items.
Drywall Installation with Anchors: Best Practices
Sometimes studs just aren't where you need them. When that happens, toggle bolts and heavy-duty metal anchors are your friends—plastic anchors from the shelf's kit usually aren't enough.
For a 36-inch shelf holding moderate weight, use at least three anchors. Drill pilot holes slightly smaller than your anchor diameter, and follow the manufacturer's specs exactly. Toggle bolts offer the most holding power in drywall (50-80 pounds each when properly installed), but they require larger holes and can't be removed without dropping the toggle behind the wall.
Ensuring Level Installation: Tips and Tricks
Here's where most DIY jobs go sideways—literally. Mark your first hole, but don't drill the second until you've checked everything.
For bracket-mounted shelves: Install one bracket first, place your level on top, then mark the second bracket location while keeping everything level. For concealed bracket systems, use your level to draw a reference line across the wall before mounting the bracket rail. These hidden systems are less forgiving because you're working blind once the shelf slides on.
Height and Spacing Guidelines
Position frequently accessed items at eye level (about 60 inches from the floor for most people). I keep my current project files and daily-use supplies here. Storage-focused shelves can go higher—72-80 inches works well, though you'll need a step stool.
When stacking multiple shelves, 12-15 inches of vertical spacing accommodates most books and binders. For purely decorative or cable management purposes, you can go tighter at 10 inches.
Check Price on Amazon →
Common Mistakes to Avoid
Don't overtighten mounting hardware—you'll crack drywall or strip threads. Don't trust shelf kits' included anchors for anything heavy. And don't assume shelves are level just by eyeballing—I've seen seasoned DIYers get this wrong.
DIY or Call a Pro?
Mounting into studs with standard bracket shelves? That's straightforward DIY territory. But if you're dealing with plaster walls, metal studs, tile, or installing heavy glass shelves above expensive equipment, hiring a handyman is $75-150 well spent for peace of mind.
Smart Organization Strategies for Office Floating Shelves
I've tested dozens of floating shelf configurations in my home office, and here's what I've learned: without a solid organization strategy, those beautiful shelves become cluttered dumping grounds within weeks. Let me share the systems that actually work.
Creating an Ergonomic Reach Zone
The most important principle is positioning items based on how often you use them. Your floating shelves should work with your natural movement patterns, not against them.
The zone method starts by grouping similar items: tech accessories in one area, reference materials in another, office supplies in a third. But here's the key—within each zone, place daily-use items on shelves you can reach without standing up or straining. That means your most-grabbed items should live on shelves 36-50 inches from the floor if you're seated.
I keep my
Check Price on Amazon →
setup on the middle shelf directly beside my desk. Charging cables, spare batteries, and my portable power bank sit in a small tray that I can reach without even swiveling my chair. Less-used items like extra printer paper or archived project binders go on higher shelves.
Containerization: Bins, Baskets, and Boxes That Work
Here's a truth bomb: bare shelves without containers look great in minimalist photos but terrible in real working offices. You need boundaries to prevent the chaos.
I use clear acrylic bins for tech accessories because I can see what's inside at a glance. For paper goods and supplies, fabric bins or wire baskets work better—they're lighter and easier to pull down when needed.
Size matters. Don't buy containers that are too large for your shelf depth. A 12-inch deep bin on an 11-inch shelf is a recipe for frustration. Measure first, then shop.
Color-coding changed everything for me. Blue containers hold ongoing project materials, gray holds archived items, white holds consumable supplies. My brain processes this instantly now—no reading labels, no guessing.
Digital Tools and Apps to Inventory Shelf Contents
This sounds excessive until you're searching for that one adapter you know you own but can't locate. I photograph each shelf section and keep a simple note in Apple Notes (Google Keep works too) listing what's in each container.
For more serious organization nerds, apps like Sortly or Nest Egg let you create a visual inventory with labels and locations. Scan a QR code on a bin, see exactly what's inside.
The 80/20 rule keeps me sane: 80% of shelf space is purely functional storage, 20% is for plants, photos, or whatever keeps you motivated during long work sessions. All function makes your office sterile. All decoration makes it useless.
Cable management on shelves deserves special attention. If you're running a charging station on a shelf, use adhesive cable clips on the back edge and a small power strip with mounting holes. Nobody wants to see that tangle.
Finally, implement a rotation system. I swap out seasonal items quarterly—tax documents come down in May, holiday planning materials go up in October. Keep a small "archive" box on your highest shelf for items you rarely need but can't discard. This prevents the "I might need this someday" items from cluttering prime real estate.
Styling Your Floating Shelves: Function Meets Aesthetics
Here's the truth about floating shelves in your home office: they're not just storage—they're the backdrop to every Zoom call and the view you'll stare at during creative blocks. After styling dozens of shelves in my own workspace evolution, I've learned that the sweet spot between "Instagram-worthy" and "actually useful" is real and totally achievable.
The rule of thirds works as well on shelves as it does in photography. Mentally divide your shelf into three sections, then place your focal points at those division marks rather than dead center. A framed print at the one-third mark, a plant at two-thirds, with your reference books filling the middle? That's instantly more dynamic than centering everything.
Mix your functional items with personality. Those binders and reference materials you actually use shouldn't hide—embrace them. I keep frequently-accessed USB drives in a small ceramic dish next to a photo from my last hiking trip, with a succulent bridging the gap. The goal isn't Instagram perfection; it's creating a space that energizes you during hour six of a workday.
Height variation transforms flat shelves into interesting displays. Stack two books horizontally, place a small object on top. Use small risers or wooden blocks under decorative items to create levels. This technique also solves the practical problem of shorter shelves where tall items won't fit—stack horizontally, layer upward.
Color Theory for Shelf Styling
You don't need an art degree, just awareness. Pick two or three main colors and let them echo across your shelves. My setup uses warm wood tones, black accents, and green plants—simple but cohesive. If your office leans cool-toned (grays, blues), white or silver accessories maintain that vibe. Avoid rainbow chaos unless that's genuinely your aesthetic; visual noise adds to mental clutter.
Layering Technique: Front to Back Depth
This is where shelves go from flat to dimensional. Place larger items in back, medium in the middle, small up front. A tall book can lean against the wall, a framed photo sits in front of it, and a small wireless charger lives at the shelf edge. Just maintain the 3-4 inch clearance from the shelf above—I've knocked over my coffee mug learning this lesson.
Check Price on Amazon →
Plant picks for the organizationally challenged: Pothos tolerate neglect like champions, snake plants survive anything, and air plants need weekly misting but nothing else. Skip the fussy ferns unless you genuinely enjoy plant maintenance as a break activity.
Lighting transforms shelves from functional to atmospheric.
Check Price on Amazon →
strips under shelves create ambiance for video calls, while small puck lights highlight specific areas. I use a simple LED strip on a smart plug—warm white during day, dimmer at night.
Photography-Ready Shelf Arrangements
Start with books—mix vertical and horizontal stacks for rhythm. Color-coordinating looks striking but reduces functionality (you'll forget where things are). I group by topic but allow color harmony within those groups.
The balance: Too sparse feels sterile and wastes space. Too cluttered creates visual stress. Aim for 60-70% full, leaving breathing room. White space matters.
Swap out 1-2 decorative elements seasonally—a small autumn pumpkin, winter pine cones, spring flowers. Your functional items stay constant, but these touches keep the space fresh without requiring a complete overhaul every few months.
Real Home Office Floating Shelf Setup Examples
I've toured dozens of home offices over the years, and floating shelves consistently prove to be the most versatile storage solution. Here's what actually works in real-world setups.
Layout Diagrams for Common Office Dimensions
Small Office Setup (Under 100 sq ft)
In compact spaces, I recommend a single-wall approach. Mount your desk against the primary wall, then install 24-36 inch shelves in a tiered configuration above it. Keep the lowest shelf at eye level (about 60 inches from the floor) for frequently accessed items, with additional shelves spaced 10-12 inches apart. This vertical strategy reclaims dead wall space without eating into precious floor area.
L-Shaped Desk Configuration
The corner creates an interesting challenge. I've found the most functional approach uses one 36-inch shelf above the primary desk surface and a separate 18-24 inch shelf on the perpendicular wall. This creates an asymmetric but highly practical setup where your main supplies stay above your computer work area, while the side shelf holds reference books or decorative items.
Dual-Monitor Setup
With two screens side-by-side, you need at least 48 inches of clear desk space. Mount a single long shelf (60-72 inches) about 18-20 inches above your monitors. This keeps reference materials, notebooks, and quick-grab items within easy view without creating a cluttered feel behind your screens.
Check Price on Amazon →
Standing Desk Arrangement
Here's where most people mess up: they install shelves at sitting height, then find them awkwardly positioned when standing. For
Check Price on Amazon →
users, I recommend positioning your primary shelf at 72 inches from the floor—comfortable reach whether you’re sitting or standing.
Shared Home Office
The fairest division I've implemented: mirror-image shelf arrangements on opposite walls. Each person gets their own 36-48 inch shelving section, creating visual balance and eliminating territorial disputes over storage space.
Multi-Purpose Room Scenarios
For office-guest room combinations, choose shelves that accommodate both functions. Install them at 65-70 inches high—perfect for office supplies but also high enough that a bed can fit underneath without feeling cramped. Use baskets or boxes on shelves to quickly hide work materials when guests arrive.
Before and After Transformations
Budget-Friendly Setup (Under $200)
IKEA's LACK shelves remain unbeatable for value. A complete three-shelf setup runs about $60, leaving budget for proper anchoring hardware and decorative storage boxes. Add a couple of their BERGSHULT shelves with PERSHULT brackets for a slightly more refined look at around $120 total.
Premium Setup
High-end solid walnut shelves with concealed brackets create that "floating" illusion while supporting serious weight. Budget $400-800 for professionally installed custom shelving with integrated LED lighting underneath. The visual impact transforms a utilitarian workspace into something you'd see in Architectural Digest.
The key difference I notice between functional and frustrating floating shelf setups? Planning shelf placement around your actual workflow rather than just aesthetic spacing. Measure twice, mount once.
Maintenance and Long-Term Care
I've seen too many beautiful floating shelf setups turn into disasters because people install them and forget about them. Trust me, a little regular maintenance goes a long way toward keeping your home office shelves functional and safe.
Keep Tabs on Weight Distribution
Every three months, I do a quick audit of what's actually sitting on my floating shelves. It's surprisingly easy to add "just one more book" until you're way past the weight limit. Remove everything, check the manufacturer's weight rating (it should be in your installation manual), and weigh your items if you're anywhere close to the limit. I use a simple kitchen scale for books and smaller items—it takes five minutes and could prevent a catastrophic shelf failure.
Material-Specific Cleaning
Wood shelves need gentle treatment. I wipe mine down with a barely-damp microfiber cloth and immediately dry them. Never use harsh chemicals or let water sit on the surface. Once a year, I apply a thin coat of furniture polish or oil to keep the finish healthy.
Metal and glass shelves are more forgiving. Standard glass cleaner works fine, though I prefer a vinegar-water solution (1:1 ratio) for streak-free results. For powder-coated metal, stick to mild soap and water to avoid damaging the finish.
Quarterly Hardware Checks
Mark your calendar for this one. Every quarter, grab a screwdriver and check that all visible screws and brackets are snug. I've caught loose hardware before it became a problem more times than I can count. While you're at it, inspect the wall anchors—look closely at the drywall around them for any cracks or crumbling.
Strategic Reorganization
Quarterly shelf audits serve double duty. While checking weight, I remove items I haven't touched in months. That conference binder from 2022? Gone. Promotional tchotchkes? Donated. This prevents your shelves from becoming cluttered catch-alls and keeps the load manageable. It also makes room for actually useful items like
Check Price on Amazon →
solutions to keep your workspace tidy.
Touch-Up and Repairs
Wooden shelves take cosmetic damage over time—small scratches, dings, or finish wear. Keep a touch-up marker or stain pen that matches your shelf color. For deeper gouges, wood filler works wonders. Sand it smooth, stain, and seal. Takes 20 minutes and makes your shelves look new.
Warning Signs You Can't Ignore
If you notice any of these, stop using the shelf immediately:
- Visible sagging or bowing, even slight
- Gaps forming between the shelf and wall
- Cracks in the drywall around mounting points
- The shelf feels less stable when you press on it
- Creaking or popping sounds when weight shifts
These aren't "maybe later" problems—they're safety hazards. You might need to upgrade to heavier-duty anchors, add support brackets, or reinstall completely.
Warranty Considerations
Most quality floating shelves come with 1-5 year warranties, but they typically don't cover improper installation or overloading. Keep your receipts and installation photos—they're invaluable if you need to claim a manufacturing defect. Some brands like IKEA offer hassle-free returns within 365 days, while others have stricter 30-day windows. Know your coverage before you drill.
Frequently Asked Questions
How much weight can floating shelves hold in a home office?
Depends on mounting method: stud-mounted shelves hold 50-100+ lbs, drywall anchors typically 20-50 lbs. Shelf material matters: solid wood and metal support more than particle board. Distribute weight evenly across shelf length rather than concentrating in center. Always check manufacturer specifications and test with lighter loads first. For heavy equipment like printers, use reinforced shelves or multiple brackets.
What is the ideal height for floating shelves above a desk?
First shelf should be 18-24 inches above desk surface for easy reach while seated. Keep shelves at or below eye level (roughly 60 inches from floor) for items you use daily. Allow 12-15 inches between multiple shelf tiers for standard books and binders. Consider your seated eye level and arm reach from office chair. Leave clearance for monitor height if shelf is directly above desk.
Can I install floating shelves without drilling into studs?
Yes, using heavy-duty drywall anchors (toggle bolts, molly bolts) rated for appropriate weight. Limit weight to 20-30 lbs per anchor depending on anchor type. Use multiple anchors distributed across shelf length for better support. Best for lightweight items like books, supplies, and decor rather than equipment. Stud mounting is always stronger and recommended for heavier loads.
What depth floating shelf works best for a home office?
8-10 inches deep for books, office supplies, and decorative items. 10-12 inches for binders, larger books, and small equipment. 12-16 inches for printers, monitors, or substantial storage needs. Shallow 6-8 inch shelves work well above monitors for lightweight display items. Match or slightly exceed the depth of your desk for visual cohesion.
How do I keep floating shelves looking organized instead of cluttered?
Use uniform containers, boxes, or baskets to contain loose items. Follow 'one in, one out' rule to prevent accumulation. Leave 30-40% of shelf space empty or with minimal items for breathing room. Group items by category and use visual anchors (plants, bookends) to create zones. Do monthly audits to remove items you haven't used recently. Keep frequently-used items at optimal height, store archive items higher up.