Best Background Setup for Home Video Calls (2026)
Most people spend more time picking a Zoom filter than they do thinking about what's actually behind them — and it shows.
I've reviewed hundreds of home office setups over the past several years, and I can tell you with confidence: your background is doing more work than you realize. Before you say a single word on a call, whoever is on the other end has already formed an impression. A cluttered bookshelf, a blown-out window, a tilted camera pointing up at your ceiling — these details quietly signal "I didn't prepare for this." And in a job interview or a client pitch, that's a problem you can't talk your way out of.
The good news? Fixing your video call background is almost never about buying expensive gear. In most cases, it comes down to understanding a handful of principles — lighting, framing, intentional staging — and applying them in the right order. I've helped people transform genuinely chaotic home setups into backgrounds that look clean and credible without moving into a different room or spending more than $50.
This guide covers everything that actually matters: the four core background approaches and how to choose between them, how to design a physical background that looks deliberate rather than accidental, why lighting overrides every other decision you'll make, and how to avoid the common mistakes I see repeated on calls every single week.
Whether you're preparing for a high-stakes interview or just tired of looking unprofessional on Tuesday morning standups, what follows gives you a clear, practical path forward. Let's start with something most people underestimate entirely — just how much your background is actually communicating.
Why Your Background Matters More Than You Think on Video Calls

Let me tell you about something I watched happen to a colleague that I still think about.
He's a genuinely talented UX consultant — sharp, articulate, well-prepared. He'd spent two weeks putting together a proposal for a mid-sized e-commerce client. The discovery call went fine by his account. But the follow-up never came. When he finally got honest feedback through a mutual contact, the client had used one phrase: "didn't seem organized." His work was meticulous. His background was not. Stacks of papers, a half-visible laundry pile, a monitor with seventeen browser tabs visible in the reflection. The client never mentioned it directly, but it had already done its damage before he spoke his first sentence.
That story isn't an outlier. I've seen versions of it more times than I can count.
The 7-Second Problem You Can't Afford to Ignore
Research on first impressions consistently shows that people form judgments about competence, credibility, and trustworthiness within the first 7 seconds of meeting someone — and on a video call, your background occupies roughly half of that visual frame. You're not just being assessed on your face, your posture, or your words. You're being assessed on your environment, and viewers make those associations automatically, without conscious awareness.
This isn't about vanity. It's basic cognitive psychology. When people see a cluttered, dark, or visually chaotic space behind you, their brains register it as a signal — even if they couldn't articulate why. When they see something calm, considered, and purposeful, that registers too. The background becomes environmental shorthand for who you are.
What's Behind You Gets Mentally Attached to You
There's a specific psychological principle at work here called environmental association — we link people to the spaces they inhabit. A doctor's office covered in diplomas isn't accidental décor; it's environmental cues doing deliberate work. Your video background operates on exactly the same principle, whether you intend it to or not.
The difference is that in a traditional office, your environment was somewhat outside your control. At home, it is entirely within your control. That makes a weak background harder to excuse and easier to fix.
This Isn't a One-Off Problem
Here's what's changed: video calls are no longer the exception. For millions of remote and hybrid workers, they're the primary medium of professional interaction. You might be on five, eight, ten calls a week with clients, hiring managers, colleagues, or collaborators. Your background isn't a one-time first impression — it's a recurring element of your professional brand, showing up again and again, compounding over time.
A
upgrade will sharpen how you look. But if what’s behind you is a mess, sharper resolution just means people see the mess more clearly.
"Nobody Cares About Backgrounds" — Let's Retire That One
I hear this dismissal constantly, and I understand where it comes from. Early pandemic video calls had such universally chaotic backgrounds that a kind collective agreement emerged: we'll all pretend not to notice. That grace period is over.
Remote work has matured. Expectations have adjusted upward. Here's what I've actually observed after reviewing and testing home office setups for years:
- Hiring managers absolutely notice backgrounds during interviews — I've spoken to recruiters who use it as a proxy for how seriously a candidate takes preparation
- Clients in professional services — law, consulting, finance, design — form trust impressions partly on environmental signals
- Internal calls matter too, because your background shapes how leadership perceives your professionalism, even when nobody says it out loud
- Content creators and educators live or die by background quality because their audience has no other physical context for their expertise
The people who say backgrounds don't matter are usually people whose backgrounds are already fine. They've never had to wonder whether a lost contract had something to do with what was on the shelf behind them.
Your background is working for you or against you on every call. The rest of this article is about making sure it's doing the former.
The Four Core Background Approaches: Which One Fits Your Situation
Not every background solution works for every person, and I've watched people waste money and effort going down the wrong path entirely. Before you rearrange furniture or buy anything, let me walk you through the four realistic options and help you figure out which one actually matches your life.
When a Real Background Beats Every Virtual Alternative
A real physical background — a deliberately arranged section of your actual room — is the gold standard, and no virtual technology in 2026 fully closes the gap. The reason is simple: cameras and the people watching you can sense depth, texture, and authenticity in ways that AI still struggles to replicate convincingly. A real bookshelf with actual books reads differently than a rendered one, even when both look "fine" on screen.
This approach is worth the setup effort if you fall into any of these categories:
- You're senior or client-facing, where credibility signals compound over dozens of calls
- You're on camera five or more times per week and need something reliable without thinking about it
- You do recorded content or presentations where the video lives beyond the call itself
- You're preparing for a job interview or board-level presentation where every detail gets scrutinized
I worked with someone — a VP of Sales who spent four hours setting up a proper background corner with a
and a few well-placed props — who told me three months later that clients started commenting positively on her setup unprompted. That’s the compounding return on investing in the real thing.
The tradeoff is honest: it takes space, some thought about what's in the frame, and occasional upkeep. If you're in a studio apartment with a kitchen visible behind you and nowhere to position yourself differently, a real background might genuinely not be accessible to you right now. That's okay — read on.
Making Virtual Backgrounds Look Realistic in 2026
There are two very different virtual background experiences, and treating them as equivalent is where most people go wrong.
Virtual backgrounds with a green screen are genuinely viable when executed properly. The keyword is properly. The cheap, wrinkle-prone fabric panels you'll find for under $20 fall apart immediately — wrinkles create shadow variations that AI reads as background complexity, and the edges of your hair become a glitchy mess. A proper retractable or frame-mounted green screen, kept taut and evenly lit, produces edges that most people on a call genuinely cannot distinguish from a real room.
This setup works well for people in rented apartments who can't modify walls, or anyone with an unavoidably cluttered background. It requires investment and consistent setup, but once it's dialed in, it's reliable.
Virtual backgrounds without a green screen — the blur and AI replacement features built into Zoom, Teams, and Google Meet — are a different story. These work acceptably for internal standups and casual team check-ins where the bar is lower. On high-stakes external calls, the artificiality becomes noticeable. Your hand passes through the background when you gesture. Hair edges shimmer. The scene shifts slightly when you lean. Experienced video call participants notice this, even subconsciously, and it creates a subtle credibility leak at exactly the wrong moment.
My honest rule: blur is fine for your Thursday standup, not for your pitch to a new enterprise client.
The Hybrid Approach Most People Miss
Here's the option I recommend most often because it fits the most situations: take a real but imperfect background and use selective blur to handle the peripheral mess.
Position yourself so your immediate background — the two or three feet directly behind you — looks intentional. A clean wall, a small plant, a few books. Then apply a light background blur in your video software to soften whatever chaos exists at the edges of the frame. You're not replacing your background with a fake image; you're directing the viewer's eye toward what looks good and away from what doesn't.
This hybrid approach threads the needle between the effort of a fully styled real setup and the limitations of full virtual replacement.
Quick decision matrix:
| Call Type | Recommended Approach |
|---|---|
| Internal standup | No-green-screen blur is fine |
| Client pitch or sales call | Real background or green screen virtual |
| Job interview | Real background, no exceptions if possible |
| Board presentation | Real background, fully staged |
| Recorded content | Real background every time |
Pick the approach that matches your highest-stakes call type, not your average one. You can always loosen standards down, but you can't undo a bad first impression.
Designing a Physical Background That Looks Intentional and Professional
A physical background will almost always outperform a virtual one — it has natural depth, realistic lighting interaction, and zero risk of glitching and swallowing your left ear mid-sentence. But "physical background" doesn't mean you need a dedicated home studio. It means being intentional about what sits behind you in the frame.
The Rule of Thirds: What Separates Polished from Amateur
Centering everything in your background actually makes it look worse on camera. Designers and photographers use the rule of thirds — mentally dividing your frame into a 3×3 grid and placing key visual elements near the intersection points, not dead center.
In practice, this means your bookshelf shouldn't be perfectly centered behind your head. A plant sitting slightly off to one side, a framed print positioned at an upper-right intersection point — these placements create visual balance without the static, ID-photo quality of a perfectly symmetrical setup. It took me embarrassingly long to figure out why my setup looked "fine but flat." The moment I shifted my shelf two feet to the left, it clicked.
Wall Color and Art Selection for Video
Camera sensors handle color and contrast differently than your eyes do, which makes wall color one of the highest-impact decisions you can make.
Medium-toned blues and greens are the consistent winners — they convey calm competence, they don't blow out exposure, and they separate cleanly from most skin tones. Soft sage, slate blue, warm gray — all solid choices. What to avoid:
- Stark white walls: They cause your camera to compensate for brightness, which makes your face look darker and flat
- Bright red: Aggressive and visually exhausting on screen — it bleeds into surrounding areas on compressed video
- Busy wallpaper or textured patterns: These become visual noise that the viewer's eye keeps returning to instead of your face
- Clocks with visible second hands: Moving objects are distracting — people will watch the clock instead of listening to you
For art, one or two framed pieces positioned at rule-of-thirds points work far better than a gallery wall. A gallery wall looks great in person and like chaos on a 1080p video call. Keep it simple.
Bookshelf Styling That Actually Works On Camera
I spent about two hours reorganizing a bookshelf specifically for video calls, skeptical it would matter. It immediately, visibly mattered.
The technique is straightforward: sort books by spine color rather than author, subject, or size. Group warm tones together, cool tones together, neutrals as transitions. This creates visual interest without making the viewer's eye hunt for anything specific. It reads as "curated" rather than "cluttered" — which is exactly the impression you want.
A few additional bookshelf rules that hold up in practice:
- Remove anything with large, readable text (political books, controversial titles — not worth the distraction)
- Add one or two non-book objects — a small plant, a simple object — to break up the spine rhythm
- Keep the shelf slightly underloaded rather than packed; breathing room reads better on camera
Small Space Solutions: Creating a Background When You Don't Have One
Apartments and rentals present a real challenge: you can't paint, you can't commit to permanent changes, and your "home office" might be a corner of your bedroom where an unmade bed lurks six feet behind you.
The standing bookshelf as room divider is the single most effective solution I've seen. A tall, freestanding shelf placed perpendicular to the wall creates a defined zone and an immediate background — and you can take it with you when you move. Combine it with a few curated items and a
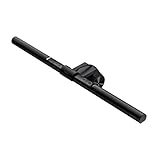
to add warm fill light, and you have a completely functional background setup with no permanent modifications.
Other rental-friendly approaches:
- Removable wall panels: Peel-and-stick panels in muted colors or wood textures can transform a blank rental wall in an afternoon and remove cleanly
- Tension rod curtain walls: A ceiling-to-floor curtain on a tension rod creates a clean, fabric backdrop — works especially well in neutral linen or soft gray
- Strategic furniture placement: Sometimes simply rotating your desk 90 degrees puts a better wall behind you. Map it out before assuming you're stuck
The goal in every case is the same: a background that looks considered without looking like a set. Natural, layered, and calm.
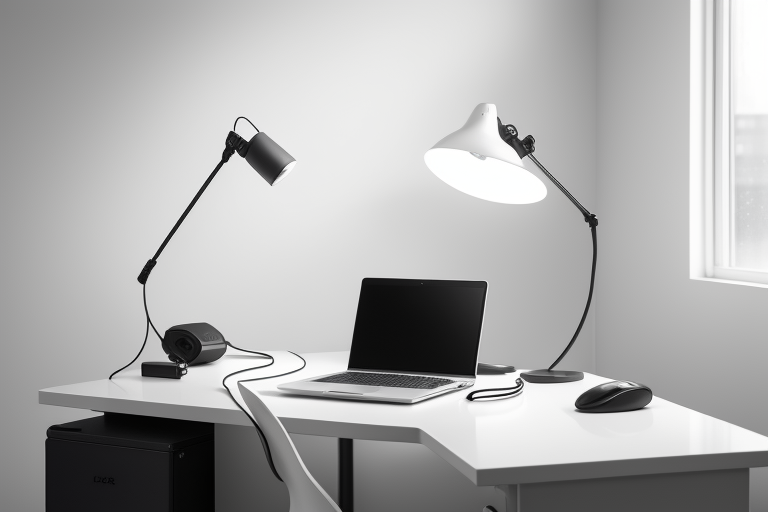
Lighting: The Single Factor That Overrides Everything Else
Lighting is a multiplier. A mediocre bookshelf background with excellent lighting will consistently outperform a carefully curated, architecturally interesting background sitting in bad light. I've seen this play out dozens of times in side-by-side comparisons. Bad lighting doesn't just make you look worse — it makes everything worse. Good lighting makes everything forgivable.
Before we get into specifics, one rule worth memorizing: match your color temperatures. If you have a warm 3200K lamp on one side of your face and a daylight-balanced 5600K window on the other, something will read as "off" even if viewers can't name why. That uncanny, slightly greenish-yellowish effect you've seen on some calls? Usually a color temperature mismatch. Pick a temperature lane — I default to 5000–5600K for video because it reads as clean and alert — and stick to it across every light source in frame.
Natural Light: How to Use It and When to Supplement It
Window light is genuinely the best light source available to most people, and it costs nothing. North-facing windows in the Northern Hemisphere are the gold standard — they provide consistent, diffused light throughout the day without the harsh shadows or blown-out intensity of direct sun exposure. I spent about three weeks working exclusively near a south-facing window before finally admitting that the constantly shifting light was wrecking my consistency from call to call.
The catch with natural light is control. Clouds pass, mornings become afternoons, and a great lighting situation at 9am can become a silhouetted mess by 2pm. If you're relying on a window, position yourself facing it, not with it behind you. And if you're taking calls across more than one or two hours of the day, plan to supplement with artificial light so you're not constantly adjusting.
Key Light vs. Ring Light: What I Actually Use After Testing Both
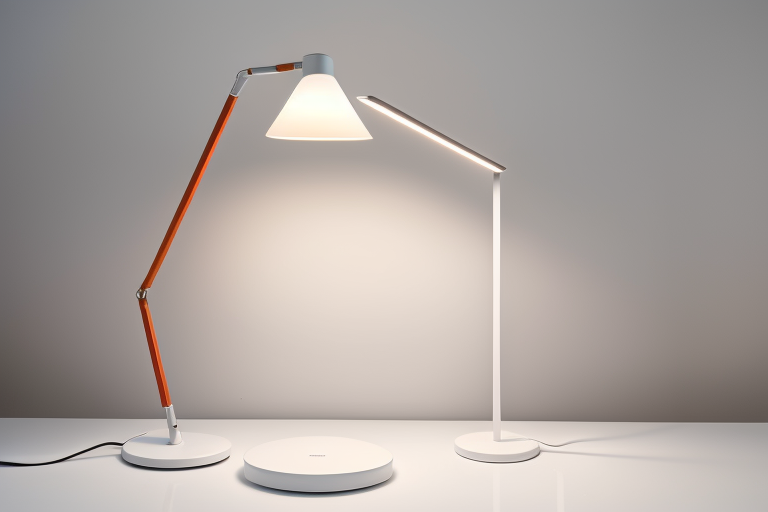
I've tested a lot of lighting gear. The ring light recommendation that circulates endlessly online genuinely frustrates me — not because ring lights are useless, but because they're usually the wrong tool for video calls. They produce flat, frontally-directed illumination that flattens facial features, and the circular reflections in the eyes read as conspicuously "streamer setup" to most professional audiences. There are better options at the same price point.
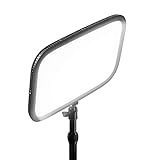
What actually works is a key light positioned at roughly a 45-degree angle from your face, placed slightly above eye level. This is standard portrait photography lighting applied to video. It creates natural-looking dimension and shadow that makes faces look three-dimensional rather than washed out. The difference the first time you see it properly set up is immediately obvious.
For desk setups, the Elgato Key Light Air remains one of the cleanest implementations of this concept — it's app-controlled, color-temperature adjustable, and mounts cleanly to a desk without taking up surface space. For larger rooms or anyone who needs more output, the Godox SL60W is a proper continuous light that photographers and videographers use, available at a reasonable price. For something compact and portable — a secondary location or a setup that travels — the Lume Cube Panel Mini is genuinely impressive for its size.

Lighting Your Background Separately for Depth
This is the technique most people skip, and it's the one that most noticeably separates "looks like a home office" from "looks intentional and considered." Background lighting — a small LED panel, an accent lamp, or a bias light positioned behind you — does two things simultaneously: it adds depth by separating you visually from the wall, and it makes the overall space appear larger and more three-dimensional on camera.
It doesn't need to be complicated. A small LED strip behind a monitor, a directed lamp hitting a bookshelf, or a single panel aimed at the wall can transform how the entire frame reads. I added a simple warm-toned lamp behind my desk pointing at the wall, and three different colleagues asked within a week if I'd changed locations. I hadn't — I'd just given the camera something to read behind me.
Camera Angle, Framing, and Eye-Level Placement
Of all the problems I diagnose in people's video call setups, bad camera angle is the most common — and it's almost always the same culprit. Someone opens their laptop, sets it flat on the desk, and suddenly they're filming upward at a 20-degree angle. Their colleagues get a lovely view of ceiling tiles, two nostrils, and whatever's dangling from the underside of their chin. I've sat through hundreds of calls where smart, credible people looked oddly diminished simply because their camera was pointed at their face from below.
This happens by default on every laptop ever made. The screen hinge positions the webcam at desk height, which is approximately chest or stomach level when you're seated. It's not your fault — it's a design reality you have to compensate for.
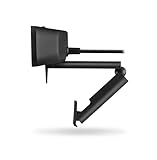
Fixing the Laptop Camera Angle Problem Cheaply
The fix is straightforward: your camera lens needs to sit at or very slightly above your eye level. For most people sitting at a standard desk, that means raising your laptop screen 4 to 6 inches off the surface.
The cheapest version? Stack two or three hardcover books under your laptop. I've done this in hotel rooms for years and it works perfectly. The slightly more elegant solution is a dedicated
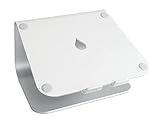
, which lets you dial in the exact height and keeps things stable. Either approach solves the problem in under two minutes.
Once you get the height right, framing becomes the next adjustment. A well-composed video call frame puts your eyes roughly in the upper third of the frame — not dead center, not cropped at the forehead. Too much empty headroom above you reads as amateur. Too little space and viewers feel crowded. Aim for about one hand-width of space between the top of your head and the top of the frame.
Distance from the camera matters more than people realize. The sweet spot is 18 to 24 inches. Any closer and your face fills the frame in a way that feels intense and unflattering. Any farther and you lose the ability to convey subtle expressions — which, in a negotiation or an important client call, is exactly when you need those micro-expressions working for you.
Webcams vs. built-in laptop cameras — in 2026, the gap has narrowed but hasn't closed. If you're on a recent MacBook, the built-in camera is genuinely decent in good light. But most Windows laptops still ship with 720p or mediocre 1080p sensors that compress poorly and struggle in anything but ideal conditions. The two external webcams I've tested that deliver a meaningful upgrade are the Logitech Brio 500 and the Insta360 Link 2. The Brio 500 produces a clean, color-accurate image with good low-light performance and a natural field of view. The Insta360 Link 2 adds AI-powered subject tracking — it physically rotates to keep you centered if you move — which sounds gimmicky until you've used it during a whiteboard session and realized you never dropped out of frame.
Logitech C920 HD Pro Webcam
Similar Posts
Wireless Headphones for Office Work Noise Canceling Guide
Why Noise-Canceling Wireless Headphones Are Essential for Office Work If you’ve ever tried to concentrate while someone three desks over is having a loud phone call, you already know why noise-canceling headphones have become standard equipment for office workers. But understanding how they work—and whether you actually need them—can save you money and frustration. How…
Best Desk Lamp for Eye Strain: 2026 Expert Guide
Understanding Eye Strain and How Lighting Affects It If you’ve ever finished a workday with tired, achy eyes or a nagging headache, you’re not alone. Digital eye strain, also called Computer Vision Syndrome (CVS), affects about 50-90% of people who work at computers. The culprits? Staring at screens for extended periods, reduced blinking, and yes—poor…
Computer Speakers with Subwoofer for Desk: 2.1 Guide
Why Desktop Speaker Systems with Subwoofers Beat Soundbars and Standalone Speakers If you’re choosing between a 2.1 speaker system, a soundbar, or a pair of standalone speakers for your desk, the dedicated subwoofer setup offers some real advantages that matter for everyday use. The Frequency Separation Advantage Here’s what makes a proper 2.1 system different:…