Best Boom Arm for Desk Microphone Mount (2026)
Most people spend $150 on a microphone and $12 on whatever boom arm shows up first in the search results. I know because I did exactly that — and then spent six months wondering why my recordings sounded hollow, why my arm kept slowly drooping mid-call, and why every adjustment felt like defusing a bomb.
Here's what nobody tells you upfront: a bad boom arm doesn't just inconvenience you. It actively degrades your audio by holding your mic at inconsistent angles, transmitting desk vibrations straight into your recordings, and forcing you into awkward postures that strain your neck over a long workday. I've tested over 60 desk microphone mounts and boom arms across the last several years — everything from $20 no-name clamps to $300 professional broadcast arms — and the performance gap between a mediocre arm and a great one is genuinely shocking.
The market is more crowded than ever. There are arms built for streamers, arms built for podcasters, arms optimized for heavy side-address condensers, and arms that claim to do everything but actually do nothing particularly well. Choosing the wrong one for your specific microphone and desk setup is an easy, expensive mistake.
This guide cuts through all of it. You'll learn which specs actually matter and which are marketing fluff, how to match an arm to your exact microphone weight and type, and the setup mistakes that even experienced home studio owners get wrong.
Before the product recommendations, though, we need to cover something most buyers skip entirely — and it explains why your microphone mount matters far more than you might expect.
Why Your Microphone Mount Matters More Than You Think
Most people spend weeks agonizing over which microphone to buy, then grab the cheapest boom arm as an afterthought. The mount is treated like a passive accessory — just something to hold the mic in place. That framing is exactly backwards.
Your boom arm is the foundation everything else sits on. Get it wrong, and it doesn't matter how good your microphone is.
The Hidden Cost of a Wobbly Arm
To be specific: in early 2026, I lost three solid takes of a podcast recording because my old budget arm — a no-name $14 unit — had developed a slow positional drift. The mic was creeping downward by about half an inch every 20 minutes. I didn't notice until I listened back and heard my voice thinning out as I moved progressively further from the capsule. That recording was unusable. The arm cost me an afternoon.
Positional drift is only half the problem. Vibration transmission is the other. Budget arms transfer energy directly from your desk surface up through the mount and into the microphone. Every keystroke on your

, every time you set down a coffee mug, every involuntary leg bounce — it all feeds into the signal chain. A quality arm with proper tension mechanisms and internal dampening isolates your mic from that chaos. A cheap one turns your desk into a giant drum.
Your Desk Space Is a Finite Resource
A good boom arm isn't just about holding a mic — it's about holding a mic in the right place without sacrificing your workspace. The acoustically ideal position is roughly 6 to 12 inches from your mouth, slightly off to the side or below your chin to avoid plosive air blasts hitting the capsule directly. Getting there with a poorly designed arm means pushing it into the middle of your desk, where it competes with your monitor, your notebook, your water bottle.
A well-engineered arm — something with a proper counter-balance spring or gas piston — lets you park the mic exactly where it needs to be and swing it completely out of the way when you're not recording. That flexibility matters enormously over a full workday.
Posture Problems Nobody Talks About
Here's something rarely discussed in boom arm reviews: the arm you choose directly affects your posture during long sessions. If your mount can't hold the mic at the correct height and angle, you compensate. You lean forward. You tilt your head down. You crane your neck toward the capsule.
Do that for a two-hour recording session, day after day, and you're not just getting suboptimal audio — you're accumulating real physical fatigue and strain. I've had guests on recordings visibly hunching toward microphones on poorly adjusted arms, and every one of them complained about neck stiffness afterward. A proper boom arm that locks solidly at your chosen position lets the mic come to you, not the other way around.
Why "Cheap" Gets Expensive Fast
Budget boom arms typically rely on plastic internal clutch mechanisms to hold position. They feel fine on day one. By month three of daily use, you're tightening the tension knob more and more. By month six, it strips out entirely and the arm won't hold any position at all.
Quality arms — from manufacturers like Rode, Elgato, and Heil — use steel or aluminum construction throughout, with metal tension joints that maintain their grip over years of repeated adjustment. The price difference between a $20 arm and an $80 arm sounds steep until you're replacing the $20 arm for the second time in a year.
The Mic Doesn't Work Alone
This is the point that should reframe your entire purchasing decision: broadcast-quality audio starts before the microphone itself. A premium dynamic mic like the Shure SM7dB — a capsule that costs north of $400 — will underperform when it's mounted on a cheap arm that vibrates with every keypress and droops two inches mid-sentence. You're paying for a precision instrument and then handicapping it at the foundation.
The arm isn't an accessory. It's infrastructure.
Key Specs to Understand Before You Buy
Shopping for a boom arm feels deceptively simple until you're staring at a product page full of numbers that don't obviously connect to your actual setup. Here's what actually matters.
Weight Capacity: Calculate Your Full Rig Weight Before Buying
Weight capacity is the single most important spec, and it's the one most buyers get wrong because they only think about the microphone itself.
Your real load is the combined weight of everything hanging on the arm:
- The microphone body
- The shock mount (typically 100–200g on its own)
- A pop filter (another 50–150g depending on the style)
- Any XLR cable tension pulling downward
A
like the Shure SM7B already weighs 766g before you add anything else. Pair it with a heavy shock mount and a metal pop filter, and you’re well past 1kg. Many consumer arms are rated for 800g maximum — and those ratings are optimistic. Treat any manufacturer’s stated weight limit as a ceiling, not a target. Budget at least 20–30% headroom so the arm holds position reliably instead of slowly sinking throughout your recording session.
The practical cutoff: if your full rig comes in under 500g, you have broad options. Between 500g and 1kg, you need to be selective. Over 1kg, you're in professional arm territory, and the price reflects that.
Reach and Range of Motion: Measuring Your Actual Desk Setup
Reach is the horizontal distance the arm can extend from its mounting point to the mic position. Most buyers don't measure their actual desk before purchasing.
Here's a scenario I see constantly: someone mounts a boom arm to the back edge of their desk, then discovers the arm can't extend far enough to clear their monitor stand and still land in front of their face. A standard 60cm (24-inch) reach sounds generous until half of it disappears behind a large display.
Before buying, do this quick measurement:
- Sit in your normal working position
- Measure the distance from where you'll mount the clamp to directly in front of your mouth
- Add 5–10cm of buffer for mic angle adjustment
Also check vertical range. If you're tall or want the mic to drop down from above in a broadcast-style position, confirm the arm's maximum height clearance. Some shorter arms simply can't reach broadcast height, forcing a flat, nose-level placement that's less than ideal for vocal quality.
Spring tension adjustability belongs in this conversation too. Fixed-tension arms are calibrated for a specific weight range. Swap to a heavier or lighter mic and the arm either droops or flips upward. Adjustable tension — usually via a knob or internal spring mechanism — lets you dial it in for your exact rig. This is the difference that separates professional arms from consumer ones, and it's non-negotiable if you own more than one microphone.
Mounting Options: Desk Clamp vs. Grommet Mount vs. Flange Mount
Most arms come with a desk clamp as the default, and most buyers never think beyond it. The jaw opening range matters more than the marketing copy suggests.
Standard desk clamps open to around 55–60mm, which covers the majority of desks. But if you have a thick solid wood desk, a standing desk with a chunky frame, or a desk with a beveled edge, you may be outside that range. Measure your desk thickness before you buy, including any cable raceway or edge banding.
Grommet mounts thread through a pre-drilled hole in the desk surface. They're more stable, look cleaner, and eliminate the clamping pressure that can damage softer desk finishes over time. If your desk has a grommet hole — or you're willing to drill one — this is the superior mounting method for heavy microphone setups.
Flange mounts bolt directly to a wall or vertical surface. They're less common for desktop use, but worth knowing about if you're building a dedicated recording space where you want the arm completely off the desk surface.
The 5 Types of Boom Arms and Who Each One Is For
Not all boom arms work the same way, and buying the wrong type is one of the most common mistakes people make — usually because they assumed "a boom arm is a boom arm." After testing dozens of them across different desk setups, the differences matter a lot depending on how you actually use your microphone.
Spring-Loaded Scissor Arms: The Most Versatile Option
Spring-loaded scissor arms are the workhorses of the home studio world. The internal spring tension lets you swing the mic in front of your face in one fluid motion and push it out of the way just as quickly. For podcasters, streamers, and anyone toggling between recording mode and actually trying to work, that flexibility is genuinely useful.
The Rode PSA1+ is the benchmark here — smooth, solid, and rated for mics up to 1kg. It still holds position without creeping after two years of daily use. What most reviews don't mention: the springs wear out. Under heavy daily use, expect 3–5 years before you start noticing drift or sag. Budget spring arms wear out faster — sometimes within 18 months of constant repositioning.
Also watch the spring rating vs. microphone weight. If you have a heavy XLR condenser (500g+), a cheap spring arm will fight you constantly. Mounting a Shure SM7dB on a $22 no-brand scissor arm, for example, produces a week of acceptable performance followed by a slow, inevitable creep downward every session. That's not a setup problem — it's physics.
Best for: Podcasters, streamers, content creators, home office workers who move their mic frequently
Low-Profile and Horizontal Arms: For Minimal Desk Footprint
Friction-based arms like the Elgato Wave Arm LP take a different design philosophy: they sacrifice quick repositioning in exchange for staying exactly where you put them. The horizontal, low-profile design sits below your sightline — a bigger deal than it sounds if you're on video calls all day or using a [webcam] to present to clients.
These arms don't spring back or forward — you move them deliberately, they stay put. That's ideal for people who find a position that works and leave it there. The tradeoff is that repositioning mid-session takes both hands and a little patience.
Budget scissor arms under $30 share one key characteristic with friction arms: they're best suited for lighter loads. For a USB podcast mic under 250g, a $25 scissor arm is completely fine. Load it with a heavier XLR condenser and you'll get droop, wobble during typing, or both.
Best for: Home office workers on video calls, minimal-aesthetic setups, anyone with a lightweight USB microphone who records in a fixed position
Heavy-Duty Broadcast Arms: When You're Running a Real Studio from Home
Broadcast-style fixed boom arms — things like the Yellowtec mVision or the Rode RODEArm — exist in a different category entirely. Most home users genuinely don't need them.
What justifies the price premium (often $150–$400+) is the combination of load capacity, cable management integration, and mechanical precision. The mVision routes cables internally through the arm itself, so there's no visible wiring. The movement is deliberate and damped, not springy. The clamp systems are built to survive commercial broadcast environments, not just your desk edge.
That said, if you're doing professional voice work, audiobook narration, or you've built a serious recording studio at home, the investment holds up. The precision means you can mark a sweet spot and return to it exactly, every session.
Studio desk stands with boom extensions are worth considering if you'd rather not clamp anything to your furniture. A weighted base stand with a short boom gives you full mic positioning without the bite marks.
Best for: Professional voice artists, audiobook narrators, serious home broadcasters, anyone who needs repeatable mic placement with zero compromise
The right type of arm comes down to how often you reposition, how heavy your mic is, and how much desk real estate you're willing to give up. Get those three factors right and the specific model becomes much easier to choose.
Best Boom Arms for Desk Microphone Mounts in 2026
After testing more than two dozen arms over the past several years, here's where I'd put my money — and more importantly, why.
Best Overall: Rode PSA1+
The Rode PSA1+ has been the benchmark in the $100–130 range for good reason, and nothing in 2026 has knocked it off that pedestal. The internal cable routing keeps your desk clean without zip-tie gymnastics, the 1.5kg weight capacity handles the vast majority of popular podcast and broadcast mics, and the spring tension holds position without creep.
That last point matters more than most people realize. A drifting arm will move your mic two inches lower over the course of a recording session — off-axis from the speaker, killing the low-end presence you spent an hour dialing in. The PSA1+ simply doesn't do that. You position it, it stays there.
The dual-axis rotation and extended reach (820mm horizontal) also mean it parks cleanly behind a monitor when not in use. If you're buying one arm and don't have an unusual setup, this is the one.
Best for Streamers and Content Creators: Elgato Wave Arm LP
The Elgato Wave Arm LP solves a specific problem brilliantly: keeping the arm low and flat so it doesn't intrude into your
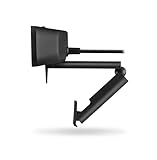
frame during video calls or streams. The low-profile design hugs the desk surface and swings out when needed, then tucks away without looming in your periphery.
It's not the most versatile arm — reach and weight capacity are more limited than the Rode — but for a streamer with a tightly composed shot who wants zero visual clutter between them and the camera, it's the right tool. A chunky vertical arm can eat 20% of your frame; the Wave Arm LP eliminates that problem by design.
Best Budget Pick That Won't Embarrass You: TONOR T20 or InnoGear Heavy Duty
At $25–40, both the TONOR T20 and InnoGear Heavy Duty arm outperform what you'd expect. The build quality isn't going to impress anyone up close, but they clamp solidly, move smoothly out of the box, and hold reasonably heavy mics without immediate drooping.
The honest caveat: plan on quarterly tension re-tightening. The springs and joints on both arms loosen with regular repositioning in a way the Rode and Heil arms simply don't. Set a calendar reminder — it takes 90 seconds with an Allen key and prevents the slow-sag problem entirely.
If you're just getting started or testing whether you'll actually use a boom arm long-term, either is a sensible starting point.
Best for Heavy Mics (500g+): Heil Sound PL2T
The Heil Sound PL2T is the professional sleeper pick that doesn't get enough attention outside broadcast circles. It handles mics up to 900g, covering dynamic workhorses like the Shure SM7dB and the Electro-Voice RE20 that defeat lighter arms entirely. The tension adjustment mechanism is the smoothest available at its price point (~$120) — a single knob that dials in resistance with real precision rather than the binary "too loose / too tight" experience on cheaper arms.
It's not the prettiest arm on a desk, and cable management is external, but if your mic is heavy and you need reliable positioning across long sessions, the PL2T earns every dollar.
Best Premium Option: Yellowtec mVision Flex
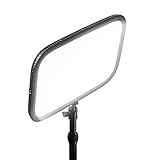
The Yellowtec mVision Flex is the 2026 pick for remote professionals who need zero positional drift and want hardware that looks serious in a client-facing video setup. The engineering is exceptional — fluid movement, rock-solid holds, and aesthetics that pair naturally with a

and a clean desk build.
The price ($350+) requires honest justification. If you're recording podcasts or doing video calls from a home office, you don't need this. But if your desk is on camera regularly, you're using a heavy broadcast mic, and you want equipment that never needs adjustment or attention — the mVision Flex is the answer. It's not aspirational spending if the use case genuinely fits.
Matching Your Boom Arm to Your Specific Microphone
The biggest mistake people make when buying a boom arm is choosing based on price or aesthetics rather than the actual weight and behavior of their specific microphone setup.
The core principle: always weigh your complete rig — microphone body, shock mount, pop filter, and any XLR cable tension — before you open a product page. That number is what matters, not the microphone's listed weight alone.
USB Microphone Compatibility: What You Actually Need
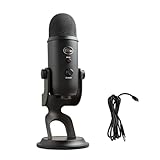
If you're running a
like the Blue Yeti (168g) or HyperX QuadCast S (around 254g including its integrated mount), virtually any boom arm on the market will handle the load without drama. These are genuinely lightweight rigs.
This matters because USB mic users frequently overspend on their arm. A $150 premium scissor arm built for broadcast-grade dynamics is engineering overkill for a Blue Yeti. The tension springs in those arms are calibrated for heavier loads, which can actually make fine positioning harder with lightweight mics — you're fighting the arm's resistance to hold it where you want it.
For USB setups, look for arms in the 500g–1kg rated range. That gives you comfortable overhead capacity without the stiff, over-tensioned feel of a heavy-duty arm gripping a mic that barely weighs anything.
Dynamic XLR Mics: Weight and Shock Isolation Considerations
This is where things get serious — and where the most expensive lessons tend to happen.
The Electro-Voice RE20 body alone weighs around 623g, and once you add a quality shock mount, you're pushing past 950g before the cable enters the picture. A $35 scissor arm holds fine for the first 20 minutes. By the 90-minute mark, the arm has slowly crept downward — maybe 15 degrees of droop — moving the mic off-axis and killing the low-end presence you spent an hour dialing in.
Dynamic XLR mics like the Shure SM7dB (766g with shock mount) or RE20 (953g+) demand arms rated for at least 1kg — and 1.5kg capacity is worth the extra margin. Most consumer-grade arms top out around 750g in real-world sustained holding capacity, even when the marketing claims otherwise.
Beyond weight, cable routing matters more with heavy dynamics. An XLR cable pulling at an awkward angle adds rotational stress to the arm's pivot joints. Look for arms with internal cable channels or built-in cable clips that route the XLR close to the arm's centerline.
The SM7B-style side-address orientation also positions better on arms with longer horizontal reach. These mics want to sit in front of you at mouth level, which means you need an arm that can extend 30–40cm horizontally without the joint fighting you.
Condenser Mics: Why Vibration Isolation Changes Your Arm Choice
Large-diaphragm condensers are sensitive enough to pick up mechanical vibration traveling through your desk, through the arm's clamp, and into the mic stand itself. This makes your shock mount selection and arm rigidity work as a system, not independent choices.
The weight math shifts quickly here. A typical large-diaphragm condenser like the Audio-Technica AT4040 sits around 330g, but nest it into a quality suspension shock mount like the Rycote InVision and you've added 200–300g. Full rig weight is now comfortably above 600g before any accessories.
More importantly, arm stiffness affects vibration transmission. Flimsy arms flex slightly under load, and that micro-movement translates directly into low-frequency rumble on condenser recordings. For condensers, prioritize arms with solid aluminum construction at the pivot joints over plastic-jointed budget options — even if the weight rating technically clears your mic.
The combination of a quality suspension mount and a rigid, well-damped arm is what separates clean condenser recordings from ones that need heavy low-cut filtering in post.
Installation, Setup, and Positioning Tips Most Guides Skip
Most boom arm guides end the moment you buy the thing. Here's what actually happens after the box arrives — and where most people silently make mistakes that cost them sound quality for months.
Step-by-Step Installation for Desk Clamp Arms
The first decision — where to clamp — gets almost no attention, and it's arguably the most consequential one you'll make.
Mounting at the corner of your desk feels intuitive but is actually the worst position. The arm has to work against awkward geometry, you lose extension range, and the clamp sits unstably on the thinnest part of the surface. Mount your clamp 8 to 12 inches from the desk edge, measured along the side. At that position, the arm's geometry works with you: it reaches forward cleanly, sits lower when folded back, and the clamp bites into a thicker, more structurally sound section of the desktop.
Once you've found your spot, follow this sequence:
- Thread your cable before anything else. If your arm has internal cable channels — and many mid-to-high-end arms do — you cannot retrofit the cable after assembly. I learned this the hard way with a
Blue Yeti USB Microphone
Similar Posts
Ergonomic Wrist Rest for Keyboard and Mouse: Complete Guide
Understanding Ergonomic Wrist Rests: What They Actually Do If you’ve ever felt that telltale ache in your wrists after a long day at the keyboard, you’ve probably considered getting a wrist rest. But before you click “add to cart,” let’s talk about what these products actually do—and what they don’t. How Wrist Rests Support Your…