Best Lighting for Home Video Calls Without a Ring Light
Introduction
Let me be direct: I've tested dozens of lighting setups for video calls over the past three years, and ring lights are overrated for home office use. Yes, they're popular. Yes, every influencer seems to have one. But they're often the wrong tool for the job.
Here's what nobody tells you about ring lights: they create that telltale circular catchlight in your eyes that screams "I'm trying too hard." They cast harsh, flat light that washes out your features. And if you wear glasses? Good luck managing those reflections. Plus, they're bulky, expensive (decent ones start around $80), and take up precious desk space you probably don't have.
I get why people buy them. You see professional-looking Zoom calls and assume you need professional equipment. But here's the thing—the best-looking video calls I've seen don't use ring lights at all. They use smart positioning of everyday light sources that create depth, dimension, and a natural look that doesn't scream "studio setup."
The alternative lighting options I'm about to share look more natural on camera, cost less money, and work better in actual home environments where you can't dedicate an entire corner to video call equipment. We're talking about the window you already have, the desk lamp gathering dust in your closet, and yes, even that overhead light you've been ignoring.
What This Guide Covers
I've broken down practical lighting alternatives into four categories:
- Window light techniques: How to position yourself and modify natural light for consistently good results (even on cloudy days)
- Lamp-based setups: Using affordable desk and floor lamps to create professional three-point lighting without the price tag
- Overhead solutions: Making ceiling lights work for you instead of creating unflattering shadows
- DIY modifications: Simple tricks with materials you already own—aluminum foil, white poster board, and parchment paper can transform mediocre light into great light
Each section includes specific positioning advice, budget-friendly product recommendations when helpful, and troubleshooting for common problems like screen glare and uneven skin tones.
My Promise to You
Everything in this guide works in real apartments and home offices. I'm not assuming you have a dedicated studio space, southern exposure windows, or unlimited budget. These are tested solutions that work whether you're in a basement office with terrible overhead fluorescents or a small bedroom where your desk faces the wrong direction.
You'll spend less money, have more flexibility in your space, and honestly—you'll look better on camera. The goal isn't to look like you're broadcasting from a TV studio. It's to look like a competent professional who happens to have really good lighting in their home office.
Let's fix your video call lighting the right way.
Why Ring Lights Aren't Always the Answer for Video Calls
I'll be honest: ring lights have become the default recommendation for video call lighting, but they're not the universal solution everyone makes them out to be. After testing dozens of lighting setups in my home office, I've found that ring lights solve one problem while creating several others that most people don't anticipate until after they've spent the money.
The Ring Light Look: Why It Screams 'Influencer' Not 'Professional'
Here's the thing nobody tells you before you buy one: ring lights create a very distinctive circular catchlight in your eyes. If you've ever watched a beauty tutorial or Instagram live stream, you've seen it—that perfect ring of light reflected in the pupils. It's become the visual signature of content creators and influencers.
For a client presentation or executive meeting? That look reads as amateur hour. I learned this the hard way during a pitch meeting when a colleague later asked if I was "doing TikToks on the side." The association is so strong now that ring lights can actually undermine your professional credibility rather than enhance it.

Check Price on Amazon →
Beyond the catchlight issue, ring lights produce extremely flat, frontal illumination. This direct-on lighting washes out facial features, eliminates natural shadows that give your face dimension, and can make skin tones look overly bright and artificial. You end up looking like a high-exposure passport photo rather than a real person in a real space.
Space and Storage Challenges in Real Home Offices
Let's talk about the elephant in the room—or rather, the giant circle taking up half your desk. Quality ring lights typically measure 12-19 inches in diameter, and they need to be positioned directly in front of you, perfectly centered with your webcam.
In a dedicated studio, that's fine. But most of us are working in:
- Spare bedrooms with desks pushed against walls
- Kitchen tables that need to convert back to dining space
- Multi-purpose rooms where the lighting setup needs to be portable
- Small apartments where every square foot matters
I've watched friends contort themselves trying to position a ring light on a crowded desk that already holds two monitors, a keyboard, a coffee mug, and the usual desk chaos. The ring light either ends up too far away to be effective, or you're constantly moving it out of the way to actually use your workspace.
Storage is equally problematic. Unlike a compact
Check Price on Amazon →
that mounts to your desk and stays put, ring lights need somewhere to go when you’re not using them. They don’t fold flat, and that awkward circular shape doesn’t fit nicely anywhere.
The cost factor compounds these issues. Decent ring lights start around $80, and if you want something with proper color temperature control and enough brightness for larger spaces, you're looking at $120-150 or more. That's a significant investment for a tool that may actually make your video presence less professional while cluttering your workspace.
The good news? Better alternatives exist that provide more natural-looking results, take up less space, and often cost the same or less.
Understanding the Fundamentals of Video Call Lighting
You don't need a
Check Price on Amazon →
to look professional on camera—you just need to understand how light actually works. Once you grasp a few basic principles, you’ll realize that good video call lighting is less about buying specialized equipment and more about positioning what you already have (or what’s readily available).
The Three-Point Lighting Concept, Simplified
Professional studios use three-point lighting: a key light (main source), fill light (softens shadows), and back/rim light (adds depth). For video calls, you don't need all three, but understanding the concept helps.
Your key light is your primary source—this does the heavy lifting. It should be your brightest light source, positioned at about a 45-degree angle from your face, either to your left or right. Eye level or slightly above works best; this mimics natural light and prevents unflattering shadows under your eyes and nose.
The fill light reduces harsh shadows created by your key light. This can be as simple as a second lamp on the opposite side at lower intensity, or even a white wall reflecting your key light back at you. Many home setups work fine with just one well-positioned light and natural fill from your environment.
Back or rim lighting separates you from your background, adding a subtle professional polish. It's nice to have but absolutely not essential for looking good on calls.
Color Temperature: Finding Your Perfect Match
Here's where people get tripped up: not all light is created equal. Light has color, measured in Kelvin (K), and mixing different color temperatures makes you look sickly or weird on camera.
Aim for 5000-5500K—this is daylight temperature and looks natural on virtually every webcam and laptop camera. It's that clean, neutral white you see in professional settings. Avoid warm tungsten bulbs (2700-3000K) for your main lighting; they'll give you an orange cast that's tough to correct.
The Color Rendering Index (CRI) is equally important but rarely discussed. CRI measures how accurately a light source shows true colors. Look for lights with a CRI of 90 or above—this ensures your skin tones appear natural rather than washed out or oddly tinted. Most cheap LED bulbs have terrible CRI ratings, which is why you might look "off" even with plenty of light.
The Science of Flattering Light Angles
Position trumps power every time. I've seen people with expensive
Check Price on Amazon →
setups look terrible because they mounted them in the wrong spot.
The golden rule: Never light yourself from directly above or below. Overhead lighting (like most ceiling lights) creates harsh shadows under your eyes, nose, and chin—instant zombie mode. Lighting from below does the opposite, giving you that horror movie flashlight effect.
The 45-degree angle isn't arbitrary—it's where shadows create subtle definition on your face without looking harsh. Place your light source slightly above eye level and off to one side. If you wear glasses, adjust the angle slightly to minimize glare, usually by raising the light a bit higher.
Brightness matters too: You'll typically need 500-1000 lumens for proper exposure. Too little and your camera cranks up the ISO, creating grain. Too much and you'll blow out your face. Your camera should expose you properly without making the background pitch black—that's the sweet spot.
One final mistake to avoid: backlighting. Sitting in front of a bright window without front lighting turns you into a silhouette. Either face the window or add strong front lighting to compensate.
Harnessing Natural Window Light: The Gold Standard
After testing dozens of artificial lighting setups, I keep coming back to the same conclusion: nothing beats good old window light for video calls. It's soft, flattering, and completely free. The key is knowing how to use it properly.
Setting Up Your Desk for Optimal Window Light
Here's the positioning trick that makes all the difference: place your desk perpendicular to your window—not facing it, not with your back to it, but at a 90-degree angle with the window to your left or right.
When you face a window directly, you'll be backlit and appear as a dark silhouette. With the window behind your camera, you get harsh, squinty light straight in your face. But positioned sideways to the window? That's where the magic happens. You get beautiful, directional light that creates subtle dimension without washing you out.
North-facing windows are the gold standard (or south-facing if you're in the Southern Hemisphere). They provide consistent, soft light throughout the day without the drama of direct sun. East and west-facing windows work too, but you'll need to manage more variable conditions as the sun moves.
The biggest challenge? Time of day. Morning light from an east-facing window can be gorgeous at 9 AM but completely wrong by 2 PM. I learned to adjust my desk position slightly or use a

Check Price on Amazon →
to shift my camera angle as the light changes.
Dealing with Too Much Sun: Diffusion Techniques
Direct sunlight is actually harder to work with than dim light. It creates harsh shadows, makes you squint, and can blow out your image entirely. You need to diffuse it.
The simplest solution: sheer curtains. They knock down the intensity while maintaining that soft, natural quality. I keep a set of white sheers on my office window year-round.
If you don't have curtains, try these alternatives:
- White paper blinds – cheap and surprisingly effective at softening harsh rays
- Translucent shower curtains – sounds weird, but they work great as temporary diffusion panels
- Frosted window film – a semi-permanent solution if you consistently get too much direct sun
Pro tip: even a single sheet of white poster board propped against part of your window can selectively diffuse problematic bright spots.
No Good Windows? Here's Your Backup Plan
Not everyone has ideal window placement. Maybe your desk faces a brick wall, or you take calls in the evening when natural light is gone. Don't panic—you have options.

Check Price on Amazon →
First, work with what you have. Even a small window across the room provides some ambient light that's better than pure artificial light. You'll just need to supplement it.
For supplemental or primary lighting when windows aren't helping, consider a
Check Price on Amazon →
positioned to mimic window light—off to one side, slightly above eye level. The goal is recreating that soft, directional quality that makes window light so flattering.
The other option? Embrace cloudy days. Overcast light is actually ideal for video—it's naturally diffused and consistent. On bright sunny days, I sometimes actually prefer closing my blinds and using artificial lights instead of fighting with constantly changing shadows.
Best Desk and Floor Lamps for Video Lighting
The smartest money I've spent on video call lighting wasn't actually on video-specific gear—it was on quality desk and floor lamps that do double-duty for both task lighting and making me look presentable on Zoom. These everyday lighting solutions often outperform dedicated video lights because they're more versatile and don't scream "I bought this for video calls."
Desk Lamps: Compact and Controllable
Desk lamps are my go-to recommendation for most people because they sit exactly where you need them without taking up floor space. The key is finding one with three critical features: dimming capability, an adjustable arm or head, and a color temperature around 5000-6500K (that's the "daylight" range that makes you look naturally lit, not jaundiced).
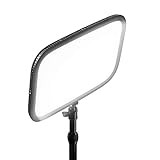
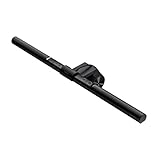
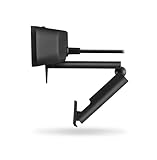
The BenQ ScreenBar deserves special mention because it mounts directly onto your monitor, saving precious desk space while putting light exactly where your face is. It's pricey at around $109, but the auto-dimming feature and curved design that prevents screen glare make it worth considering if you're tight on space.
For a more traditional desk lamp, the TaoTronics LED Desk Lamp (typically $40-50) gives you full control over brightness and color temperature with a simple touch panel. I've recommended this to at least a dozen people who've all reported back that it completely transformed their video quality. The flexible neck lets you position it at that magic 45-degree angle from your face, slightly above eye level—which mimics natural window light and minimizes unflattering shadows.
If budget isn't a concern, the Dyson Lightcycle tracks local daylight and adjusts accordingly. It's beautifully engineered overkill for video calls, but if you're already considering it for desk work, know that it excels at video lighting too.
Floor Lamps: Maximum Flexibility
Floor lamps give you positioning options that desk lamps simply can't match. The Brightech Sky LED is my standard recommendation here—it's around $80, has an adjustable gooseneck head, and produces excellent daylight-balanced light. Position it about 2-3 feet away at that same 45-degree angle, and you'll get professional-looking results.
The Ikea RANARP floor lamp is the budget champion at under $50. It's not specifically designed for video lighting, but the adjustable head and clean light quality work beautifully. Just swap in a daylight-balanced LED bulb if needed.
Check Price on Amazon →
Smart Bulbs: Upgrade What You Already Own
Before buying new lamps, consider whether smart bulbs could transform what you already have. Philips Hue and LIFX bulbs let you dial in the exact color temperature and brightness from your phone. I have a Philips Hue in my existing desk lamp, and being able to quickly switch between warm light for evening work and cool daylight for video calls is genuinely useful.
This approach works best if you already have a lamp with good positioning. You can't fix bad placement with a smart bulb, but if your lamp is already at the right angle, a $25-45 smart bulb might save you from buying an entirely new fixture.
Budget options under $40: The basic LEPOWER metal desk lamp with a daylight LED bulb, or even a well-positioned pharmacy-style lamp from a big box store, can work surprisingly well if you're willing to experiment with placement.
Overhead and Ambient Lighting Solutions
Here's the thing about overhead lighting: it's probably sabotaging your video calls right now. I've tested dozens of lighting setups in my home office, and ceiling fixtures consistently create the most unflattering look—deep shadows under your eyes, a dark line under your nose, and that generally tired appearance that makes 10 a.m. meetings look like midnight.
The problem is simple physics. Light coming from directly above casts shadows downward on every facial contour. It's the opposite of what photographers want, which is light coming from slightly above eye level at a 45-degree angle.
Fixing Your Overhead Lighting Problem
Before you give up on your ceiling lights entirely, know that they can still play a supporting role. Overhead lighting works great as fill light—the secondary illumination that softens shadows created by your main light source. It also creates depth by separating you from your background, preventing that flat, washed-out look.
The key is positioning yourself so overhead lights hit you from the side or back, not directly above. I've gotten decent results by sitting slightly away from center in my room, letting my ceiling light act as a backlight while my primary illumination comes from a desk lamp or window.
If you have track lighting or directional fixtures, aim them at the wall behind you instead of at yourself. The reflected light creates a soft, indirect glow that's way more flattering than direct overhead beams. This bounce lighting technique is how professional studios work—and it's free if you already have adjustable fixtures.
Budget-Friendly Ceiling Light Modifications
For renters or anyone who can't overhaul their lighting system, paper lanterns are criminally underrated. A large rice paper lantern over your existing bulb transforms harsh overhead light into a soft, diffused glow. They cost $15-30 and take two minutes to install. I've used this trick in three different apartments.
If your ceiling fixture uses standard bulbs, switching to color-tunable LED bulbs gives you surprising control. Set them to warmer temperatures (2700-3000K) during evening calls to avoid the harsh, clinical look of cool white light. The Philips and LIFX smart bulbs even let you adjust brightness and color from your phone, though basic tunable bulbs from hardware stores work fine for half the price.
For truly harsh overhead fluorescents (common in basements and converted spaces), fabric diffusers are your friend. You can clip sheer white fabric or photographer's diffusion material to the fixture with binder clips. It's not pretty up close, but nobody's looking at your ceiling.
The most effective approach I've found: layer your room lighting. Use your overhead fixture at 40-50% brightness, add a floor lamp behind and to the side of your monitor, and place a small desk lamp opposite your window. This multi-source approach eliminates harsh shadows without requiring any single perfect light source. It's forgiving, flexible, and works in nearly any room layout.
DIY and Creative Lighting Hacks Under $50
You don't need expensive studio equipment to look great on video calls. Some of the best lighting setups I've tested cost less than a takeout dinner and use materials from your local hardware store. Here's how to get professional results without the professional price tag.
The $15 Hardware Store Setup That Actually Works
The most underrated lighting solution is sitting on the shelf at Home Depot or Lowe's right now: basic clamp lights with daylight LED bulbs. I'm talking about those simple metal reflector lamps with a spring clamp—usually around $10-12 each.
Grab two of these and pair them with 5000K-6500K LED bulbs (around $3-5 per bulb). Clamp one to each side of your monitor or nearby shelves, angled slightly toward your face. This creates a basic two-point lighting setup that eliminates shadows and mimics natural window light. The clamp design is brilliant because you can attach them to bookcases, shelves, or even the back of a chair.
I've used this exact setup in three different home offices, and people consistently ask what fancy lights I'm using. The secret? Position them about 45 degrees from your face and slightly above eye level. Point them at your face, not directly into the camera.
Shop lights—those rectangular LED fixtures meant for garages and workshops—work surprisingly well too. A 4-foot linkable shop light runs $20-30 and provides broad, even illumination. Mount it above your monitor or lay it across a shelf behind your webcam. The wide coverage eliminates the "spotlight" effect you get with smaller sources.
Diffusion and Reflection: Making Harsh Light Soft
Hard light creates harsh shadows and makes you look like you're in an interrogation room. The fix? Diffusion and reflection—fancy words for simple concepts.
Diffusion materials that actually work:
- Parchment paper: Tape it over your light source (keep it away from hot bulbs). Instant softbox effect for under $5.
- White shower curtain liner: Cut a square and clip it in front of your light. This is my go-to for softening harsh desk lamps.
- Frosted plastic sheets: Available at craft stores, these provide more durable diffusion than parchment paper.
The key is putting something translucent between the light and your face. It scatters the light rays, creating that flattering, soft glow you see in professional setups.
Reflection tricks:
- White poster board ($2 at any drugstore): Position one just outside your camera frame to bounce light back onto the shadow side of your face. I keep one leaning against my desk permanently.
- Aluminum foil reflectors: Crumple foil, then smooth it out and tape it to cardboard. The textured surface creates a softer reflection than flat foil. Place it opposite your main light source.
- Photography reflectors
Check Price on Amazon →
: Those 5-in-1 collapsible reflectors run $15-25 and work beautifully as fill lights. The white side is perfect for video calls—just prop it up on a stack of books.
Don't overlook furniture placement either. Moving your desk 90 degrees so a window hits you from the side instead of behind can transform your lighting instantly. I once improved someone's video quality dramatically by just having them rotate their desk to face a blank wall with a window to the left. Free lighting upgrade.
Complete Lighting Setups for Different Budgets and Spaces
The $30 Starter Setup
You don't need to break the bank to look professional on video calls. My go-to budget recommendation is a simple clamp light with a daylight-balanced LED bulb positioned at 45 degrees from your face. Add it to whichever side has less natural light, and boom—you've already fixed 80% of common lighting problems.
Position yourself facing a window (but not directly in front of it), and use the clamp light as your fill to balance out shadows. If you're getting harsh shadows on one side, grab a piece of white foam board from the dollar store as a reflector. Prop it up with books on the opposite side from your light source. Total cost: usually under $40.
The $100 Sweet Spot Setup
This is where things get interesting. At this price point, you can create studio-quality lighting that actually makes you look forward to video calls.
Start with a quality adjustable LED desk lamp as your key light. Look for something with at least 800 lumens and a color temperature around 5000K. Position it slightly above eye level, about 2-3 feet from your face.
Check Price on Amazon →
For fill light, I'm a fan of smart bulbs in existing lamps or overhead fixtures. You can dial down the intensity through your phone and get just enough fill to soften shadows without competing with your key light. The controllability is clutch—you can adjust on the fly during calls without standing up.
Premium No-Ring-Light Configuration
With a $150-300 budget, you're playing in the same league as content creators, minus the ring light.
The game-changer here is having multiple adjustable sources with color-tuning capability. I typically recommend two adjustable LED panels or high-end desk lamps with independent brightness and temperature controls. This lets you adapt to different times of day and match the color temperature of any ambient light in your room.
Add a third subtle backlight (even a basic LED strip behind your monitor works) to create separation from your background. This three-point setup without a ring light gives you that polished, dimensional look that actually appears natural on camera.
Room-Specific Solutions
Bedroom offices usually have decent overhead lighting but terrible shadows. Mount a small LED panel to your wall or headboard, or use a tall floor lamp with a flexible neck that can angle down toward your face.
Kitchen table setups are tricky because overhead pendants create raccoon eyes. Bring in a desk lamp from another room or use a clip-on light attached to a nearby shelf. Face the window if you have one.
Basement offices need the most help since natural light is scarce or nonexistent. You'll need at least two artificial sources here—a strong key light plus an overhead or side fill. Don't skimp on bulb brightness in windowless spaces; go for 1000+ lumens in your primary source.
Small desks benefit from compact, multi-directional desk lamps or monitor-mounted lights that don't eat up precious workspace. Wall-mounted swing-arm lamps are also brilliant space-savers.
Large rooms require stronger light sources or positioning yourself closer to your lighting. The goal is illuminating you, not the entire room. Avoid placing lights too far away—they'll create that overexposed, blown-out look when your camera tries to compensate.
Testing and Adjusting Your Lighting Setup
The difference between "okay" lighting and great lighting often comes down to testing and tweaking. I've spent countless hours on video calls, and here's what I've learned: you can't judge your lighting by how your room looks—you need to see how it looks through your camera.
The 5-Minute Lighting Test Process
Start by opening your video call software and recording a 30-second test clip. Sit naturally, move your head slightly, and speak as you normally would. Then take several screenshots from different angles.
Here's what to check in your footage:
Shadows under eyes and nose: These are the biggest giveaway of poor lighting. If you see dark crescents under your eyes, your light source is too high or you need fill light from below.
Even skin tone: Your face should look naturally lit without hot spots (overly bright areas) or dark patches. If one side of your face is significantly darker, reposition your light or add a second source.
Background visibility: You want your background visible but not competing with you for attention. If your background is brighter than your face, you'll appear as a silhouette.
Color accuracy: Your skin tone should look natural, not orange, blue, or green. If you notice a color cast, adjust your light's temperature or move away from colored walls that reflect onto you.
Check Price on Amazon →
Troubleshooting Common Issues
Too bright? Move your light source farther away or angle it slightly away from your face. If you're using a window, close sheer curtains or move your desk back a few feet. Don't just reduce your camera's exposure—that'll make everything darker.
Too dim? Bring your light closer or add a second source. A simple

Check Price on Amazon →
in white or light gray can actually bounce light back up onto your face from below, acting as a natural fill light.
Harsh shadows? Soften your light by bouncing it off a wall or ceiling instead of pointing it directly at yourself. You can also diffuse direct light by placing a white shower curtain or thin white fabric between you and the light source.
Color casts? Cool-toned lights (5000K+) can make you look washed out, while warm lights (below 3000K) can make you look orange. Aim for 4000-4500K for natural-looking skin tones.
Fine-Tuning for Real-World Use
Your face shape and skin tone matter. If you have deeper skin tones, you'll need more light intensity to avoid looking muddy on camera. Longer faces benefit from slightly lower light positions, while rounder faces look better with higher, more angled lighting.
For different times of day, use your video software's preview function for quick adjustments. Morning sunlight is cool and bright; afternoon light is warmer. I keep my desk lamp on a dimmer switch specifically for balancing changing natural light.
For presentations where you're sharing slides, increase your key light intensity slightly—screen glare can wash you out. For intimate one-on-ones, softer, slightly dimmer lighting feels more personal and less clinical.
The goal isn't perfection—it's consistency. Once you find what works, take photos of your light positions and note the settings. Your future self will thank you when you're scrambling to join a call.
Frequently Asked Questions
Can I use regular household lamps for video call lighting?
Yes, standard lamps work great if you replace bulbs with daylight (5000K-5500K) LEDs. Look for bulbs with CRI rating of 90+ for accurate color representation. Position lamp at 45-degree angle from your face, slightly above eye level. Add a simple paper or fabric diffuser if light is too harsh. Total cost: $10-20 for quality bulbs to upgrade existing lamps.
What's the best position for a single light source during video calls?
45-degree angle from center of your face, positioned to your left or right side. Slightly above eye level (6-12 inches higher than your face). Distance: 2-4 feet away depending on brightness. Use wall or white surface on opposite side as natural reflector for fill light. Avoid directly behind camera (too flat) or directly above (creates shadows).
How do I avoid looking washed out without using professional lighting?
Reduce light intensity by dimming or moving source farther away. Use indirect/bounced light off walls instead of pointing directly at your face. Add fill light opposite your key light to create dimension and reduce flatness. Adjust camera settings: reduce exposure/brightness in video software if available. Ensure background has some lighting too – creates depth and prevents blown-out look.
What lighting works best for evening or night video calls?
Two artificial light sources work better than one: key light + ambient fill. Use 60W-equivalent LED bulbs (800-1000 lumens) in daylight color temperature. Desk lamp as key light + ceiling/floor lamp as fill creates natural-looking setup. Avoid mixing warm room lighting with cool daylight bulbs – pick one temperature. Consider smart bulbs you can adjust brightness and warmth for different call types.
How much should I spend on lighting for professional-looking video calls?
Minimum effective setup: $15-30 (clamp light + daylight LED bulb). Sweet spot for most people: $50-100 (quality adjustable desk lamp or two smaller sources). Premium setups without ring lights: $150-200 (multiple adjustable sources with dimming). Don't overspend – a $25 setup positioned correctly beats $200 equipment used poorly. Prioritize positioning and color temperature over expensive equipment.