Acoustic Treatment Panels for Home Studio on a Budget 2026
Introduction
Here's something that surprised me when I first started treating my home studio: the difference between a $3,000 acoustic treatment setup and a $500 one isn't what you'd expect. Sure, the expensive solution looks prettier and might edge out the budget option by 10-15%, but that last bit of performance costs exponentially more. For most home studio owners, that math just doesn't make sense.
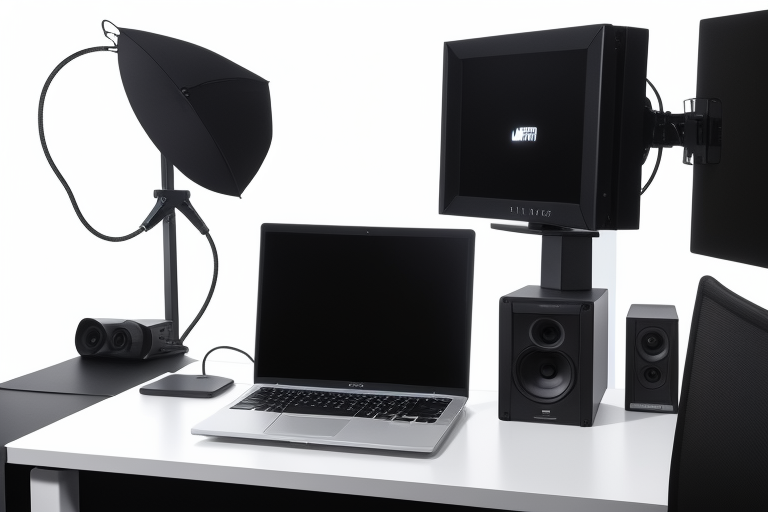
I've spent the last five years testing acoustic panels, bass traps, and diffusers in everything from spare bedrooms to converted garages. The biggest lesson? Acoustic treatment matters more than almost any piece of gear you'll buy. You can record with a budget
Check Price on Amazon →
, but if your room sounds like a bathroom, your recordings will too. Meanwhile, proper acoustic treatment makes even mid-tier equipment sound professional.
The reality is this: you can achieve roughly 80% of what professional studios accomplish with about 20% of their budget. I'm not talking about cutting corners or accepting "good enough" results. I mean genuinely effective acoustic treatment that addresses the core problems in your space—flutter echo, bass buildup, and excessive reverb.
What Actually Matters
Most beginners get this backwards. They'll drop $800 on a fancy interface or
Check Price on Amazon →
, then wonder why their mixes sound muddy or their vocals have that hollow, roomy quality. The truth is uncomfortable but liberating: your room’s acoustics are probably your biggest problem, not your gear.
A treated room does several critical things:
- Reduces unwanted reflections that cause phase issues and muddy your sound
- Controls bass frequencies that build up in corners and make mixing decisions impossible
- Shortens decay time so you hear your actual sound, not your room's character
- Creates a consistent monitoring environment where mixing decisions actually translate
What This Guide Covers
I'm going to walk you through the practical reality of budget acoustic treatment. We'll compare DIY solutions (where you can save 60-70% if you're willing to put in weekend work) versus ready-made panels that prioritize convenience. I'll show you placement strategies that matter more than the panels themselves—seriously, six panels placed correctly beat twelve panels randomly stuck to walls.
Most importantly, I'll give you actual bang-for-buck recommendations based on real testing, not marketing claims or affiliate commission rates.
Setting Realistic Expectations
Let's talk numbers. For a typical 10×12 foot home studio or bedroom setup, you're looking at $200-500 for DIY solutions or $400-800 for ready-made panels. Larger rooms or spaces with serious bass issues might push toward the upper end. Smaller vocal booths or podcasting corners can get away with less.
This won't turn your spare bedroom into Abbey Road Studios. But it will eliminate the amateur sound that screams "recorded at home" and give you a neutral space where you can make confident decisions about your music. That's worth far more than another plugin or piece of hardware.
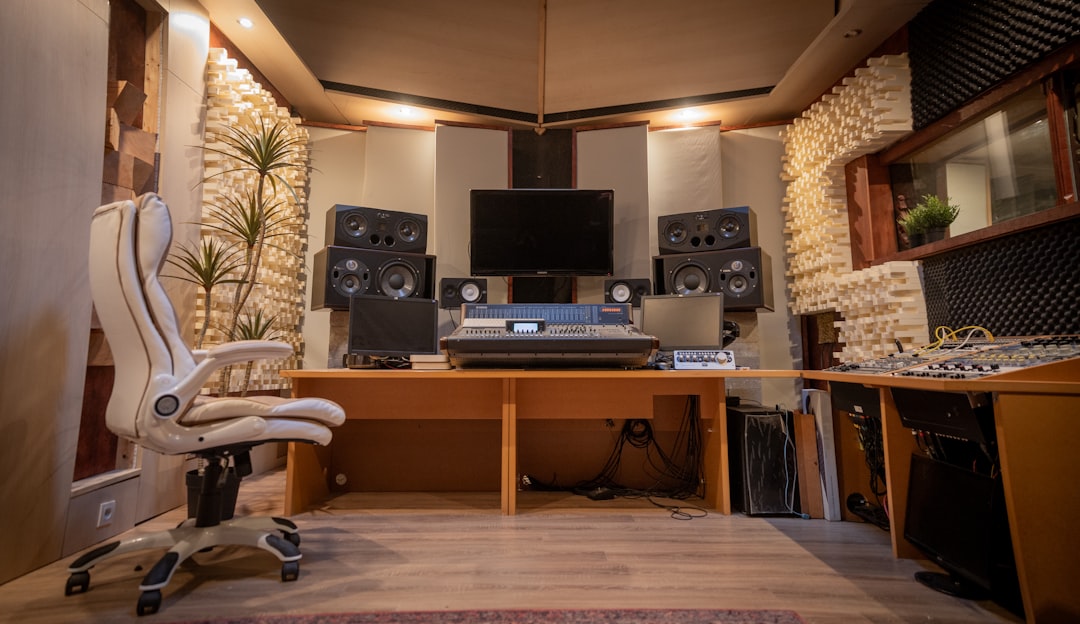
Understanding Acoustic Treatment Basics for Home Studios
Let's clear up the biggest misconception right away: acoustic treatment and soundproofing are completely different things. Soundproofing keeps noise from entering or leaving your space—think mass, decoupling, and serious construction. Acoustic treatment improves how sound behaves inside your room. Unless your neighbors are complaining or street noise is ruining takes, you probably need treatment, not soundproofing.
The Three Acoustic Villains in Your Home Studio
Every untreated room has the same troublemakers. Flutter echo happens when sound bounces rapidly between parallel walls—clap your hands in an empty room and you'll hear that metallic "boing" sound. Standing waves occur when certain frequencies build up or cancel out based on your room dimensions, creating massive bass inconsistencies depending on where you sit. Early reflections are the first sound waves that bounce off nearby surfaces before reaching your ears, smearing stereo imaging and making everything sound like it's coming from inside a box.
Here's why this matters: when you're mixing in an untreated room, you're essentially wearing sonic beer goggles. That kick drum sounds boomy because your room has a 60Hz resonance, so you cut it—then your mix sounds thin everywhere else. Those cymbals seem harsh, so you tame them, but you've actually just EQ'd around room reflections. You're making decisions based on lies your room is telling you.
The Frequency Spectrum Challenge: Why Bass is Hardest and Most Expensive to Treat
High frequencies are easy—a few inches of acoustic foam or
Check Price on Amazon →
and you’re done. But bass frequencies have wavelengths measured in *feet*. A 100Hz wave is over 11 feet long, which means you need serious thickness and material to control it. This is why budget studios struggle: proper bass traps require 4-6 inches of dense absorption in room corners, and they’re expensive or time-consuming to DIY.
My practical advice? Prioritize the midrange and highs first. You'll get 70% of the benefit for 20% of the cost. Then save up for proper corner bass traps rather than wasting money on thin foam that does nothing below 500Hz.
Absorption vs Diffusion: What Budget Studios Actually Need
Diffusion scatters sound reflections instead of absorbing them, maintaining room energy while reducing problems. It sounds fancy, but here's the truth: most home studios under 150 square feet need absorption, period. Diffusion works best when you have distance—at least 8-10 feet—between the diffuser and the listener. In a 10×12 bedroom studio, that math doesn't work.
Focus your budget on absorption panels at first reflection points (the spots on your side walls where sound bounces on its way to your ears) and bass traps in corners.
Why Your Room Dimensions Matter More Than You Think
A perfectly square room is acoustic hell—every dimension reinforces the same problematic frequencies. Bedroom studios often work better than you'd expect because they're naturally asymmetrical with closets, doors, and irregular features that break up patterns. Dedicated rectangular spaces with ratios around 1:1.6:2.6 (height:width:length) are ideal, but honestly, you work with what you have.
The real priority? Don't set up in the exact center of the room. That's where standing waves converge into a nightmare. Position your listening spot about 38% of the room's length from the front wall—it's a sweet spot that minimizes modal problems.
Budget-Friendly Acoustic Panel Options: DIY vs Ready-Made
Here's the truth about acoustic treatment: you don't need to spend thousands to get legitimate results. I've tested dozens of panels in my own studio space, and the difference between expensive premium panels and well-executed budget options is often minimal—especially for home studios.
The DIY Route: Building Effective Panels for Under $200
Building your own panels is absolutely the most cost-effective approach if you have a free weekend and basic tools. DIY rockwool or mineral wool panels typically run $3-5 per square foot of coverage, which is hard to beat.
Here's what you need:
- Rockwool Safe'n'Sound or Owens Corning 703 (the actual sound absorption material)
- 1×3 or 1×4 lumber for frames
- Fabric (guilford of maine or even canvas drop cloths work great)
- Basic tools: saw, staple gun, wood glue
For a typical 12×14 bedroom studio, you can build 8-12 panels (24×48 inches each) for around $180-250. I've done this twice, and while it takes a solid 6-8 hours of work, you end up with panels that perform identically to commercial options costing 3x as much.
The catch? DIY only makes sense if you value your time at less than $25-30/hour. If you're busy or just want to get recording, the time investment might not be worth the savings.
Best Ready-Made Budget Panels That Actually Work
If you'd rather buy ready-made, there are legitimate budget options that actually work:
Budget tier ($8-15 per square foot):
- Acoustimac panels are my go-to recommendation for beginners. They use proper mineral wool and offer decent fabric options.
- ATS Acoustics panels perform well and come in various colors. Slightly more expensive but still budget-friendly.
- Foamily wedge panels work in a pinch, but stick to their thicker 2-inch options minimum.
Mid-tier options worth considering ($15-20 per square foot):
- GIK Acoustics 242 panels are where I'd upgrade if budget allows. Better construction and mounting hardware.
- Primacoustic London series offers professional results without the premium price tag.
For that same 12×14 bedroom studio, expect to spend $400-600 for ready-made panels with proper coverage.
Check Price on Amazon →
What to Avoid (Seriously)
Don't waste money on:
- Egg crates: They do almost nothing acoustically. This myth won't die, but please don't fall for it.
- Thin foam pyramids (anything under 2 inches): These only affect the highest frequencies, making your room sound worse, not better.
- "Soundproofing" panels: If it claims to block sound from neighbors, it's marketing nonsense. Acoustic treatment and soundproofing are completely different things.
Bottom line? If you have time and enjoy projects, go DIY and pocket the savings. If you value convenience or want matching aesthetics, Acoustimac or ATS Acoustics deliver solid performance without breaking the bank. Either way, proper mineral wool or rockwool panels at 2-4 inches thick will transform your recordings—everything else is just cosmetic differences.
Bass Traps on a Budget: Taming Low Frequencies Without Breaking the Bank
Here's something most home studio builders learn the hard way: you can hang acoustic panels all over your walls, but if you haven't addressed your bass frequencies, your mixes will still sound muddy and inconsistent. The good news? Bass traps deliver the biggest acoustic improvement per dollar spent, especially when you focus on corners.
Low frequencies are stubborn. They build up in room corners like rush hour traffic, creating peaks and nulls that make your bass sound booming in one spot and completely disappear three feet away. Corner bass traps interrupt this buildup, and they should absolutely be your first acoustic purchase—even before those prettier broadband panels.
Making Your Own Superchunk Bass Traps
The DIY "superchunk" design is legendary among budget-conscious studio builders for a reason: it's devastatingly effective and costs maybe $30-40 per corner in materials. You're essentially building triangular chunks of dense insulation that fit snugly into corners.
Here's the basic approach: grab some Roxul Safe'n'Sound or Rockwool insulation (the denser, the better), cut it into triangular sections that span from floor to ceiling, and wrap it in breathable fabric. You can stack rectangular pieces at angles or actually cut them into triangles—both work. The goal is filling that corner space as completely as possible with 6+ inches of thickness.

Check Price on Amazon →
The real trick? Use a cheap fabric like burlap or even painter's drop cloth. You're not winning any design awards here, but you're solving a physics problem. I've heard perfectly professional mixes come from rooms with burlap-wrapped superchunks.
For those who'd rather buy than build, budget commercial options like the GIK Acoustics Monster Bass Traps or Primacoustic MaxTraps typically run $50-120 per corner unit. They're cleaner-looking and arrive ready to install, which matters if carpentry isn't your thing.
Where Bass Traps Matter Most in Your Room
Small project studios typically need 2-4 treated corners minimum to hear meaningful improvement. But which corners should you prioritize?
Start with the ceiling-wall corners behind your listening position. This is where low-frequency energy accumulates most aggressively. If you're on a tight budget, two rear ceiling corners will give you more bang for your buck than anything else.
The front ceiling-wall corners (behind your monitors) come next. Many builders save the floor-wall corners for last, though they still contribute to the overall bass response.
One budget hack worth mentioning: thick broadband absorption panels (4+ inches) placed strategically in corners can function as makeshift bass traps. They won't match dedicated corner traps in sheer low-end absorption, but stacking two 4-inch panels in a corner creates something approaching bass trap territory for less money.
The bottom line? Two properly built corner bass traps will transform your room's sound more than $500 worth of thin wall panels. Start with corners, get the bass under control, and then worry about those mid-high frequencies everyone obsesses over.
Strategic Panel Placement: Getting Maximum Results from Minimum Panels
When you're working with a tight budget, where you place acoustic panels matters exponentially more than how many you buy. I've seen $200 worth of panels in the right spots outperform $800 worth scattered randomly around a room. Let's focus on the high-impact zones that actually affect what you hear at your mixing position.
First Reflection Points: Your Highest Priority
Here's the mirror trick that'll save you hundreds of dollars: Sit at your mixing position while a friend holds a small mirror flat against the side walls. Slide the mirror along until you can see your monitor's tweeter reflected. Mark that spot. That's your first reflection point, and it's acoustically screaming for treatment.
Do this on both side walls and have your friend check the ceiling above your head too. These are the exact spots where sound bounces directly from your monitors to your ears, causing phase issues and skewing your frequency response. Treat these spots first, before anywhere else.
You need about 2-4 inches of absorption depth here. Two overlapped panels work if you're on a serious budget—the extra thickness helps with lower-mid frequencies that single thin panels miss.
Priority treatment zones:
- Side wall first reflections (ear height, typically 3-4 feet from your head)
- Ceiling reflection point directly above mixing position
- Wall directly behind monitors (12-18 inches of spacing from wall helps)
- Corner bass traps if budget allows (low-end control matters more than you think)
Creating an Effective Ceiling Cloud on a Budget
Low ceilings in spare bedrooms and basements are brutal for acoustics. The ceiling reflection arrives at your ears just milliseconds after the direct sound, creating comb filtering that makes everything sound weird and untrustworthy.
A ceiling cloud doesn't need to cover your entire ceiling—just a 3×3 or 4×4 foot section directly above your mixing position. I've built these for under $60 using four 2×4 foot panels suspended 6-12 inches below the ceiling with eye hooks and light chain from the hardware store. The air gap between panel and ceiling extends the absorption down into lower frequencies.
Common placement mistakes I see constantly:
- Treating the back wall behind your head with absorption when diffusion would work better
- Covering entire walls floor-to-ceiling (overkill that deadens the room)
- Ignoring corners where bass frequencies pile up
- Placing panels at random "decorative" heights instead of ear level
- Over-treating until the room sounds like a padded cell
The sweet spot for most budget home studios is 30-40% surface coverage. This gives you control over reflections without killing the room's life. Start with first reflections, add front wall treatment behind monitors, then assess what else you actually need by listening to reference tracks you know intimately.
Your room will never sound like Abbey Road, but strategic placement of even 6-8 panels transforms a problematic spare bedroom into a space where you can actually trust your mixing decisions. That's the goal.
Material Science: What Actually Works for Acoustic Absorption
Let's cut through the marketing nonsense—most "acoustic foam" sold on Amazon is borderline useless. After testing dozens of materials in my home studio, I can tell you that understanding material science saves you hundreds of dollars and actually fixes your room's sound problems.
The Big Three: Rockwool, Fiberglass, and Polyester
Mineral wool (Rockwool/Safe'n'Sound) is the gold standard. At 6-8 lb/cu ft density, it absorbs across a wider frequency range than anything in its price class. A 2×4 foot panel costs about $12-15 in materials. It's rigid, fire-resistant, and lasts decades.
Fiberglass insulation (like Owens Corning 703) performs nearly identically to Rockwool but costs more and requires careful handling. Unless you already have it, skip it.
Polyester batting (recycled denim or polyester fill) works for high frequencies but struggles below 500Hz. It's safe to handle and decent for first reflection points, but you'll need double the thickness compared to mineral wool. Cost-wise, it's a wash.
The cheap 1-inch egg crate foam everyone buys? It only absorbs above 2kHz. You're basically putting expensive decorations on your walls while your room still sounds muddy.
Density Matters: Why Numbers Actually Mean Something
Here's what I learned the hard way: a 2-inch panel of 8 lb/cu ft mineral wool outperforms a 4-inch panel of 2 lb/cu ft foam by a massive margin. Denser materials have more surface area for sound waves to interact with. Those $30 foam panel packs on Amazon? They're typically 1-2 lb/cu ft—practically useless for anything below 1kHz.
Thickness requirements you can actually trust:
- 2 inches minimum for treating mid-high frequencies (500Hz and up)
- 4 inches to start affecting lower mids (250-500Hz)
- 6+ inches for any meaningful bass absorption below 250Hz
The Air Gap Trick: More Absorption for Free
This changed everything for me: mounting panels 3-4 inches off the wall doubles their effectiveness at lower frequencies without buying more material. A 2-inch panel with a 4-inch air gap performs like a 4-inch panel against the wall.
Build simple spacers from 1×4 lumber—costs about $8 per 8-foot board. Your $15 panel now works on frequencies it had no business touching before.
Fabric Covering: What Actually Lets Sound Through
Acoustically transparent fabrics are typically less than 6 oz/sq yard. I use cheap burlap or cotton duck canvas from fabric stores—$3-5 per panel. Avoid thick upholstery fabric, vinyl, or anything waterproof. The "breathability" test: hold it up to your mouth and blow. If air passes easily, sound will too.
Check Price on Amazon →
Fire Safety: Not Just Red Tape
Most building codes require Class A fire rating for wall-mounted materials. Rockwool and fiberglass meet this naturally. Polyester needs fire-retardant treatment. This isn't just for insurance—untreated foam releases toxic fumes if it catches fire. Your homeowner's policy might actually deny claims if you've covered walls in non-rated materials. Check your policy before mounting anything.
The best budget material? Roxul Safe'n'Sound from any home improvement store. It's literally designed for this, meets fire codes, and costs less than "acoustic" products that perform worse.
Complete Budget Treatment Plans for Different Room Sizes
Let's get real about what acoustic treatment actually costs and what you can expect at different price points. I've treated dozens of home studios over the years, and the good news is you don't need to spend thousands to hear meaningful improvement.
Starter Package: $200 Minimum Viable Treatment
For small rooms (10×10 to 12×12):
This is your bare-minimum effective setup. You won't have perfect acoustics, but you'll eliminate the worst problems that make mixing impossible.
What to buy first:
- 6-8 corner bass traps (4" thick): $120-150
- 6 reflection panels (2" thick) for first reflection points: $60-80
- DIY mounting hardware or adhesive strips: $20-30
Place those bass traps in the ceiling-wall corners behind you and in front of you. The reflection panels go on the side walls where sound bounces between your speakers and ears. Hold up a mirror while sitting at your mix position—if you see a speaker reflection, that's where the panel goes.
What you'll notice: The room will sound less "boomy," and your mixes will translate better to other systems. You won't get professional-level accuracy, but you'll stop making bass-heavy mixes that sound terrible in the car.
Intermediate Setup: $500 Comprehensive Solution
For medium rooms (12×14 to 15×15):
This is the sweet spot where you get diminishing returns beyond this point. Most bedroom and spare-room studios should aim for this level.
Complete treatment list:
- 12-16 bass traps (mix of 4" and 6" thick): $250-300
- 12-16 broadband absorption panels (2-4" thick): $150-200
- Diffusion or additional absorption for rear wall: $80-100
- Cloud panels for ceiling: $50-80
Phased buying approach if you can't drop $500 at once:
- Month 1: Corner bass traps and first reflection points ($200)
- Month 2: Additional side wall and ceiling treatment ($150)
- Month 3: Rear wall treatment and remaining corners ($150)
For large rooms (15×20+):
You're looking at $600-1000 for adequate coverage. Large rooms actually need less treatment per square foot because they have fewer low-frequency mode problems, but the sheer wall space requires more panels. Budget for 20-30 pieces total.
Check Price on Amazon →
Setting Realistic Expectations
Here's what proper treatment won't do: turn a bedroom into Abbey Road Studios. Here's what it will do: reduce reverb time by 40-60%, smooth out bass response by 10-15dB, and eliminate the worst frequency buildups.
Before treatment, you might see 20dB peaks at 80Hz and 200Hz. After treatment, those peaks drop to 8-10dB—still not perfect, but workable. Your mixes will sound more consistent across different playback systems, which is the whole point.
Test your work with Room EQ Wizard (REW)—it's free and shows exactly what's happening acoustically. Run measurements before and after each phase of treatment. You'll see real frequency response improvements, which is incredibly satisfying and helps you place additional panels where they'll have maximum impact.
The biggest mistake? Buying randomly without measuring. The second biggest? Expecting $300 of foam to compete with a $30,000 control room. Set your expectations appropriately, and budget treatment will absolutely improve your work.
Maximizing Your Investment: Tips, Tricks, and Budget Hacks
Let's be real—acoustic treatment can get expensive fast. But with smart timing and a strategic approach, you can build a genuinely effective studio without emptying your bank account.
Timing Your Purchases
Acoustic treatment companies follow predictable sale patterns. Black Friday through Cyber Monday typically brings 20-30% discounts from major manufacturers. Spring sales (March-April) are another sweet spot, when companies clear inventory for new product lines. Sign up for email lists from your preferred brands a month before these windows—you'll get early access codes and bundle deals that aren't publicly advertised.
The Bulk Buying Advantage
Individual acoustic panels usually run $30-50 each, but panel packs dramatically change the math. A 12-pack that would cost $480 individually often sells for $300-350. That's real money saved. If you're treating a typical 10×12 bedroom studio and need 8-12 panels minimum, buying in bulk makes sense from day one. Some companies even throw in free bass traps when you hit certain pack sizes.
The Hybrid Approach That Actually Works
Here's my tested method: DIY your bass traps, buy commercial panels for walls. Why? Bass traps are simple boxes filled with dense insulation—easy to build and physically large, so shipping costs kill you on commercial versions. Wall panels benefit from commercial manufacturing because consistent thickness and attractive fabric wrapping matter more when they're at eye level.
For temporary solutions or supplemental treatment, heavy moving blankets work surprisingly well. I'm talking the actual furniture-grade ones (72" x 80"), not thin packing blankets. Hang them in corners or behind monitors while you save for proper treatment. Cotton batting from fabric stores (like Warm & Natural brand) costs about $8 per yard versus $15-20 for "acoustic" cotton—it's literally the same material.
Check Price on Amazon →
What Deserves Your Money
Don't cheap out on corner bass traps and first reflection points—these are your acoustic foundation. Terrible bass response and early reflections destroy mix translation no matter what else you fix. If you're splitting a $500 budget, spend $300 here and $200 on everything else, not the reverse.
Actually Measure Your Results
Download Room EQ Wizard (REW)—it's free and shows exactly what your treatment accomplishes. Use your existing
Check Price on Amazon →
to measure before and after. You’re looking for smoother low-frequency response and reduced decay times. This data tells you where to add treatment next, not guesswork.
Your Upgrade Path
Start with corner bass traps and first reflection points. Next, add rear wall diffusion or absorption depending on your room size. Then tackle ceiling reflection points. Finally, add density to existing treatment areas. This staged approach lets you verify improvements at each step and spread costs across 6-12 months.
The goal isn't perfection—it's consistent, trustworthy monitoring that translates to other systems. Even modest treatment gets you 80% there, and that's honestly enough for most home studios.
Frequently Asked Questions
How much should I budget for acoustic treatment in a small home studio?
Minimum effective treatment: $200-300 for a small bedroom studio (DIY bass traps + basic absorption panels). Recommended budget: $400-600 for comprehensive treatment of a 12×14 room. Costs include: 4 corner bass traps ($100-200), 6-8 wall panels ($100-250), optional ceiling cloud ($50-150). DIY can cut costs by 50-70% but requires 8-12 hours of labor. Prioritize spending: corner bass traps first, then first reflection points, then additional coverage.
Is DIY acoustic treatment as effective as commercial panels?
Material effectiveness is identical if using proper density rockwool or fiberglass (same materials pros use). Main differences are aesthetic finish and convenience, not acoustic performance. DIY advantages: 50-70% cost savings, custom sizes for your exact room needs. Commercial advantages: professional appearance, fire rating certifications, faster installation, warranty. Performance depends on material density and thickness, not whether it's DIY or commercial. Many professional studios use DIY treatment in areas that aren't client-facing.
Can I use foam panels instead of mineral wool to save money?
Thin acoustic foam (1-2 inch) only absorbs high frequencies, making your room sound worse and 'boxy'. Foam lacks the density to absorb critical mid and low-mid frequencies where problems occur. Budget foam panels ($1-3/sq ft) actually cost similar to DIY rockwool but perform far worse. Exception: high-quality 4+ inch foam can work but costs more than mineral wool alternatives. Rockwool provides broader frequency absorption and better value for home studio budgets. Foam's only advantage is lighter weight, which rarely matters for permanent installation.
What's the minimum acoustic treatment needed to improve my mixes?
Four corner bass traps are the absolute minimum for meaningful improvement (addresses room modes). Add panels at first reflection points (typically 4-6 panels) for accurate stereo imaging. This basic setup (8-10 panels total) costs $200-400 and provides 70% of possible improvement. Untreated ceilings and back walls can wait for phase two unless you have severe echo problems. Even minimal treatment dramatically reduces ear fatigue during long mixing sessions. Test with room measurement software to identify your specific problem frequencies.
How do I know if my budget acoustic treatment is actually working?
Use free software like Room EQ Wizard (REW) to measure frequency response before and after. Clap test: sharp claps should decay quickly without flutter echo or ringing. Your mixes should translate better to other systems (car, headphones, phone speakers). Reduced listening fatigue during long sessions indicates better room response. Stereo imaging becomes clearer – you can pinpoint instrument positions more accurately. Bass should sound tighter and more controlled without boomy resonances at specific notes. Reference tracks you know well should sound more balanced and clear.