How to Set Up an Ergonomic Workstation From Scratch (2026)
Introduction: Why Building Your Workstation Right From Day One Matters
I've reviewed hundreds of desk setups over the years, and I can tell you this: the people who brush off ergonomics in the beginning are the ones emailing me six months later with wrist pain, neck stiffness, and a desperate need to start over.
Here's the reality—poor ergonomics isn't just uncomfortable. It's expensive. We're talking chronic pain that follows you home, productivity that drops 20-30% by the afternoon when your back starts screaming, and genuine long-term health issues like carpal tunnel syndrome or disc problems that can take years to resolve. I've watched talented developers, writers, and designers struggle through workdays because they ignored the setup fundamentals when they started.
But here's the good news: you're starting from scratch, which means you actually have an advantage.
You're not trying to retrofit a bad setup or justify keeping that $50 Amazon chair because you already bought it. You have a clean slate. You can build your workstation correctly from the ground up, avoiding the trial-and-error phase that costs most people hundreds of dollars in products they end up replacing.
Think of it this way—would you rather spend $800-1,500 building a proper workstation once, or spend $300 now and another $800 in six months replacing everything that's causing you pain? I've tested both paths. The first one wins every time.
What This Guide Will Cover
This isn't a theoretical ergonomics lecture. We're going to walk through every single element of an ergonomic workstation in the order you should actually set it up:
- Your foundation: desk and chair positioning (get this wrong and nothing else matters)
- Display setup: monitor height, distance, and angle that prevent neck strain
- Input devices: keyboard and mouse placement that keeps your wrists happy
- Lighting: reducing eye strain without turning your office into an operating room
- Cable management: because tripping hazards and visual clutter affect your mental state
- Fine-tuning: footrests, monitor arms, and accessories that perfect your setup

Check Price on Amazon →
Each section includes specific measurements, not vague advice like "sit up straight." You'll know exactly where everything should go and why it matters.
The Investment That Actually Pays Back
I know the sticker shock is real when you start adding up ergonomic products. But here's what I've seen after years of testing: people who invest in proper ergonomics upfront report working 2-3 hours longer comfortably, with noticeably better focus and work quality.
Your neck won't hurt at 2 PM. Your wrists won't ache after typing for an hour. You'll actually want to sit at your desk instead of dreading it. That's not marketing fluff—that's what happens when your body isn't fighting your workspace all day.
Let's build this right the first time.
Understanding Ergonomic Principles Before You Buy Anything
Before you drop hundreds (or thousands) of dollars on gear, let's talk about what actually matters. I've tested countless "ergonomic" products that completely miss the mark because they don't follow basic biomechanical principles. Understanding these fundamentals will save you money and help you avoid the mistakes I see people make constantly.
The foundation of ergonomics is neutral posture—basically, keeping your body in positions that don't strain muscles or compress nerves. Think about how you stand naturally when relaxed: slight curve in your lower back, shoulders back but not tensed, head balanced over your spine. That's what we're aiming for while seated. Your joints should rest at comfortable angles without you actively holding them in place. The moment you're forcing anything—craning your neck up, bending wrists, or perching on the edge of your seat—you're creating problems.
Here's the critical thing most people miss: adjustability beats "perfect" fixed dimensions every single time. Your body is different from mine. You might be 5'2" or 6'4". You might prefer sitting slightly reclined or more upright. Buying a fixed-height desk or non-adjustable
Check Price on Amazon →
is setting yourself up for compromise from day one.
The Three Key Ergonomic Zones
Zone 1: The Monitor Zone
Your screen should sit 20-28 inches from your eyes—roughly arm's length. The top of your monitor should be at or slightly below eye level, so you're looking at the center of the screen with a very slight downward gaze (about 10-20 degrees). This is where I see the most violations. Laptop users are the worst offenders, staring down at their keyboards all day. If you work on a laptop, get a
Check Price on Amazon →
and external keyboard immediately.
Zone 2: The Input Zone
Your keyboard and mouse should let your wrists float in a neutral position—straight, not bent up, down, or sideways. Your elbows should rest at roughly 90-100 degrees, with your upper arms hanging naturally from your shoulders. The keyboard should be close enough that you're not reaching forward.
Zone 3: The Sitting Zone
This is where the 90-90-90 rule comes in: 90-degree angles at your ankles, knees, and hips (though 90-110 degrees at the hips is actually better for most people). Your feet should rest flat on the floor or a footrest, thighs parallel to the ground, lower back supported by your chair's lumbar curve.
Common Ergonomic Mistakes to Avoid
The "I'll adjust it later" trap. You won't. Set up everything correctly from day one, even if it takes an hour of fiddling.
Prioritizing aesthetics over function. That minimalist desk looks amazing, but if it's the wrong height and can't be adjusted, you'll pay for it with neck pain.
Ignoring the gaps. If your monitor is too low, don't just crane your neck—fix it with a stand or

Check Price on Amazon →
. If your feet dangle, get a footrest. Don’t let your body adapt to bad furniture; make the furniture adapt to your body.
The "good enough" mindset. Small misalignments compound over hours. A wrist angle that's "only slightly" bent becomes carpal tunnel syndrome after months of eight-hour days.
Step 1: Choosing and Setting Up Your Desk
Your desk is the foundation of everything else—literally. Get this wrong, and even the best monitor or chair won't save you from neck pain and fatigue. I've tested workstations ranging from $100 basic desks to $2,000 motorized setups, and here's what actually matters.
Fixed Height vs. Adjustable Desks: Making the Right Choice
Standard fixed-height desks sit at 29-30 inches, which works fine if you're between 5'8" and 6'0". Outside that range? You'll likely need workarounds like footrests or keyboard trays. I'm 5'6", and I spent years with shoulders hunched at a standard 30-inch desk before I measured properly and realized the mismatch.
Adjustable desks solve this immediately. Electric
Check Price on Amazon →
models let you dial in your exact seated height, then switch to standing throughout the day. Yes, they cost more upfront ($400-1,200 vs. $150-400 for fixed desks), but I consider them essential rather than optional for one crucial reason: your body changes throughout the day. Even if you never stand, being able to raise or lower your desk by two inches can be the difference between comfort and chronic tension.
That said, budget-friendly manually adjustable desks exist. They're clunky to adjust, but if you're setting your height once and staying there, they work.
The Dimensions That Actually Matter
I've squeezed work setups into tiny apartments and sprawling home offices. The bare minimum for productive work is 24 inches deep and 48 inches wide. That gives you space for a monitor at proper viewing distance (20-30 inches from your eyes) plus a keyboard and mouse without cramping.
I strongly recommend going wider if possible—60 inches is the sweet spot. This gives you room for dual monitors, a notebook, coffee, and other desk real estate without feeling cluttered. Depth matters less unless you're running multiple monitors; 30 inches deep is luxury territory.
Surface considerations people overlook:
-
Stability: Wobble drives me insane. Press down on any desk before buying—cheap particle board flexes noticeably. Solid wood or quality engineered wood with a sturdy frame is worth paying for.
-
Material: I prefer laminate surfaces over raw wood for durability and easy cleaning. Matte finishes show fewer smudges than glossy.
-
Built-in cable management: Grommets, cable trays, or channels underneath make life easier. Without them, you'll need aftermarket

Check Price on Amazon →
solutions.
How to Test Your Desk Height
Sit in your chair at your desk with feet flat. Your elbows should bend at 90-100 degrees when your hands rest on the keyboard. If your shoulders hike up, the desk is too high. If you're reaching upward, it's too low. Most people set desks too high—I see this constantly in photos readers send me.
A quick fix for too-high desks: raise your chair and add a footrest. For too-low desks, bed risers work in a pinch, though they're admittedly not pretty.
Desk Setup Checklist
- Height allows 90-100 degree elbow angle while typing
- Surface is stable with no wobble
- Adequate depth (24"+ minimum) for monitor viewing distance
- Width accommodates your monitor(s) and workspace needs
- Cable management solution in place or planned
- Located near power outlets and good lighting
Step 2: Selecting and Adjusting Your Ergonomic Chair
Your chair is the foundation of your entire ergonomic setup. Get this wrong, and even the best monitor positioning won't save you from back pain. I've tested everything from $150 basic task chairs to $1,500 premium models, and here's what actually matters.
Budget-Friendly vs. Premium Chairs: What Features Matter Most
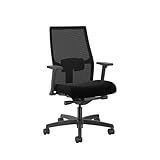
The good news? You don't need Herman Miller money to sit comfortably. Whether you're spending $200 or $2,000, prioritize these five adjustments:
Must-have features (even on budget chairs):
- Adjustable seat height – Non-negotiable. Period.
- Lumbar support – Either built-in or adjustable. Fixed lumbar is fine if it hits your lower back correctly
- Adjustable armrests – At minimum, height adjustment. 3D adjustable armrests are ideal
- Seat depth adjustment – Critical if you're shorter than 5'6" or taller than 6'2"
- Breathable material – Mesh or quality fabric. That $99 leather chair will become a sweat factory
Premium chairs add refinements like independent back angle adjustment, seat tilt, and better build quality that lasts 10+ years. Budget chairs often force you to choose between features—prioritize what affects your specific pain points.
Check Price on Amazon →
The Complete Chair Adjustment Sequence
Here's the exact order I use when dialing in any new chair. Start from the bottom up:
1. Set seat height first
Sit all the way back and place your feet flat on the floor. Your thighs should be parallel to the ground or angled slightly downward—never upward. The back of your knees should be level with or slightly higher than your hips. If your feet dangle, you need a footrest. If your knees are too high, raise that seat.
2. Adjust seat depth
Slide the seat pan forward or backward until there's 2-4 inches (about three fingers width) between the front edge of the seat and the back of your knees. This prevents the seat from cutting off circulation behind your legs. Too much pressure there causes numbness and fidgeting.
3. Dial in lumbar support
Your lower back has a natural inward curve. The lumbar support should fill this gap without pushing you forward. Adjust the height so it supports your lower back curve, typically at belt level. If the lumbar feels too aggressive, you're probably not sitting far enough back in the chair.
4. Position armrests properly
Your shoulders should be relaxed (not shrugged up), with elbows bent at 90-100 degrees while typing. Armrests should barely touch your forearms—they're there to support your arms during breaks, not while actively typing. If your armrests push your elbows out or force you to shrug, lower them or remove them entirely.
5. Set tilt tension and recline
Adjust the tilt tension so you can recline with light pressure—not so loose you fall backward, not so tight you need to throw your weight. I keep my chair's back recline unlocked for "active sitting," which lets me shift positions throughout the day. Lock it only if you find yourself constantly leaning back unintentionally.
Pro tip: Spend a full day with your initial adjustments before tweaking. Your body needs time to adapt, and that "uncomfortable" feeling might just be your muscles doing the work they've been avoiding.

Check Price on Amazon →
Step 3: Positioning Your Monitor for Optimal Viewing
Getting your monitor position right is probably the single most important thing you can do to prevent neck pain and eye strain. I've seen people hunch over laptops for years, then wonder why their neck feels like it's been put through a medieval torture device. Let's fix that.
The Height Sweet Spot
Your monitor's top third should sit at or slightly below eye level when you're sitting upright. This keeps your neck in a neutral position—you shouldn't be looking up or down more than about 15 degrees. If you find yourself tilting your head back to see the screen, it's too high. If you're constantly looking down, it's too low.
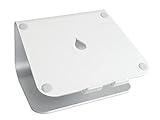
Most stock monitor stands are actually too short for average-height adults. You'll probably need to elevate your display with either a few sturdy books (the low-budget option I used for years), a proper monitor riser, or my preferred solution: an adjustable monitor arm.
Check Price on Amazon →
Distance Matters More Than You Think
Park your monitor about an arm's length away—roughly 20 to 28 inches from your eyes. Bigger screens can sit a bit farther back, while smaller displays should come closer. The 27-inch sweet spot most people use works great at about 24-26 inches away.
Here's the test: extend your arm straight out. Your fingertips should just about touch the screen. If you have to reach, it's too far. If your arm bends significantly, bring it back.
The Subtle Tilt
Tilt your monitor back 10 to 20 degrees from vertical. This slight angle reduces glare and aligns better with your natural downward gaze. Don't go overboard here—you're not creating a reading lectern.
Winning the War Against Glare
Position your monitor perpendicular to windows, not facing them or with them directly behind you. Overhead lights should sit outside your screen's reflection zone. If you're seeing yourself or the ceiling fixture in your display, you're going to have a bad time.
When rearranging isn't possible, consider closing blinds during peak sunlight hours or repositioning your desk. I've literally rotated my entire setup 90 degrees to solve a glare problem.
Dual Monitor Setup Reality
If you're running two monitors, place them so the gap between screens sits directly in front of you. Angle each display inward about 15-20 degrees so you're not constantly rotating your neck.
Which monitor becomes "primary" depends on your work. If you code 80% of the day, make that your centered screen and push the secondary (email, Slack, whatever) to the side.
Laptop Users: Why You Need an External Monitor or Laptop Stand
Let me be direct: using just a laptop on your desk is ergonomically terrible. The screen is way too low, forcing you into the "vulture neck" position that'll haunt you in a decade.
Minimum viable solution? Get a
Check Price on Amazon →
that elevates the screen to proper eye level, then add an external keyboard and mouse. Better solution? Connect to a proper external monitor and use the laptop as a secondary screen or closed in a dock.
Ultra-Wide and Large Screen Considerations
Screens 32 inches and larger need to sit farther back—sometimes up to 40 inches. Ultra-wides are fantastic for productivity, but make sure you're not swiveling your head like you're watching tennis. The edges of your display shouldn't require significant head movement to view comfortably.
Step 4: Setting Up Your Keyboard and Mouse
Your keyboard and mouse are the tools you interact with most during your workday, so their positioning can make or break your ergonomic setup. Get this wrong, and you're looking at wrist pain, shoulder tension, and those annoying finger tingles that show up after hours of typing.
Start with keyboard placement. Position your keyboard directly in front of you—not off to the side—so you're typing straight ahead without twisting your torso. Keep it close to the edge of your desk, about 4-6 inches from the edge, so your elbows can stay close to your body. If you're constantly reaching forward, your shoulders are working overtime.
The golden rule for wrist positioning is neutral. Your wrists shouldn't bend up (extension), down (flexion), or sideways (deviation). When you're typing, imagine a straight line from your elbow through your wrist to your knuckles. If your keyboard is too high, you'll bend your wrists upward—a common culprit behind carpal tunnel issues.
Your mouse should sit at the same height as your keyboard and within easy reach. You shouldn't have to stretch your arm out or lift your shoulder to use it. Keep it close enough that your elbow stays at roughly a 90-degree angle.
If standard keyboards cause you discomfort, ergonomic options are worth exploring. Split keyboards separate the key layout into two sections, letting your hands stay at shoulder width. Tented keyboards angle upward at the center, rotating your forearms into a more natural position. Negative tilt keyboards (sloping down away from you) can help maintain that neutral wrist position better than traditional keyboards with feet that prop up the back.
Check Price on Amazon →
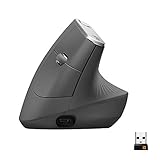
For mouse alternatives, vertical mice rotate your hand into a "handshake" position, reducing forearm rotation. Trackballs eliminate repetitive arm movements entirely—you move the cursor with your thumb or fingers while your hand stays stationary.
Keyboard tray systems can help if your desk is too high and can't be lowered. They're genuinely useful for fixed-height desks above 29 inches. However, if your desk is already at proper height, adding a tray might force your keyboard too low, creating its own problems. Skip them unless you have a specific height issue to solve.
Wrist Rest: Yes or No?
Here's where people get confused. Wrist rests are for resting, not typing. They support your wrists during breaks between typing sessions, not while your fingers are flying across the keys. If you're actively pressing your wrists into a rest while typing, you're creating pressure on the median nerve—the exact opposite of ergonomic.

Check Price on Amazon →
That said, a good gel or memory foam wrist rest can be comfortable during those moments when you're reading or thinking. Just lift your wrists when you actually type.
Alternative Input Devices Worth Considering
Beyond the basics, some alternatives are worth testing if you experience persistent discomfort. Pen tablets let you use a stylus instead of a mouse—great for design work but also surprisingly comfortable for general navigation. Touchpads built into separate peripherals give you laptop-style control without sacrificing desk space. Some people swear by ergonomic mice with programmable buttons that reduce repetitive clicking.
The key is finding what keeps your hands and wrists in neutral positions throughout your workday. Your specific body mechanics matter more than any "best" recommendation.
Step 5: Optimizing Lighting and Reducing Eye Strain
Your workspace lighting can make the difference between ending the day with fresh eyes or a pounding headache. I've spent years tweaking lighting setups, and I can tell you that proper illumination isn't about having the brightest room—it's about having the right light in the right places.
The 20-20-20 Rule (Actually Follow It)
Let's start with the simplest fix: every 20 minutes, look at something 20 feet away for 20 seconds. I know, everyone mentions this rule, but hardly anyone does it. Set a timer on your phone or use a desktop reminder app. Looking across the room or out a window gives your eye muscles a break from constant near-focus work. It sounds almost too simple to matter, but this single habit has done more for my end-of-day eye comfort than any fancy equipment.
Building a Layered Lighting Approach
Forget the single overhead light. You need three layers:
Ambient lighting fills the room with general illumination. This could be ceiling lights, floor lamps, or natural light from windows. Keep it moderate—not dim, not blazing.
Task lighting illuminates your desk surface and keyboard without creating screen glare. A
Check Price on Amazon →
works brilliantly here because it sits above your display and casts light downward onto your workspace without bouncing off your screen. Position any desk lamp to the side (never behind your monitor) and angle it so it lights your documents or keyboard area.
Bias lighting is the secret weapon most people skip. Place a soft LED strip behind your monitor to reduce the contrast between your bright screen and dark wall. This dramatically reduces eye strain during evening work sessions. You want something around 6500K color temperature that matches your screen's white point.
Getting Natural Light Right
If you have a window, position your desk perpendicular to it—not facing it, not with your back to it. Facing a window creates glare and makes you squint. Having the window behind you turns your screen into a mirror. Side positioning gives you natural light benefits without the drawbacks. Use adjustable blinds or curtains to control brightness throughout the day.
Screen Settings That Reduce Eye Fatigue
Your monitor's default settings are usually terrible for comfort. Here's what to adjust:
Brightness matching: Your screen should roughly match your room's ambient lighting. Hold a white sheet of paper next to your display—if the screen looks like a light source by comparison, it's too bright. If the paper looks brilliant white, your screen is too dim.
Color temperature: Warmer (more yellow/orange) settings reduce eye strain, especially in evening hours. Most operating systems now include automatic color temperature adjustment (Night Shift, Night Light). Start with a setting around 3400K after sunset and adjust to your preference.

Check Price on Amazon →
Regarding blue light: The research is mixed on whether blue light specifically causes eye strain. The bigger culprits are brightness, glare, and staring at a fixed distance for hours. That said, reducing blue light in the evening helps with sleep quality, so use those OS-level warm color settings after dark. Blue light filter glasses might help, but they're not a substitute for proper lighting and regular breaks.
Refresh rate and flicker: If your monitor supports 75Hz or higher refresh rates, enable them. Many eyes are sensitive to 60Hz flicker even if you don't consciously notice it.
The key is treating lighting as a system, not a single fix. Combine these elements, and you'll notice the difference by day three.
Step 6: Adding Essential Ergonomic Accessories
Once you've nailed the big stuff—chair, desk, monitor position—it's time to think about accessories. But here's the thing: not all ergonomic accessories are created equal, and you definitely don't need to buy everything at once.
The Minimalist Approach: Which Accessories Actually Matter
Let's start with what genuinely makes a difference based on your specific setup and body.
Footrest: The Height Equalizer
If your feet dangle or you're stretching to reach the floor, you need a

Check Price on Amazon →
. This isn’t about comfort—it’s about proper posture. When your feet don’t have support, you slouch, shift your pelvis forward, and throw off your entire spine alignment. A simple angled footrest (even a sturdy cardboard box works temporarily) keeps your knees at 90 degrees and takes pressure off your lower back. Skip the fancy rocking footrests initially; a basic static one does the job.
Document Holder: The Neck Saver
If you reference papers, books, or your phone while working, a document holder positioned at screen height prevents the constant neck-down-then-up motion that causes strain. Position it between your keyboard and monitor, or clip it to the side of your screen. I've seen people develop serious neck issues from glancing down at notes hundreds of times daily.
Cable Management: Unsexy but Essential
Tangled cables aren't just ugly—they're trip hazards and dust magnets. More importantly, they make adjusting your setup a nightmare. Velcro straps, cable sleeves, or even binder clips attached to your desk edge keep things tidy.
Check Price on Amazon →
solutions range from $10 to $50; the cheap ones work fine.
Monitor Light Bars: Rethinking Task Lighting
Traditional desk lamps create screen glare and eat up desk space.
Check Price on Amazon →
bars sit atop your monitor, illuminating your keyboard and desk without reflecting on your screen. They’re genuinely brilliant for evening work and cause way less eye strain than overhead lighting alone. The catch? They’re $50-150. A regular lamp angled away from your screen works if you’re on a budget.
Anti-Fatigue Mats and Desk Pads
If you have a standing desk, an anti-fatigue mat isn't optional—it's required. Standing on hard floors destroys your feet, knees, and motivation to stand. For seated work, a large desk mat creates a smooth surface for both your mouse and keyboard, reducing wrist extension and adding a bit of cushioning.
Accessories to Skip (At Least Initially)
Wrist rests: Controversial, but hear me out. If your keyboard and mouse are at proper heights, you shouldn't be resting your wrists while typing. Rests are for breaks between typing, not during. Many people use them incorrectly and develop pressure points.
Ergonomic mice and keyboards: Yes, they help some people, but start with proper positioning of standard equipment first. You might not need them.
Standing desk converters if you have an adjustable desk: Redundant and clunky.
Buy accessories that solve actual problems you're experiencing, not problems you think you might have someday. Your workspace will thank you.
Creating Healthy Work Habits in Your New Setup
Here's the truth: even the most ergonomically perfect workstation won't save you if you're sitting completely still for eight hours straight. I learned this the hard way after spending a fortune on an amazing setup, only to still end up with neck pain because I was glued to my chair like a statue.
The secret isn't just the gear—it's how you use it.
Movement is non-negotiable. Set a timer for every 30-60 minutes to stand up and move around. I'm talking about actually leaving your desk, not just shifting in your chair. Walk to the kitchen, do a lap around your house, or step outside for 30 seconds. These micro-breaks reset your body and, honestly, your brain too. I've found my best problem-solving happens during these short walks.
If you've invested in a
Check Price on Amazon →
, use it strategically. Don’t try to stand all day—that’s just trading one static position for another. Start with 15-20 minute standing intervals, a few times per day. I alternate every hour, but find what works for your body. Some people prefer standing in the morning when they have more energy, others like standing after lunch to fight that post-meal slump.
Your typing technique matters more than you think. Rest your palms on your desk or a
Check Price on Amazon →
between typing bursts, but when you’re actually typing, let your wrists float. Use a light touch on the keys—you shouldn’t be pounding them like you’re angry at your keyboard. Your fingers should do the work, not your whole arm.
And about that "perfect posture" everyone talks about? Forget sitting ramrod straight for hours. That's just as bad as slouching. Practice dynamic sitting—shift positions regularly, lean back occasionally, adjust your angle. Your body craves variety, not rigidity.
Automate your reminders because willpower alone won't cut it. Use apps like Stretchly, Time Out, or even just your phone's timer. Set them to bug you every 30-45 minutes. Yes, they're annoying. That's the point.
Quick Desk Stretches to Do Throughout the Day
Keep these in your rotation—each takes under a minute:
- Neck rolls: Slowly roll your head in a circle, 5 times each direction
- Shoulder blade squeezes: Pull your shoulders back like you're trying to hold a pencil between your shoulder blades, hold for 5 seconds
- Seated spinal twist: Turn your torso to look behind you while keeping your hips forward, hold each side for 10 seconds
- Wrist circles: Rotate your wrists 10 times in each direction
- Standing quad stretch: Pull one foot behind you toward your glutes, balance and hold for 15 seconds each leg
The first two weeks are crucial. Your body is adapting to new positions, and you might feel weird at first. That's normal. But pay attention to the difference between "new" discomfort and "something's wrong" pain. Adjust your monitor height if you're getting neck strain, tweak your chair if your lower back aches, or raise your keyboard if your wrists hurt.
Take notes on what bothers you and when. By week three, you'll have dialed in a setup that actually works for your specific body, not just the theoretical "correct" positions from an ergonomics chart.
Frequently Asked Questions
How much should I budget for a complete ergonomic workstation setup?
Minimum viable setup: $400-600 (basic adjustable chair, monitor arm or stand, external keyboard and mouse). Mid-range comfortable setup: $800-1200 (quality ergonomic chair, standing desk converter, proper monitor setup). Premium investment: $1500-3000+ (electric standing desk, high-end ergonomic chair, multiple monitors with arms). Priority ranking: invest most in chair and monitor positioning first, as these have the biggest impact.
Can I make my existing furniture ergonomic, or do I need all new equipment?
Many setups can be improved with modifications: monitor risers, seat cushions, footrests, keyboard trays. The critical test: can you achieve neutral posture with your current setup plus accessories?. When replacement is necessary: if chair has no adjustments or desk height prevents proper arm positioning. Start with low-cost fixes and monitor arm before committing to major furniture purchases.
What's the single most important ergonomic element to get right?
Monitor height and distance—this affects neck, eye strain, and upper back more than any other factor. Poor monitor positioning causes forward head posture, the root of many desk-related issues. You can temporarily compensate for other imperfect elements, but wrong monitor height causes immediate strain. A $20 monitor stand or stack of books can often solve this before any other investment.
How long does it take to adjust to a properly ergonomic workstation?
Initial adjustment period: 1-2 weeks as muscles adapt to proper positioning. Some people experience temporary discomfort as underused postural muscles strengthen. Fine-tuning phase: 2-4 weeks of small adjustments based on what feels right. If pain increases or persists beyond two weeks, reassess your setup—proper ergonomics should reduce discomfort. Keep an adjustment journal during first month to track what works.
Is a standing desk necessary for an ergonomic setup, or is a good chair enough?
A quality ergonomic chair with proper adjustment is the foundation—standing desk is secondary. Prolonged standing has its own issues; alternating positions is the real benefit. Budget-conscious approach: perfect your sitting setup first, add standing option later. Standing desk converters (desktop risers) let you test standing work before committing to full desk replacement. Focus on movement and posture variation rather than sitting vs. standing as binary choice.